Data Tree Explorer
Prerequisites
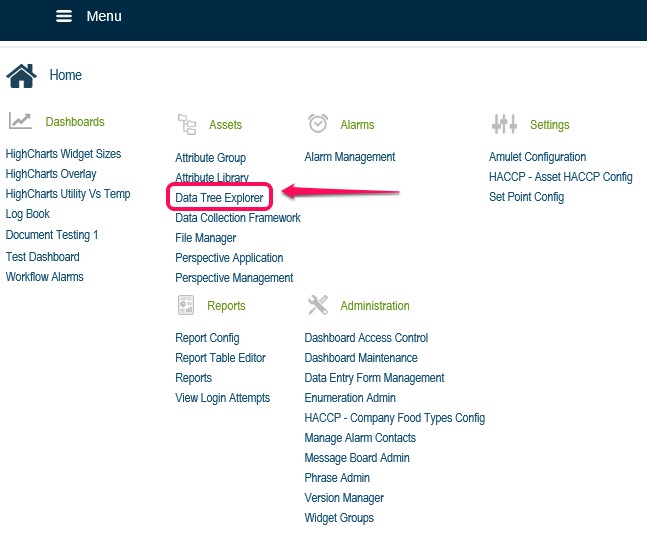
The DTE is accessed via Menu>Data Tree Explorer.
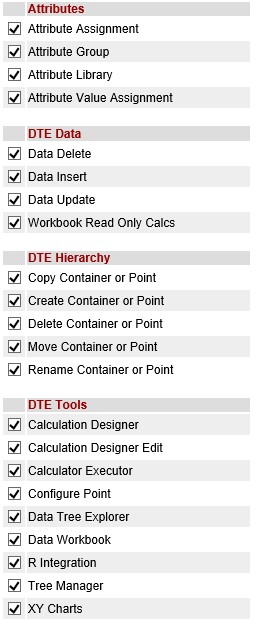
To access the DTE, the users group must have some DTE permissions enabled. This is done in Menu>System Configuration>Groups.
To be able to create points and containers, configure, set alarms, configure calculations, assign attributes and test data input, it is recommended to have the following options enabled. Permissions can be disabled after configuration as required.
The DTE is accessed from the Menu.
Data Tree Explorer Overview
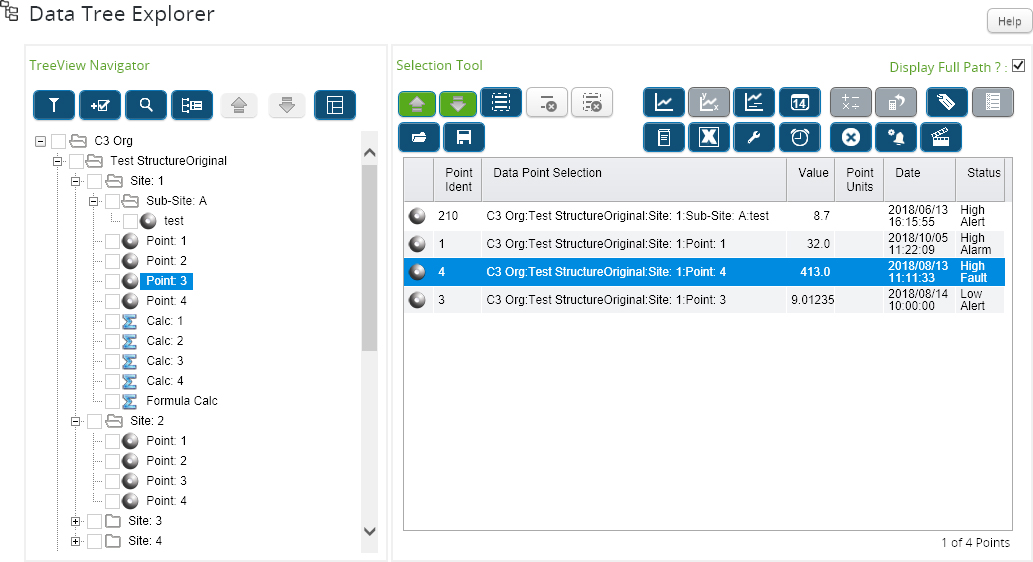
The data tree explorer is made up of the ‘TreeView Navigator’ and the ‘Selection Tool’
When you first login to a new org that has not yet been configured, the tree view will consist of the top level organisation container.
The tree view on the left hand side is where we build up our structure. What you see in this section is static. Items will only be removed from here once they are deleted. Deletion is permanent and cannot be undone.
The selection tool on the right hand side is where we can build up a group of points for various configuration or viewing options. This is just a view. If a point is removed from here, then it will still exist in the tree view. If users regularly work with the same sets of points, the selection group can be saved and reloaded.
The icons available will vary depending on what permissions the user has enabled. Permissions are set on the group that the user belongs to. This is done in Administration>Groups.
The Display Full Path box is checked by default and presents the full path (including point name) in the Data Point Selection column of the grid. Remove the check from the box to display the point name only.
The Date column shares the same date formatting options as the Data Workbook. The default is set from the Web Config Date Format for the Data Workbook. This can be overridden on an individual user basis by setting the Date Format Type within the Data Workbook options.


