Building the Structure
The structure is built within the tree view.
The first thing to do is to create container(s) under our top level org. Points cannot be added at this level.
Adding New Containers and Points
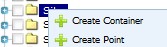
To add a new container, right mouse click on the top level org and from the menu that opens, select create container.

The following window will open:
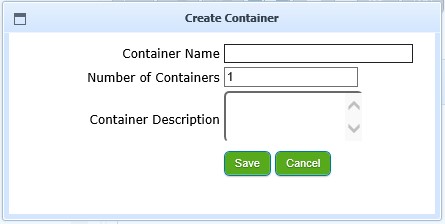
Container Name: The name of the new container. The maximum length is 150 characters.
Number of Containers: Choose a number of between 1-250. This will create multiple containers and is a useful tool when building up a new system.
Container Description: The description of the container.
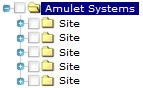
As an example, I set the name to ‘Site’ and set number of containers to 5. When I clicked Save, I had 5 new containers under my org. The new containers can be renamed as required.
We can then add containers and points to our new containers by right mouse clicking and selecting the correct action from the menu.
The following window will open:
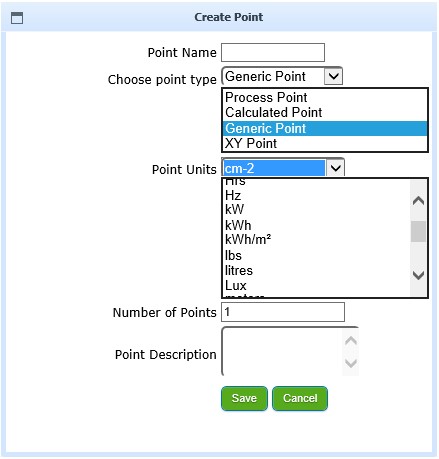
The point type and point unit lists have been expanded.
Point Name: The name of the new point. The maximum length is 75 characters.
Choose Point Type: Select from the list. Descriptions of points were given above.
Point Units: The units we are measuring. Existing units used will be in the list. If the unit is not in the list, users can type in the unit name. The point units are free text. They are used to represent the measurement of the point – for example, litres, gallons, time or distance based. The units shown above are just examples.
Number of Points: Choose a number between 1-250. This will create multiple points and is useful building up a new system.
Point Description: The description of the point.
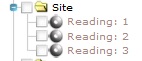
As an example, I set the name to ‘Reading’ and set the number of points to 3. When I clicked Save, I had 3 new points in my container. When multiple points are added they are given the name as entered with a sequential number added. The new points can be renamed as required.
Unique Idents
When added, Containers and Points are given a unique number known as its Ident. This is how they are identified throughout the system. These are sequential numbers and are incremented by one.
The container numbering is sequential and unique from the point idents. The numbering will start at 1 and is increased by 1 for each new container added.
The point idents are also sequential and unique from the container idents. The numbering will start at 1 and is increased by 1 for each new point added.
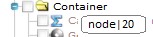
In the treeview, to view the ident, hover over the name and the ident will appear. If it is a container, the text will read ‘node|ident’.
For a point, the text will read ‘leaf|point ident|point name|’.

Point Idents can also be viewed in the Selection Tool. There is a column which will display the Point Idents.

Renaming Containers and Points
The points and containers can be renamed by highlighting the item, right mouse clicking and selecting Rename Container/Point from the menu.

A window will open allowing the user to rename the selected item. A description can also be given. The description can be any bit of information that we want to use for the item.
Deleting Containers and Points
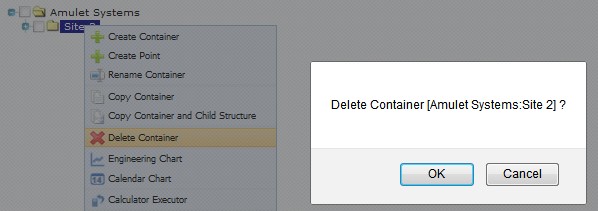
Containers and points can be deleted by selecting the item to be deleted, right mouse click and choose ‘Delete Container’/‘Delete Point’.
A pop up box will appear asking for confirmation.
When deleting a point, the single point will be deleted from the system.
When deleting a container, the container and all sub containers and points will be deleted.
All data associated to the deleted items is removed. This includes alarm settings, attributes, data values etc.
The deletion is permanent and cannot be un-done.
Copy Point
Right-click a point and from the menu select the Copy Point option.

Right-click the parent container of where you would like to paste the point, and there are two options within the context menu.

Mini Templates
In some systems there will be repeating structures. This would be common on sites where is repetition of measurements, for example on an electrical plan there will be identical transformers that contain the same measurements and calculations.
When this happens, we can create a ‘template’ which once created and configured can be copied.
We have two types of templates:
- Templates which are used for helping to build a structure
- Template and Replication where changes are replicated through the system.
For this initial guide, we will just use (1) Templates.
To keep our templates together, we can create a container called ‘TEMPLATES’. As an example, I have created a simple template called ‘Asset Type B1’ which comes with some pre-configured points and calculations. This is just an example.

What we can then do is copy ‘Asset Type AB1’ and paste it where we want an instance of it.
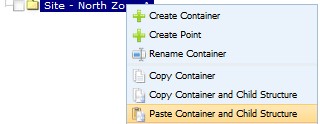
To copy, right mouse click and choose ‘Copy Container and Child Structure’. If you choose this option, then all containers and points within it are also copied.

Go to the container where we want a copy of this, right mouse click and choose ‘Paste Container and Child Structure’.
An instance of the template will be copied in. All points and their configuration settings will be added. The only thing that does not get copied is any data that had been stored against the template points.

Users can create as many templates as they require. In this simple form, any amendments to the master template will not be replicated to instances of the template. This allows users to quickly build up a structure.
To create another instance of the template, the user must go to the master template and copy it again as the copy is removed from memory once it has been pasted.