Treeview Navigator Icons
On the left hand side is the Treeview Navigator. Going from left to right the icons are as follows:
Filter

This allows the user to search and filter on items in the treeview.
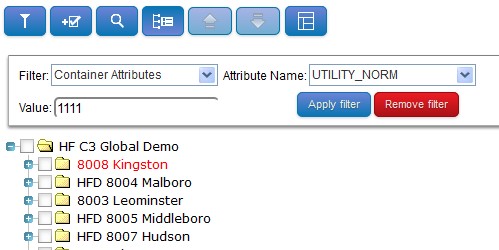
A word or attribute can be entered here and the tree view can be filtered to display only the Containers that match the filter.
This can be further refined by choosing either a search criteria of Container Name, Description, Attribute or Ident. When selected, enter a Value in the text field to search for. Alternatively, an attribute value can also be added (from the drop-down list available) to search for attributes that are set against a container.
The below example has displayed one container (in red) which has searched for an attribute with a specific value.
Add Checked

This will send any points that are checked to the selection tool. If a container is checked it will send all points within this container to the selection tool, up to the maximum of 2000 points.
Find Points

As well as containers, points can also be searched from within the Data Tree in several different ways using a combination of names, properties and property values.
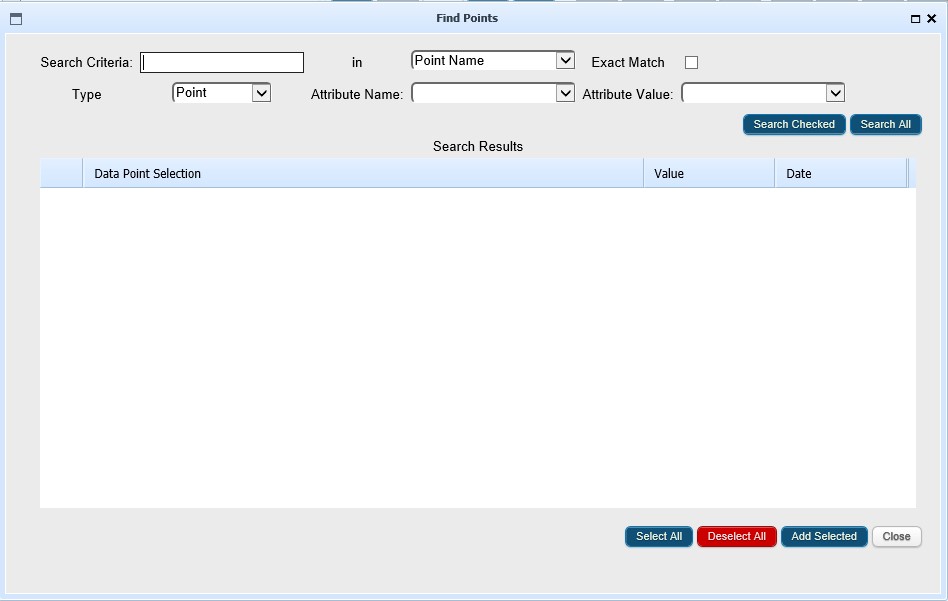
- Before pressing the Find Points button to open the Find Points window, select an area in the data tree to search, such as branch or the whole organisation itself.
- When Find Points is clicked, type a name in the Point Name text field (the text does not have to be case sensitive).
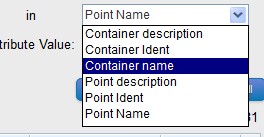
- Select an option from the drop-down menu to search either a Point Name, Container etc.
- Tick the Exact Match box if you require an exact match to your Search Criteria. With this un-ticked, if the Search Criteria is within the text of a Point Name, Container name, etc, then the point(s) will be returned in the results.
- Next, click on the Search Selected button to search in the chosen area, or click the Search All button to search through the whole organisation in the displayed tree.
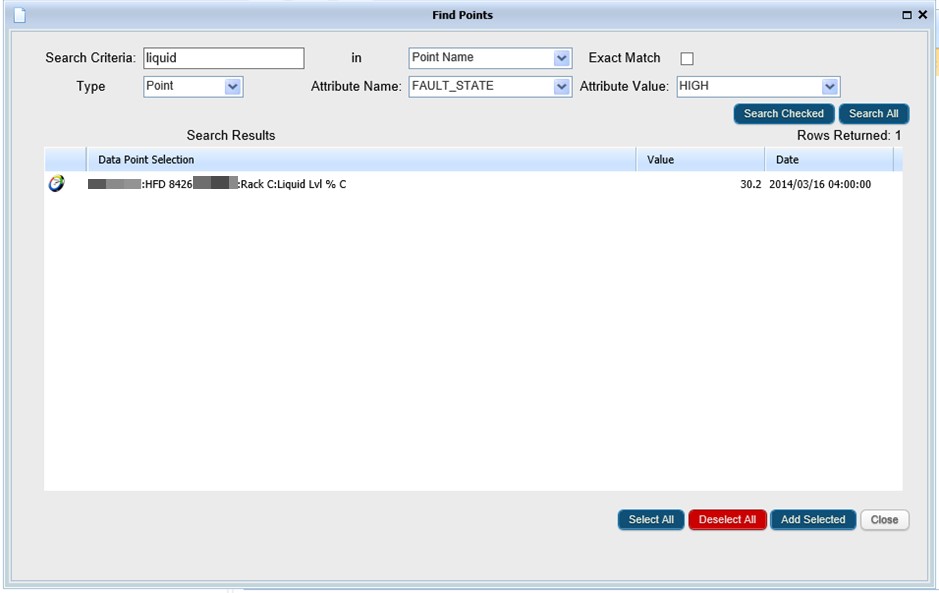
- The results will then be displayed in the Search Results window, where all the points that contain the point name or part name will be displayed (the image below displays the selection from several sites/containers).
- These points can then be selected or deselected (either individually using the Ctrl and Shift keys or all together using the relevant buttons) and then added to the Selection Tool window.
- A more filtered search can be conducted by selecting a Type (Container or Point), then an Attribute Name you know to exist on the container or point, and then (optionally) a specific Attribute Value. The Attribute Name drop-down is filtered to display only the attributes that exist on containers or points (as dictated by the Type selection). For example, if Type is set to Container then the Attribute Name drop-down will only contain attributes that exist on containers.
- Alternatively, points can be searched for based entirely on an attribute. Selecting an attribute without entering a Point Name will display all of the points with the attached property. This is helpful to users when finding points they need with common or specific property values. Adding a property value will narrow the search down further.

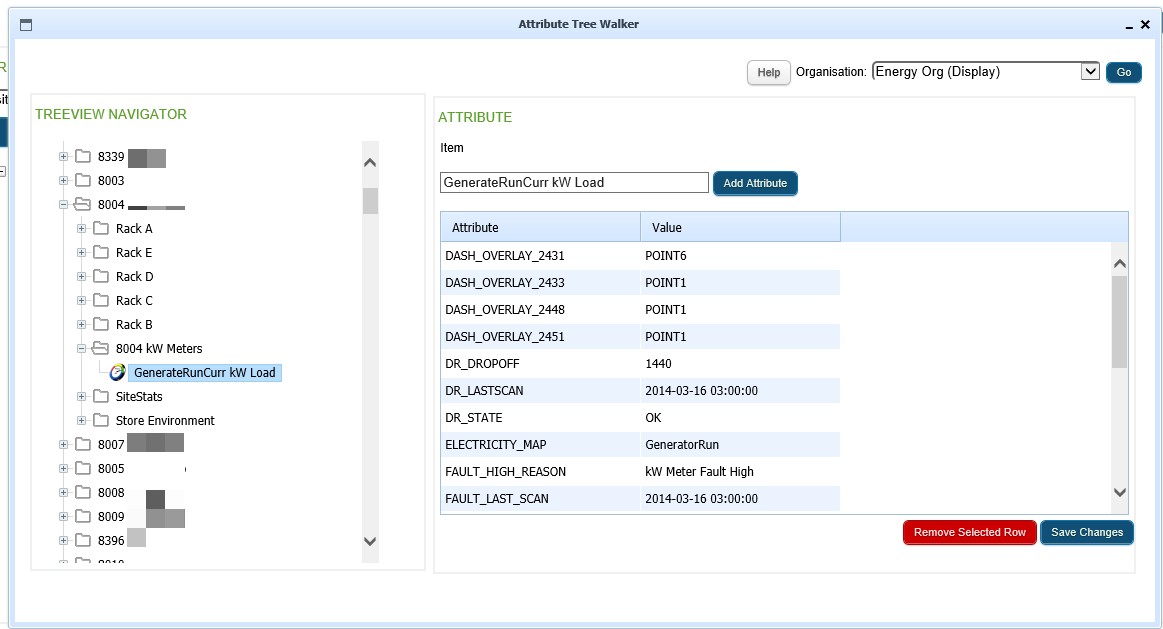
Attribute Tree Walker

This will open up the Attribute Tree Walker window. From here users can click on items in the tree view and add, edit and delete attributes. It is a quick way of checking attributes.
- Clicking on the icon brings up and new window with the familiar treeview. Clicking on a point or container will display any attributes in the right hand window.
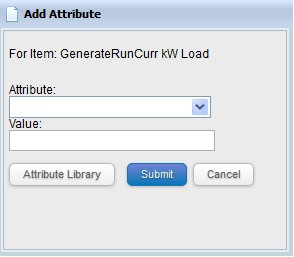
- New attributes can be added by clicking on the Add Attribute button and selecting an attribute from the drop-down list, entering a value and pressing the Submit button.
- Attributes can also be edited by highlighting the attribute, double clicking in the value field and entering a new Value.
- Existing attributes can be removed by selecting it from the list and pressing the Remove Selected Row button.
- When finished any action, press the Save Changes button.
Move Up and Move Down

This allows the user to move containers or points up and down within the tree. It is for organising how the items in the tree are ordered. Click on a container or point in the tree structure and click on the up or down arrow to adjust its position.
Selecting Items in Tree View
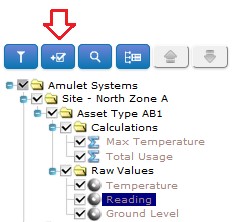
Beside each item in the tree, there is a check box. When the box is checked for a container, all items within the container will also be checked/selected. The user can then un-select any items they do not want selected.
The same applies when a container is un-checked, all items within the container will be un-checked/un-selected.
In this example, I checked the top container ‘Site – North Zone A’. All items within it were also checked. By then un-checking the container called ‘Calculations’, the points within this were also un-checked/un-selected.
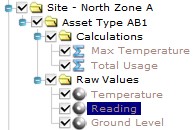
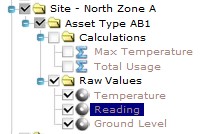
Points can also be checked or un-checked as required.
Right Mouse Menu Options
Once the hierarchy structure has been built or is in the process of being built, the user can select an individual item, right mouse click and a menu will appear. From here the user can add items, delete, items, rename, assign attributes etc. For points, most of these items can also be performed from the Selection Tool. The data tree explorer generally lets you select individual items whereas the selection tool allows you to select multiple points at once for bulk configuration.
Add Points to the Selection Tool
Adding points to the selection tool can be done by:
Selecting the items and clicking on the ‘Add Checked’ icon. All checked points will be added to the selection tool.
Drag and drop a container in the selection tool. All points within this container will be added to the selection tool. If doing this from a container at a high level, then there is the potential for there to be hundreds of points.
Drag and drop a point. The single point will be added to the selection tool.