Designing or Editing a Form
Once you have created a form, you can edit the form content in Forms Designer by adding controls to the form. When the form is completed and published, users will be able to enter different types of data such as text, numbers, images, or selections into these controls. For a full list of the types of controls you can add to a form, see the Available Controls topic.
Adding Controls
To add a control to a form in Forms Designer, drag the control from the left panel onto the canvass. When you place controls on the canvass, the controls snap to the nearest gridline. You can add as many controls as you need.
Viewing and Editing Controls
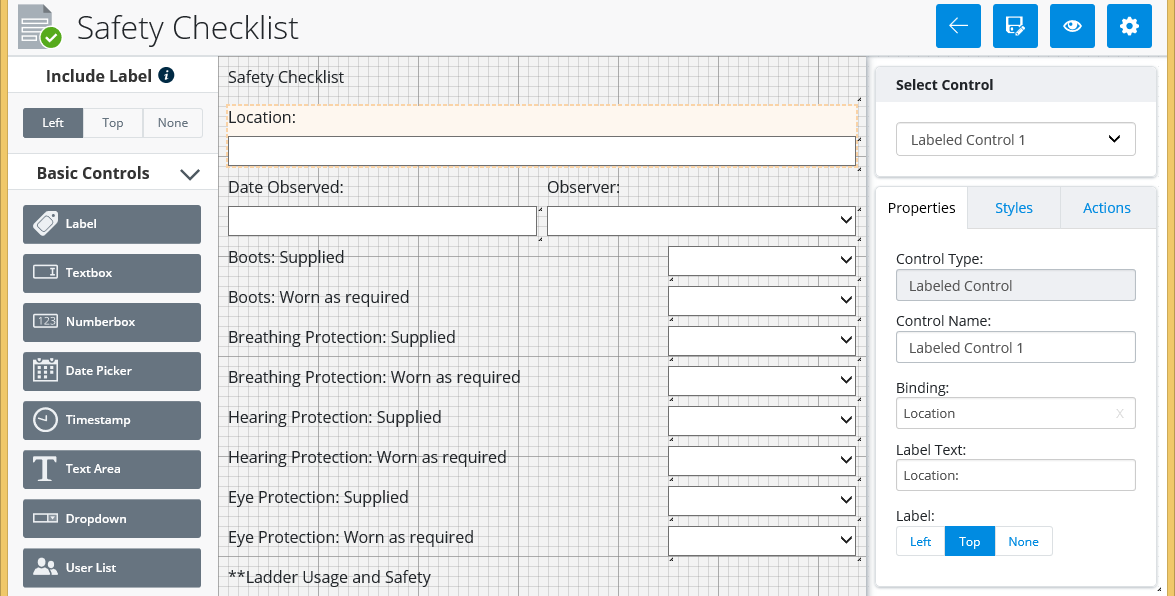
To view and edit information about a control, click or tap the control on the canvass or choose the control from the Select Control list on the right side of the canvass. The control panel displays on the right side, where you can view or edit Properties, Actions, and Style if applicable. From the Style tab, you can define the exact dimensions of the control, or you can resize a control on the canvass by selecting the corner or edge of the control and moving your cursor. To move a control, click or tap the control and then drag it to a new position.
Labeled Controls
You can quickly add a label to a control in one of two ways. Before you add a control to a form, click the or button, then add the control to the canvass. This automatically adds a label to the left or above the control once it is placed on the canvass. Or, if a control is already on the canvass but currently has no label, you can select the control and then click the Left or Top button on the Properties tab.
You can work with and position the control and the label at the same time.
Bindings
Before your form will work correctly in the client app, you need to set up Bindings for the controls. For more information, click here.
Saving the Form
Changes to the form are saved as you make them. If you want to make a copy of this form, in the top panel select Save As and then in the Save Form As dialog enter a name for the new form and click OK.
Publishing the Form
Setting the form Status to Approved publishes the form, so
that users can access the form in the client application. To publish a form
(when you are finished editing it), select the
Return to Forms Manager icon
 to go back to the
Forms Manager and then change the form
Status from
Draft to
Approved. For more information about Status,
click
here.
to go back to the
Forms Manager and then change the form
Status from
Draft to
Approved. For more information about Status,
click
here.
Renaming the Form
The name of the form displays above the form, on the left side of the top panel. You can change the form name by clicking the name, which opens a text field - change the name as needed and then click anywhere outside of the field to save the change.
Previewing the Form
From the top panel, click the
Preview icon
 to view a
preview of the form on a device or on the web.
to view a
preview of the form on a device or on the web.
 to access
Context Menu
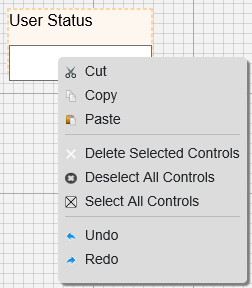
- To delete selected controls from the canvass and copy the controls to the clipboard, select Cut.
- To copy selected controls to the clipboard, select Copy.
- To paste copied controls from the clipboard, select Paste.
- To delete all the controls you have selected from the canvass, select Delete Selected Controls.
- To deselect any controls you have selected, select Deselect All Controls.
- To select all the controls on the canvass, click or tap Select All Controls.
- To undo the last operation you performed, select Undo.
- To perform an operation that you previously undid, select Redo.