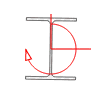
Rotate >
|
Reset Rotation
|
Rotates the section to zero about the
longitudinal axis.
|
| Rotate 90°
|
Rotate the section 90 clockwise about the
longitudinal axis.
|
| Rotate 180°
|
Rotate the section 180 clockwise about the
longitudinal axis.
|
| Rotate 270°
|
Rotate the section 270 clockwise about the
longitudinal axis.
|
| Custom Rotation
|
Opens the
Modify member orientation
dialog, which is used to specify an arbitrary rotation angle.
|

Hinge Both Ends
|
This tool releases both ends of the
selected members for bending moments about local axes y and z (My and Mz are
free to rotate).
|

Fix Both Ends
|
This tool sets all degrees of freedom
to fixed in the selected elements.
|

Hinge End >
|
Hinge about major principal axis
|
Click to release the bending moment fixity about
the major principal axis at the member end nodes currently selected. Both the
member and nodes must be selected.
|
| Hinge about minor principal axis
|
Click to release the bending moment
fixity about the minor principal axis at the member end nodes currently
selected. Both the member and nodes must be selected.
|
| Hinge about torsional axis
|
Click to release the torsional
fixity at one end of the currently selected members.
|

Fix End
>
|
Fix About Local Axis z
|
Click to fix the bending moment about the major
principal axis at the member end nodes currently selected. Both the member and
nodes must be selected.
|
| Fix About Local Axis y
|
Click to fix the bending moment
about the minor principal axis at the member end nodes currently selected. Both
the member and nodes must be selected.
|
| Fix Torsional Moment
|
Click to fix torsion of the
currently selected members.
|

Axial
Behavior >
|
Tension-Only Member
|
Click this tool button to indicate
that all currently selected members can only carry tension forces.
|
| Compression-Only Member
|
Click this tool button to indicate
that all currently selected members can only carry compression forces.
|
| Complete
|
Click this tool to restore full
axial capacity in both tension and compression (i.e., the default
specification).
|

Local Axis
>
|
Local Axis y Pointing a Selected
Node
|
Click this tool to rotate the
member's local y axis to point to a selected node.
|
| Local Axis y Parallel to Two Selected
Nodes
|
Click this tool to rotate the
member's local y axis parallel to a line between a pair of selected nodes.
|
| Local Axis z Pointing a Selected
Node
|
Click this tool to rotate the
member's local z axis to point to a selected node.
|
| Local Axis z Parallel to Two Selected
Nodes
|
Click this tool to rotate the
member's local z axis parallel to a line between a pair of selected nodes.
|

End Offsets
|
Opens the
Modify Member End Offsets dialog,
which is used to rigidly offset a frame member end from a joint to model the
offset conditions existing at the ends of frame members.
|

Axial End Offsets
|
Used to set the end offsets along
the members longitudinal axis to the half-depth of the connecting member.
The program detects the depth of the outstanding
face of the supporting member from its own centerline. The program then sets
the local x offset equal to this value.
|

Cross Section Position
|
Opens the
Modify Member Alignment dialog,
which is used to align the cross section of the physical member on the
analytical member centerline (i.e., member hang points).
|

Exchange Connectivity
|
Used to switch the
"start" and
"end" ends (i.e.,
Ni and
Nj) of the member.
Note: Refer to the
spreadsheet to review the incidences for members.
|

Segment Member >
|
Split members in a number of
segments
|
Opens the
Segment Member dialog, which is
used to split the selected members into divisions of equal length.
|
| Segment member given node and
distance
|
Opens the
Segment Member from Node dialog,
which is used to split the selected members into two at a specified distance
from a selected end node.
|
| Segment members at intersections
|
Segments selected members at
points where they intersect.
|

Merge >
|
Merge members keeping nodes
|
Merges selected members into a
single member connecting to the two end nodes. Intermediate nodes will be kept
in the model.
|
| Merge members deleting nodes
|
Merges selected members into a
single member connecting to the two end nodes. Intermediate nodes will be
deleted.
|