Synchronizing Projects
After you download, install, and start ProjectWise Drive, you can go back to ProjectWise Web and synchronize your projects with ProjectWise Drive. You can synchronize as many projects as you want.
Synchronizing a project with ProjectWise Drive
- Go to ProjectWise Web and open your ProjectWise project.
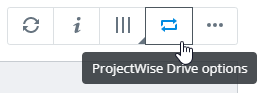
- Open any work area connection and click the ProjectWise Drive options icon.
- In the
ProjectWise Drive options dialog,
turn on
Synchronize this project (move the slider to
the right) and click
Save.
The dialog will tell you which connection in the project will be synchronized.

Once you synchronize the project, the ProjectWise Drive-enabled work area connection in that project becomes available in the ProjectWise Drive node in File Explorer. Expand the work area to find the documents and folders you want to work on.

When you synchronize projects that belong to different organizations, you will see multiple ProjectWise Drive nodes in File Explorer - a node for each organization and under that node the synchronized projects from that organization:

What documents will I see in ProjectWise Drive?
Only the documents and folders that you have access to in the work area in ProjectWise will appear in ProjectWise Drive. You will not see any folders or documents that you do not have access to. If a document has versions, only the active version of the document will appear in ProjectWise Drive (assuming you have access to the active version). Also, you will not see any documents in ProjectWise Drive that are not downloadable. For example, if you have Document Read permission (permission to see the document in the list) but not File Read permission (permission to open the file) on a document in ProjectWise, then you will not see that document in ProjectWise Drive. Also, a placeholder document (a document in ProjectWise that has no file attached) will never appear in ProjectWise Drive, since there is nothing to download.
Does synchronization download documents?
Synchronization alone does not download any documents, it just establishes links to the documents you have access to in ProjectWise. Documents are only downloaded when you check them out or open them, or if you explicitly download them.
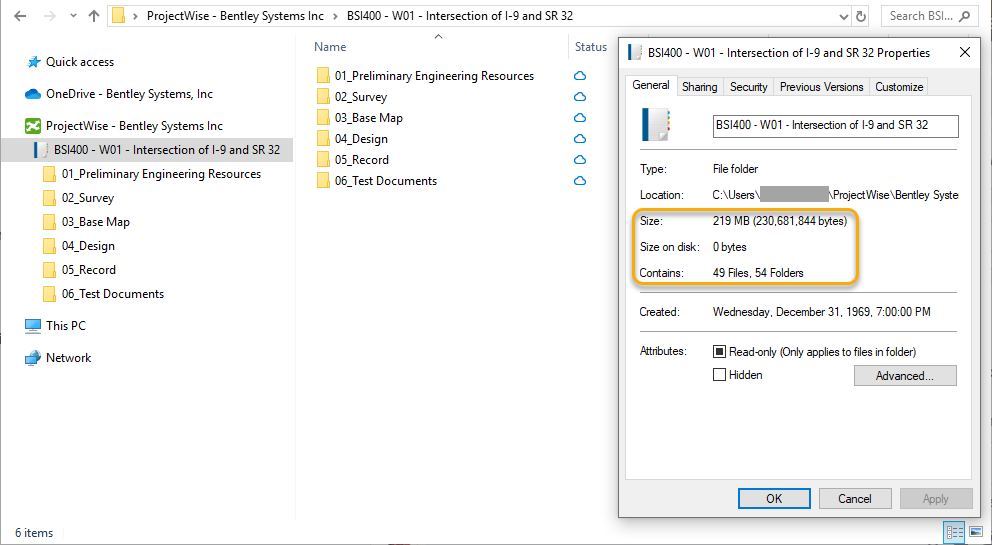
How much space will a synchronized work area take up?
You can open the properties of a work area in ProjectWise Drive to find out the total space that all the documents you have access to in the work area take up in ProjectWise (Size) and how much actual space that all the documents currently downloaded from the work area are taking up on your computer (Size on disk). You can also open the properties of a particular folder within the work area to find out how much space the documents in that folder and its subfolders take up.
Status icons
When you select a folder in the navigation pane on the
left, the
Status column in the document list on the right
shows the status of the documents and folders in the selected folder. For
example, if there is a cloud icon
 next to a document, it means that
the document is available in ProjectWise, but there is no local copy of the
document. The meanings of the various status icons are described in the
section,
Document and Folder Status Icons.
next to a document, it means that
the document is available in ProjectWise, but there is no local copy of the
document. The meanings of the various status icons are described in the
section,
Document and Folder Status Icons.

ProjectWise Drive file location
Once a project is synchronized, documents from that project are accessed from the ProjectWise Drive node (labeled ProjectWise - <organization_name> by default) in the navigation pane of File Explorer. However, the actual location on your computer where documents from the synced project will be downloaded to is called the ProjectWise Drive file location.
The default ProjectWise Drive file location for every organization is:
%userprofile%\ProjectWise\<organization_name>\<project_name>
Where:
- %userprofile%\ProjectWise is the ProjectWise Drive root folder, and where %userprofile% (which typically expands to C:\Users\<user.name>) is the user profile location for the user you are logged in to the computer as.
- <organization_name> is the folder that is named after the organization that owns the ProjectWise project
- <project_name> is folder that is named after the ProjectWise project that is being synced.
If you are syncing multiple projects, each project will have its own folder, grouped by organization.
For example:
ProjectA owned by Org1 syncs to C:\Users\<user.name>\ProjectWise\Org1\ProjectA
ProjectB owned by Org1 syncs to C:\Users\<user.name>\ProjectWise\Org1\ProjectB
ProjectC owned by Org2 syncs to C:\Users\<user.name>\ProjectWise\Org2\ProjectC
The default ProjectWise Drive file location used by your organization can be changed as needed by the administrator from the Enterprise Administration page in ProjectWise 365 (see Enterprise Administration > ProjectWise Drive).
Viewing your currently used file locations
You can now view the file locations of your currently synced projects.


Changing your backup default location
If ProjectWise Drive is not able to sync a project to the file location currently defined for that project's organization, ProjectWise Drive will automatically sync the project to your backup default location instead.
Use these steps if you want to change your backup default location.
- Make sure you do not have any projects synchronized.
- Click the ProjectWise Drive icon in the notifications area of the taskbar to open the ProjectWise Drive app window.
- Click your initials in the upper right corner and select Settings.
- Change the path in the Default location field as needed and click Save.

Resynchronizing projects to new file location
If an administrator redefines the file location for their organization, and your ProjectWise Drive is currently synced with one or more projects from that organization, you will receive a notification in your local ProjectWise Drive app window and be asked to resync those projects to use the new file location.
You will also see a warning icon in the ProjectWise Drive node in File Explorer:

To resynchronize projects:
- Click the ProjectWise Drive icon in the notifications area of the taskbar to open the ProjectWise Drive app window.
- Click the link in the
notification that says,
Click here to resynchronize.
The Resynchronize Projects dialog opens, informing you about the changes that this resync is about to make to the file location paths used by the currently synced projects of the specified organization.
- Click Resynchronize.
- When the resync is complete, click Exit.


Unsynchronizing a project
You can unsynchronize a project, either from the ProjectWise Drive node in File Explorer, or from the ProjectWise Web website.
To unsynchronize a project, from the ProjectWise Drive node in File Explorer:
(requires ProjectWise Drive v2022.1.x or later)
- Open File Explorer and go to the ProjectWise Drive node.
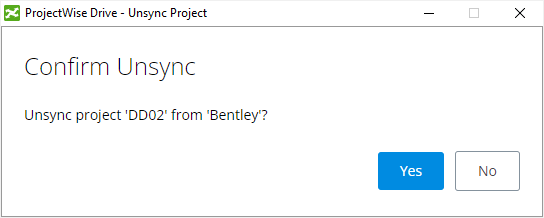
- Right-click the project (work area connection) you want to remove and select Unsync project.
- When prompted, click Yes to confirm that you want to unsynchronize this project.

To unsynchronize a project, from the ProjectWise Web website:
- Go to ProjectWise Web and open your ProjectWise project.
- Open any work area connection and click the ProjectWise Drive options icon.
- In the ProjectWise Drive options dialog, turn off Synchronize this project (move the slider to the left) and click Save.

Once the project is unsynced, the work area connection is removed from the ProjectWise Drive node in File Explorer, and any downloaded documents (that are not currently checked out to you on this computer) are automatically deleted from the ProjectWise Drive file location. Any downloaded documents that are still currently checked out to you on this computer, and any local files that you added to the work area in ProjectWise Drive but have not yet been added to ProjectWise will remain in the ProjectWise Drive file location.