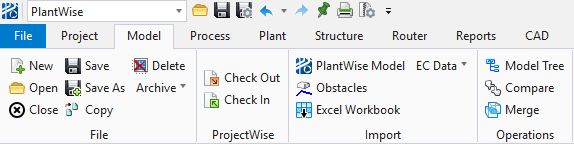
Model Menu
From the Model menu you can: create new models, open existing models, copy models from one name to another, delete models, import data, compared models, and merged models.
| Setting | Description |
|---|---|
| New... | Opens the New Model dialog. If a project with an
active model is already open, the
PlantBuilder
Close Model dialog opens.
Defining a new model:
If the current model is not saved, changing models – either creating a new model or opening an existing model – opens the PlantBuilder Close Model dialog (See Below). Click Save to save the current model. To avoid saving changes made during the session since the last save, click Don’t Save. To abort the operation that caused the Plant Close Model window to appear click Cancel. Creating a new model starts CAD if it is not already running. If CAD is open, then creating a new model loads the new drawing file. After creating a new model, or opening an existing model, all the previously inactive PlantWise menus and menu commands become active. The name of the currently active model is also displayed. |
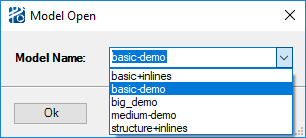
| Open... | Opens an existing model in the project. The
Model Open dialog, listing all existing
models in the project, opens. Select a model by either double-clicking on the
desired model name, or selecting the model by clicking on its name and then
clicking the
Select button. You can also type the model
name in the
Model Name field and matches will be
displayed as type.
Note: if the project
contains models with very long names the dialog can be made wider prior to
selection so the complete name will be visible.
The first model opened in a PlantWise session, will also start CAD. If CAD is already open, the new drawing file is loaded. If a model is already open, the Close Model dialog opens (See Below). You can re-open the model they are currently working in without having to close it first. When choosing the current model to open, you are be prompted with the message shown in on the right.
|
| Save | Saves the currently active model. The Save command saves the process model and the plot script. The process model data is saved in the appropriate files in the \input subdirectory and the plot script is saved in the \scripts subdirectory. For more information on process model and plot scrip file formats, see Appendix D - File Formats . |
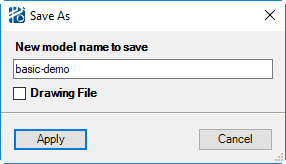
| Save As... | Saves the currently active model under a new name and makes the new model active. A Save Model As dialog opens. Enter the name of the new copy of the model in the New model name field; then select whether or not to save the drawing file; and then click the OK button. Click Cancel to abort the Save As operation. |
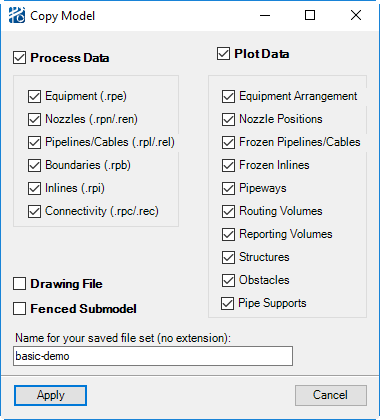
| Copy... | To save only a specified set of data or area of the
model, you would use the
Copy command. You can choose to save only
selected process or plot data using the check boxes at the top of the dialog.
As with the
Save As command, you can choose whether or not to
save the drawing file.
Note: Structure
pipeways, vertical pipeways, vertical chases, and floor penetrations are saved
with Structures rather than with Pipeways.
Fenced Submodels: To save a selected area of a model, you need to: draw a CAD fence about the desired area; open the Copy Model dialog; and select the Fenced Submodel checkbox. (For more information on using fenced submodels, see Advanced Workflow.) Note: When fencing a
pipeline with an equipment set header, it is strongly recommended that the
fence include the entire header to avoid future confusion is the submodel is
combined with another model through the
Merge
or Import functions.
|
| Import... | Cascades another menu where you select either PlantWise Model, EC Data (which has 4 sub selections), Excel Workbook, or Obstacles from Design Files. |
| Compare... | Checks changes in the process and script files of the current model with the selected model. |
| Merge... | Allows you to import changes from a model on disk into the current model. |
| Close... | Closes the open model without exiting the project. If the model has unsaved changes, the Close Model dialog opens. |
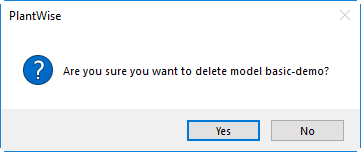
| Delete... | Closes the open model and deletes the associated files from the project directory. You are asked for confirmation (shown below); To proceed with the model deletion, click Yes. To abort, click No. |