To Create a General Correspondence (ProjectWise Explorer)
-
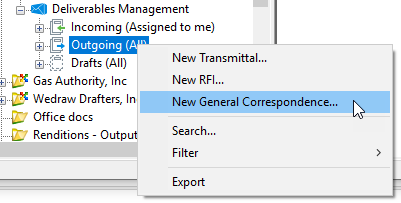
Select the type of general correspondence draft you want to
create:
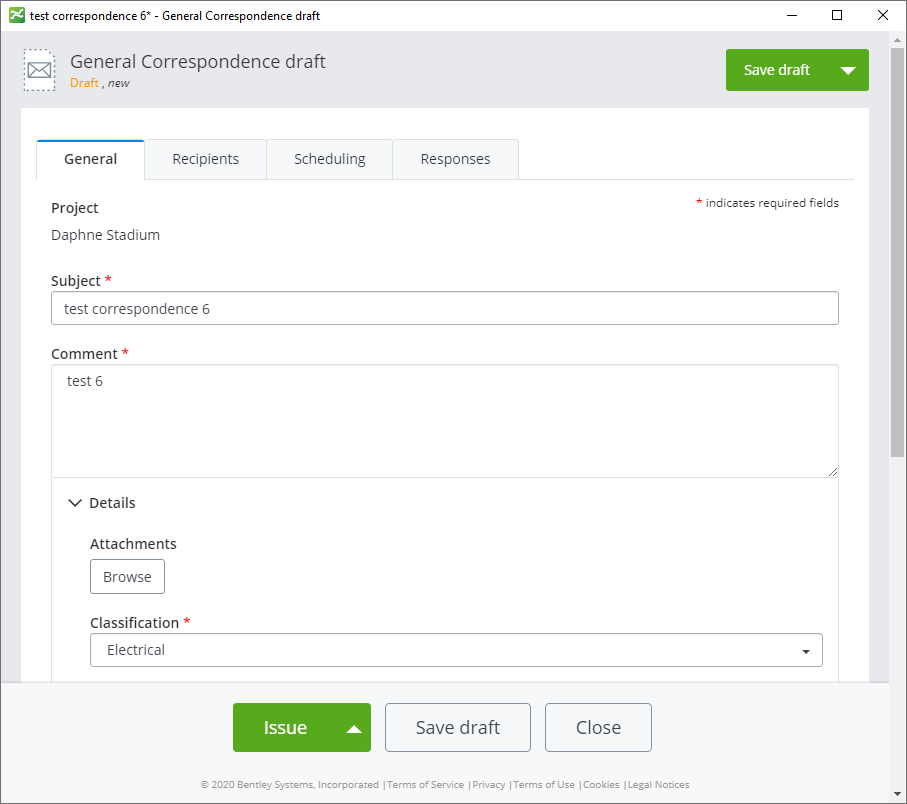
The General Correspondence draft form opens.
Tip: As you are preparing the general correspondence, click Save draft at any time to save a draft of this general correspondence. Once saved, you can close the draft and open it later for further editing.At a minimum, every general correspondence you issue must contain:
-
On the
General tab, do the following:
- Subject - Enter a title that describes the general correspondence.
- Comment - Write a message to the recipients of the general correspondence.
-
Expand the
Details section and do the following:
- (Optional) Attachments - Click Browse to add one or more attachments.
-
Classification
- Select a classification from the list to assign to the general
correspondence.
Classification labels are used to categorize transmittals, submittals, RFI's, and general correspondences into the parts of the project they relate to.
Classification labels are completely customizable in each project and are defined by the administrator in the portal settings. The administrator can also decide whether to make assigning a classification required or optional. If the Classification list is not present at all, it means the administrator has not defined any classification labels for this project.
- Below the
Classification field, fill out any additional custom attributes as needed.
Custom attributes are completely customizable in each project and are defined by the administrator in the portal settings. Default attributes for the General Correspondence package type are Location, Source, Project Phase, Contract. If there are no additional attributes in this section, it means the administrator has either deleted the default attributes or has not defined any custom attributes for this general correspondence package type you are creating.
See Configuring the Attribute List for General Correspondences.
-
On the
Recipients tab, add the participants that you
want to receive this general correspondence and turn the
Ack (Acknowledge) and
Resp (Respond) options on or off as needed for
each recipient.
To add participants, do the following:
- Click
Add recipients.
The Add recipients dialog opens.
You can filter the dialog to show only internal participants, only external participants, or both internal and external participants.
You can use this dialog to add any current internal or external participant to the recipients list.
You can also use this dialog to invite new external participants to the project. Once invited, you can immediately add the newly invited person(s) to the recipients list (you do not have to wait for them to accept the invitation in order to issue the general correspondence).
-
To add a current external or internal participant:
-
To invite and add a new external participant:
- Click Invite new.
- In the Contact email field, enter the email address of the person you want to invite to this project.
- In the
Subject field, enter a subject for the project
invitation email.
A default subject is provided, which you can keep or change as needed.
- (Optional) In the Message field (not labeled), enter a short, personal message to the invitee.
- Click
Send.
An invitation is sent to the person, and they are added to the external participants list.
- Select the newly invited external participant in the list and click Add selected.
- Click
Add recipients.
-
On the
Scheduling tab, do the following:
-
Set the
Acknowledgement due date (the date by which
the recipient must acknowledge that they have received the general
correspondence).
-
Set the
Response due date (the date by which the
recipient must send a formal response to the general correspondence).
For both due dates, you can either set a specific due date, or you can make the due date a certain number of days after the general correspondence was issued. You can also specify how many days (if any) before the due date that a reminder email will be sent to the recipient.
-
Set the
Acknowledgement due date (the date by which
the recipient must acknowledge that they have received the general
correspondence).
-
Depending on how complete the general correspondence is, click
one of the following:
- Save draft - if you want to save your changes so far but leave the draft open for further editing
- Close - if you want to close the draft after saving it (you can open it for editing later)
- Send for review & issue - if you want to send the draft to another internal participant to review before issuing it
- Issue - when you are ready to send the draft to the selected recipients