To Create a File Import
You can acquire data by importing files created with the following applications:
- Excel
- SmartPlant PID
- AVEVA PID
- AVEVA Diagram
- AutoPLANT
- AutoCAD
- Proteus
- Microstation
- Navisworks
- Revit
Prerequisites:
- You have uploaded your source files and all required additional files to the PlantSight Documents share. You find a list of all mandatory and optional additional files in Requirements for File-Based Imports.
- If you want to import whole folders instead of selecting files individually: You need to upload all mandatory files, like mapping files or satellite files into the same folder as the source files on the PlantSight Documents.
- If your import requires a mapping file, it must be named mapping.json.
- Open Data Acquisition.
- In the panel Acquisition, select Other Import.
-
Select
New
(
 ).
).
The import wizard appears.
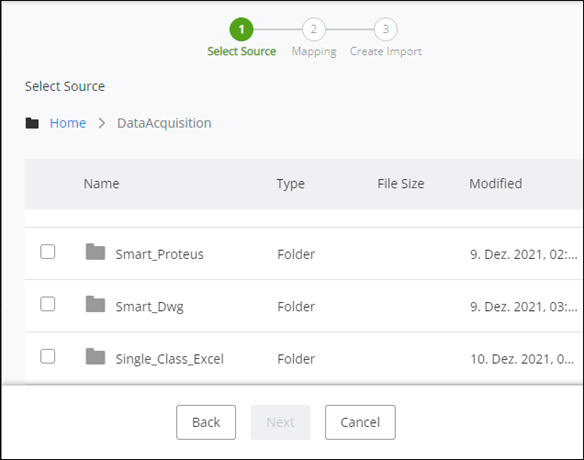
- Click Browse File, and then click Next. The contents of the Documents share appears.
- To select import files, do one of the following:
- Click Next. The list Import Type appears. Depending on the selected source file type, it offers you all suitable import types. The following image shows an example.
-
Select an import type, and then click
Next.
If applicable for your import type, the
mapping.json file and other additional files in the selected folder appear.
Tip: For non-OpenPlant schema imports, you can use the mapping file to create functional data by using the EC-SQL Query configuration. See Mapping.jason Configuration.
- Click Next.
-
(Optional) Edit the
Import Name.
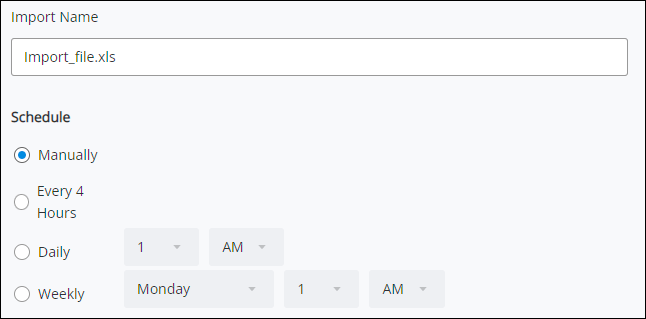
- (Optional) Create a schedule to keep the Digital Twin updated. In the Schedule section you define a schedule for re-starting the import automatically. If you don't want to re-start the import automatically, select Manually. See Scheduling Imports.
- Click Create.


For Excel, AutoCAD and Proteus:
The import is created. The import appears in the imports list with Loading state. Once the import has been successfully created, the status changes to Draft. You can start this import later. For imports in Draft status you can map EC Classes in the Preview.
For Bentley bridges:
The import is created. The import appears in the imports list with Draft state. You can start this import later.
If you have scheduled the import, your schedule plan appears in the Schedule row of the import overview. The import starts according to the schedule automatically. Scheduled imports may only start if the previous import state is either Draft or Completed.