Working with Tables
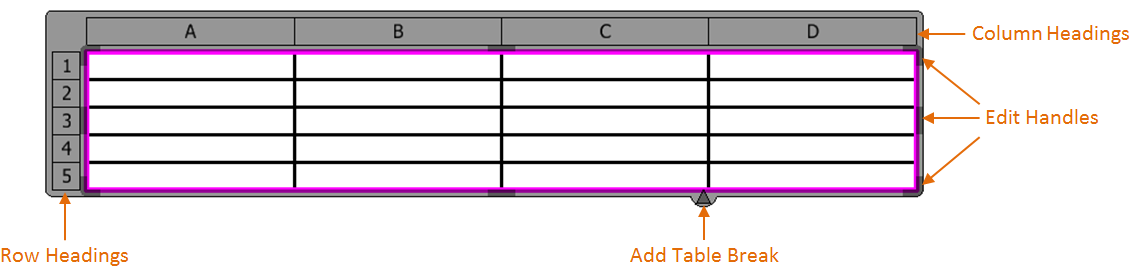
A table is a set of cells arranged in rows and columns. The cells in a table are separated by gridlines. When you click on a table, the entire table is highlighted and its column headings and row headings are displayed on the top and left side respectively. These headings help in identifying cells in the table and manipulating the table.
When you select a table, eight edit handles appear between the row or column headings and the table's outer borders. Four edit handles appear in the four centers and four appear on the edges of table. The edit handles in the center of the table allow you to resize either the rows or the columns. Whereas, the edit handles at the corners allow you to resize entire table.
You can lock the size of a table so it cannot be manipulated manually. You can do so by selecting the table and in the Formatting section of the Properties pane, and setting Size Lock to True. This will lock the table and you will not be able to adjust its size by using the edit handles.
A triangular Add Table Break handle also displays when you select a table. It allows you to break the table horizontally.
Selecting a table opens the contextual tab in the ribbon. You can perform various operations on the table from the contextual tab.
Row and Column Types
By default, all table rows are of type Body. You can assign other types to the rows from the Properties dialog. You can also assign different text styles to each row type. If you break a table, the title, header, and footer rows can be repeated in each table.
You can assign different text styles to the first and last columns of a table. This can be done from the First Column and Last Column settings in the Properties dialog.
Selecting Rows, Columns, and Cells of a Table
- To select a cell
- To select multiple cells
- Click the table to select the table.
- Click the first cell that you want select.
- Press <Ctrl> and select the next cell.
- Repeat step 3 to select more cells.
To select multiple consecutive cells, press <Shift> and then select the first and the last cell. All the cells within the first and last cell are selected.You can also select a table and then drag the pointer over the cells that you want to select.
- To select a row or column
- To select multiple rows or
columns
- Click the table to select the table. The row and column headings display.
- Click the desired row or column number in row or column heading respectively.
- Press <Ctrl> and select the next row or column number in the row or column heading respectively.
- Repeat step 3 to select more rows or columns.
To select multiple consecutive rows or columns, press <Shift> and then select the first and the last row or column heading. All rows or columns between the first and last row or column are selected.You can also select a table and then drag the pointer over the row or column headings to select the respective rows and columns.
Adding Rows and Columns
You can add rows by selecting the
Insert Above
 and
Insert Below
and
Insert Below
 tools and add
columns by selecting the
Insert Left
tools and add
columns by selecting the
Insert Left
 and
Insert Right
and
Insert Right
 tools. These
tools can be accessed from the
contextual tab or from the right-click pop-up menu of
the table's cell, row, column, row heading, or column heading.
tools. These
tools can be accessed from the
contextual tab or from the right-click pop-up menu of
the table's cell, row, column, row heading, or column heading.
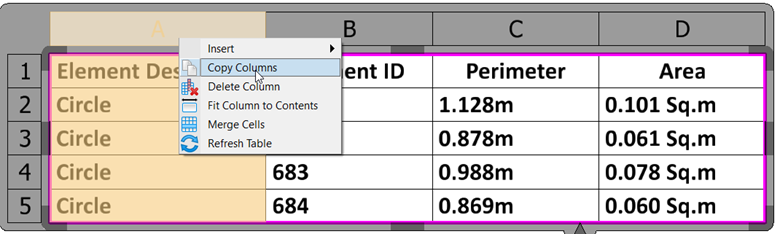
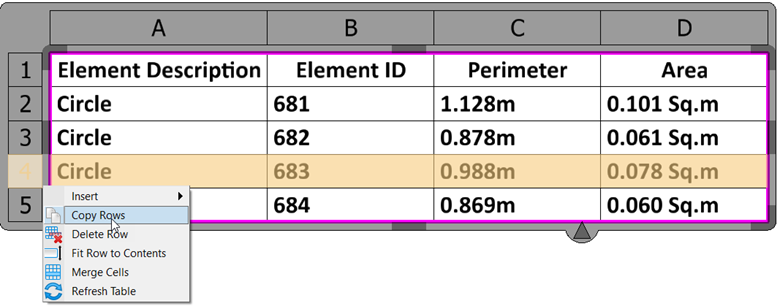
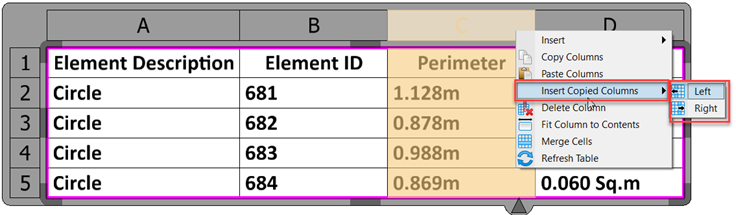
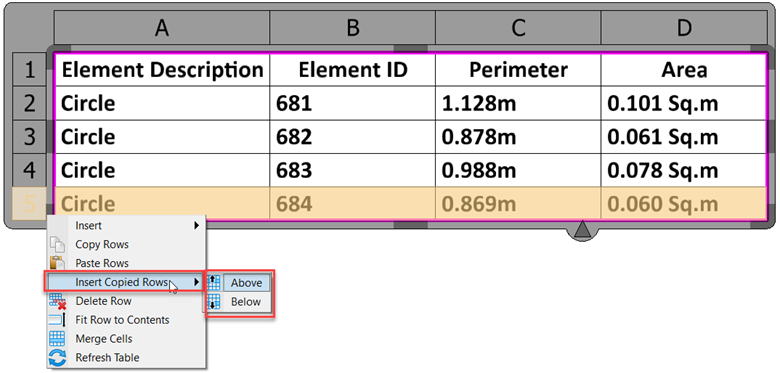
Copy and Paste Rows and Columns
You can copy the entire selected row(s) or column(s) and paste it next to another row or column.

Resizing Rows and Columns
- Manual - There are three
ways to manually resize the row and columns of a table:
- Select the table. Drag the gridline and enter a data point. The row or column is resized accordingly.
- Select the table. Then select the desired row or column and in the contextual tab's Cell Size group enter desired values in the Height and Width fields respectively. Height changes the row height and Width changes the column width.
- Select the table and drag the edit handles to resize.
- Using Distribute tools in
the ribbon - The
Distribute Rows
 and
Distribute Columns
and
Distribute Columns
 tools in the
contextual tab's
Cell Size group adjust the row height and
column width respectively, without changing the overall size of the table.
tools in the
contextual tab's
Cell Size group adjust the row height and
column width respectively, without changing the overall size of the table.
- Fit to Contents - When you right-click a row or column heading, you get the option Fit to Row Contents and Fit to Column Contents respectively. These options resize the rows or columns to fit to the content in respective row or column.
By default, Width Lock is set to True and Height Lock is set to False. Manually setting width or height sets the respective property to True. Using the Fit to Contents options set the respective property to False.
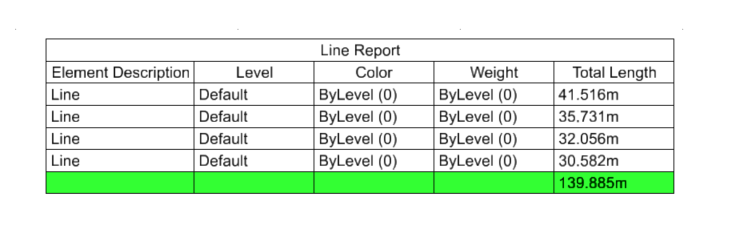
(Technology Preview) Summary Row in Tables
There are 3 different ways to define the Summary Row in Tables:
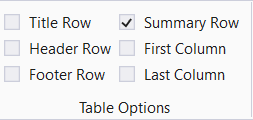
- Select the Table.
- Select the Summary Row in the Table Options from the Layout contextual tab.
- You can also check the row type in Properties Dialog, Formatting section.
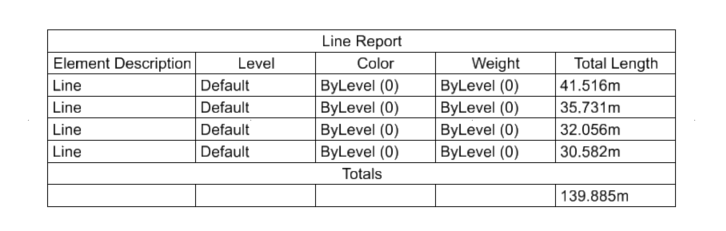
- Select the Report Definition in the Reports Dialog (Drawing > Analyze > Reports)
- Define the method from the Sum drop-down menu. Refer Summarize Information in Report
- Select Place Table from Reports. The table will be placed.
- The selected Table will have rows such as title, body, summary. Select the particular row to view its row type in the Properties Dialog, Formatting section.
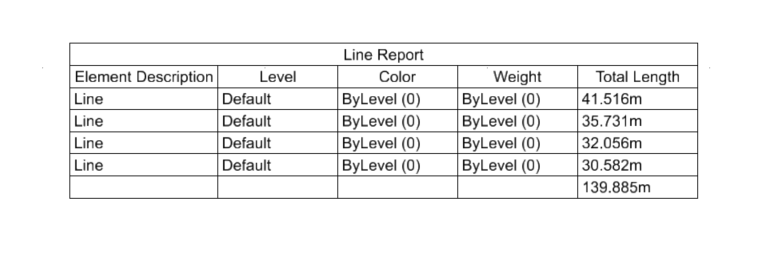
- To disable the Totals row, set configuration variable, MS_REPORTTABLE_HIDETOTALSLABEL. The table will be placed without the Totals row.
Removing Rows and Columns
You can delete rows and columns by selecting the
Delete Row
 and
Delete Column
and
Delete Column
 tools
respectively. These tools can be accessed from the
contextual tab or from the right-click pop-up menu of
the table's cell, row, or column.
tools
respectively. These tools can be accessed from the
contextual tab or from the right-click pop-up menu of
the table's cell, row, or column.
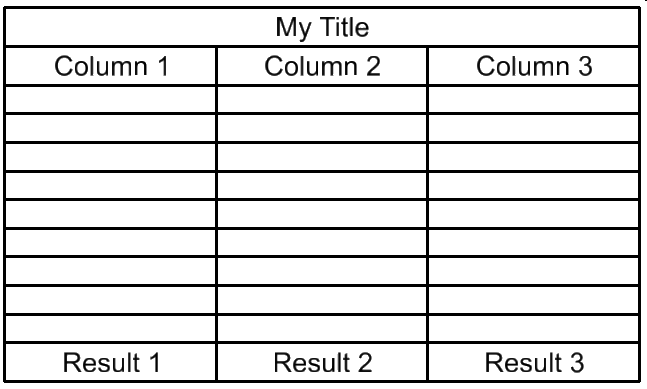
Breaking Tables
You can break or split a table into two or more tables using the table break settings. When you select a table, the Add Table Break handle appears at the bottom of the table. Selecting and dragging the handle allows you to break the table.
- Break Type - Sets the way in which you want to break the table:
- Break Height - Sets the height at which the table should be split.
- Repeat Headers - If set to Yes, repeats the title and header on each table.
- Repeat Footers - If set to Yes, repeats the footer on each table.
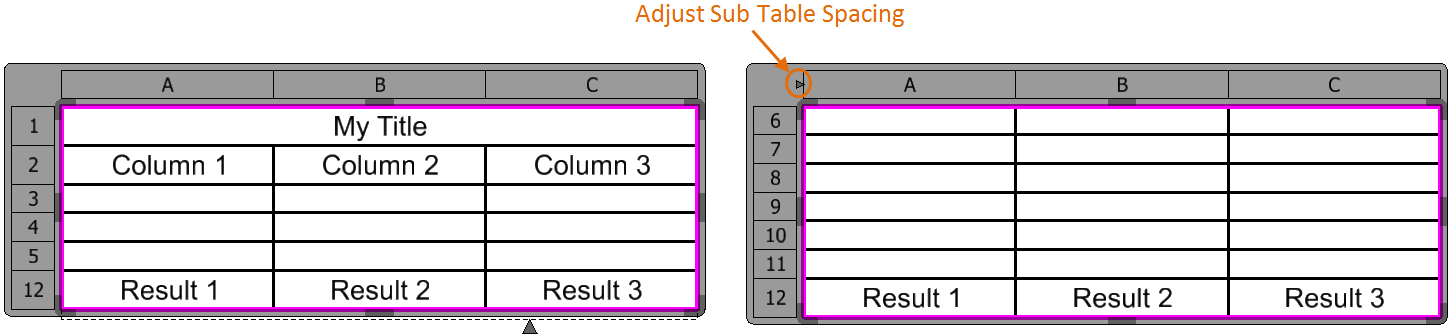
- Sub Table Position - Sets the position where the split table will be placed with respect to the original table. Options are Right, Left, Above, Below, and Manual.
- Sub Table Spacing - Sets the spacing between the split table and the original table.
Changing the Color and Weight of Text Inside the Table
By default, the text inside a table takes the color and weight of the active level. You can override the color and weight of all the text inside the table using the Default Text Color and Default Text Weight properties in the Text Styles section of the Properties dialog. Note that the text weight does not affect TrueType fonts.
To change the color of text inside a particular cell of a table, double-click the text to open the Text Editor window. Then select the text in the Text Editor window and change the color from the color drop-down.