To Place Text with the Place Text Tool
-
Select the Place Text tool (
).
The Text Editor window opens.
- (Optional)
Do one of the following:
In the Text Editor window, choose a text style by selecting a text style name from the drop-down menu.
or
In the Text Editor window and/or the Text Styles dialog ( dialog launcher), adjust the active text attributes such as the Active Font.
If you are using a text style, changing the active text attributes results in text that overrides those attributes. That is to say that the text ignores the Text Style for those attributes that are overridden.
- (Optional) If you are creating a sheet model for drawing production in which you will eventually scale the drawing border to fit the design, turn on Annotation Scale Lock icon in the Place Text tool settings window.
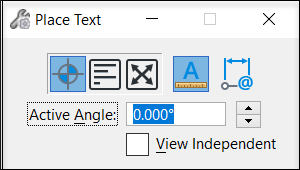
- (Optional) In the Place Text tool settings window, adjust other relevant tool settings, such as the Active Angle and the placement Method (By Origin, Word Wrap, Fitted, View Independent).
- (Word Wrap method only) Draw a rectangle on the screen to define the text boundaries. For horizontal text, only the width matters; for vertical text, only the height matters.
- In the Text Editor window, type your text.
- (Optional)
Apply formatting to the text you typed using the icon bar in the Text Editor window.
Note: If you want to apply multiple formats, turn off the option Apply to all text in the Preferences dialog Text category ( ). Otherwise, formatting changes are made to all text regardless of the caret position or selection.
-
Do one of the following:
(By Origin and View Independent methods only) As you move the pointer in the view window, the text displays dynamically. Enter a data point in the model to position the text.
or
(Fitted method only) Enter a data point as the base data point, then move the cursor to yield the desired fitted range and enter a second data point to accept.
or
(Word Wrap method only) The location was already defined prior to entering the text; enter a data button to accept the placement.
- Do one of the following: