Issues
Using a punch list to document and share issues.

Before creating an Issue
Issues are associated to a CONNECTED project. Select the appropriate project by selecting the Change Project button on the File Open screen. If you do not have a project, contact your Project or IT administrator to register a CONNECTED project.
Creating a Punch List item
All issues are associated to objects in the model. Before creating an issue, select an object in the view using the Select Item tool. Once you have selected the item, go to the Issues tab of the Content Management zone from the middle left, and select the Add "+" button in the tool bar. The Add issue form appears on the screen with four different sections to add information to document the issue.
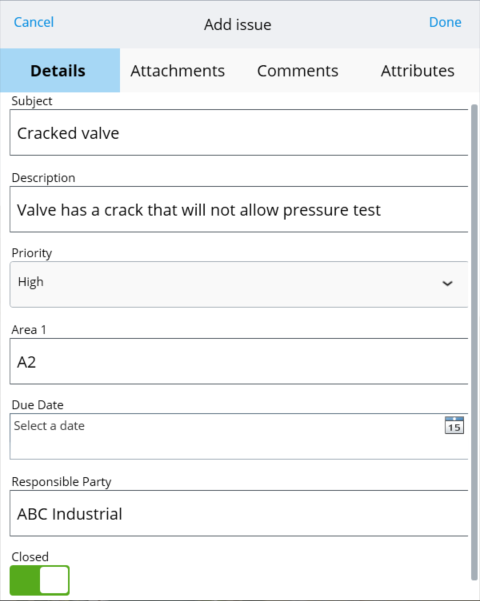
You can switch between the different sections by selecting the different tabs at the top of the form.
- The Details tab contains all the fields defined by the project administrator.
- The Attachments tab is where you can create and annotate screen shots of the model or photographs taken with the camera from mobile devices. For more information on how to create and annotate an attachment, go to the Add Attachment topic.
- The Comments tab is a running list of any commentary project participants want to add.
- The Attributes tab displays information about the Issue, such as ID, the person the issue was Created By, or the date the issue was Created On.
Adding all this information is optional. Select Done to
create the issue. Select Cancel to discard the issue. The newly-created
issue appears in the list with a triangle
 which means that this issue has
local changes that need to be synchronized. To synchronize the issue, select
Sync from the Backstage Panel.
which means that this issue has
local changes that need to be synchronized. To synchronize the issue, select
Sync from the Backstage Panel.
Synchronizing Issues
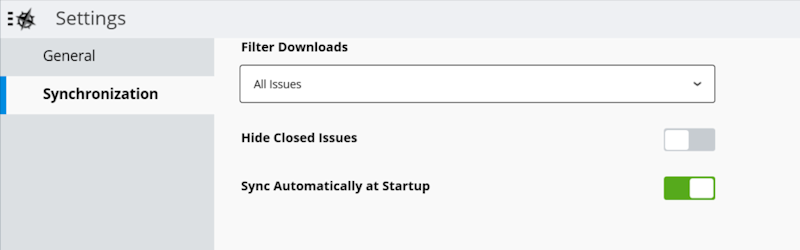
By default, Issues are synced automatically on startup of Navigator as long as you have an Internet connection. To change this, from the Backstage panel go to Settings and then select the Synchronization tab. You can manually sync the punch list by selecting Sync from the Backstage Panel.
Since issues are associated to a project and the list can get quite long, you can filter the issues that are downloaded. Go to Settings in the Backstage panel and select the Synchronization tab. Set the Filter Downloads option to control what types of issues are downloaded.
Editing Issues
You can select any issue in the list which also selects
the associated item in the view and zooms to the item. To edit the fields of
the punch list or add attachments or comments, select the Edit
 icon for the Issue. The form for
the issue opens and once the changes are made, select the Done button. The
changes made to the issue are only stored locally and are not available to
other project participants until you synchronize to upload the changes.
icon for the Issue. The form for
the issue opens and once the changes are made, select the Done button. The
changes made to the issue are only stored locally and are not available to
other project participants until you synchronize to upload the changes.
Closing an Issue
While there are a number of fields that a project administrator can define, the closed field is a required field and is the only field Navigator uses to determine if an issue is closed or completed. Closed issues can be hidden from the list by going to Settings from the Backstage panel and then selecting the Synchronization tab.