ProjectWise Configuration Map (Overview tab)
When you turn on ProjectWise Project Insights, you are taken to the Overview tab which contains a configuration map showing the general steps that are required to configure ProjectWise Design Integration data to display in ProjectWise Project Insights, and which step of the configuration needs to happen next. The configuration map is designed to walk the administrator through the entire configuration process, and provides links to sections in this help where appropriate. The other dashboard tabs for ProjectWise remain disabled until the configuration is complete, or unless the administrator hides these tabs.
Whenever anyone visits the ProjectWise Project Insights portal, the configuration map on the Overview tab will detect which steps of the configuration have already been completed and which steps still need to be completed, and will show you what step is in progress or required next. If the user is an administrator, the configuration map will provide instructions on what they need to do next. If the user is not an administrator, the configuration map will explain what step of the configuration is in progress or needs to happen next, and the accompanying message will tell them to see the administrator for details.
The four general configuration steps (as shown on the configuration map) are documented below.
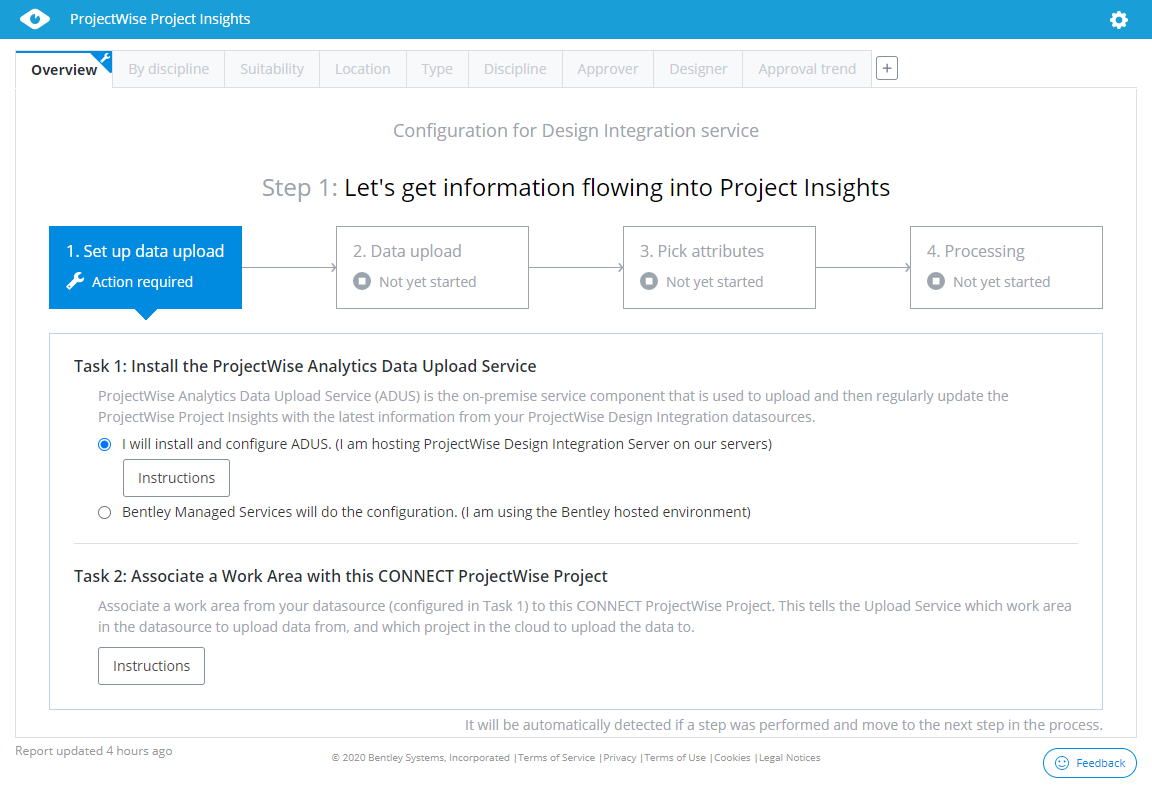
Step 1 - Setup data upload
Step 1 has two tasks which can be completed independently of each other:
- Install and configure the
ProjectWise Analytics Data Upload Service.
Whether or not you need to perform this task depends on whether your ProjectWise Design Integration Server is hosted by Bentley or not.
Whoever performs this task will use the ProjectWise Analytics Data Upload Service to select which ProjectWise databases they want to upload data from.
- If your organization
hosts its own
ProjectWise Design Integration Server and
databases, then select
I will install and configure ADUS. (ADUS
is short for
ProjectWise Analytics Data Upload Service).
Click the Instructions button if you want to go to the section of the ProjectWise Project Insights help that describes how to install and configure ProjectWise Analytics Data Upload Service.
or
- If your ProjectWise Design Integration Server and databases are hosted by Bentley, then select Bentley Managed Services will do the configuration, and also click Submit request so that you can specify which hosted server and datasource (database) you want to upload data from.
- If your organization
hosts its own
ProjectWise Design Integration Server and
databases, then select
I will install and configure ADUS. (ADUS
is short for
ProjectWise Analytics Data Upload Service).
- Associate a work area to a
ProjectWise project.
In this task, you will use ProjectWise Explorer to associate a work area from your datasource (whose database was selected in task 1) to this ProjectWise project (where ProjectWise Project Insights is turned on).
This tells the Upload Service which work area in the datasource to upload data from, and which ProjectWise project to upload the data to.
Click the Instructions button if you want to go to the section of the ProjectWise Project Insights help that describes how to associate a work area to a ProjectWise project.
Once step 1 is complete, the configuration map will automatically advance to step 2.
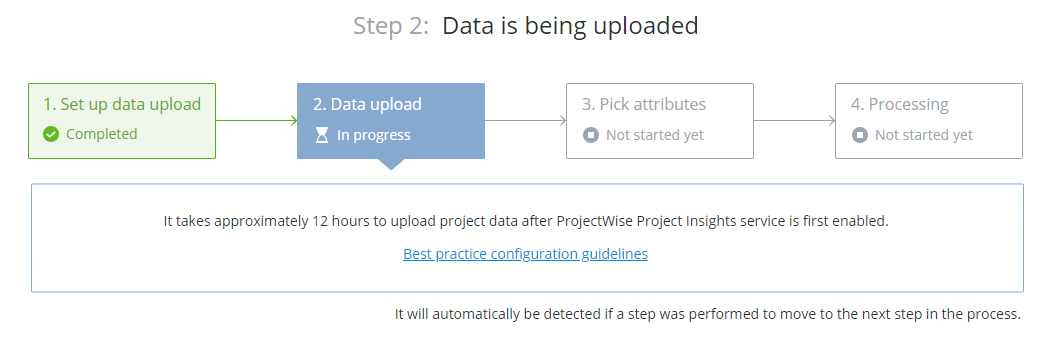
Step 2 - Data upload
There is nothing you need to do for step 2. This step just shows you that step 1 is complete, and that the uploading of ProjectWise data has begun.
- ProjectWise Project Insights is turned on in the ProjectWise project (required preliminary setup)
- ProjectWise Analytics Data Upload Service has been installed and configured to upload data from a specific ProjectWise database (configuration step 1, task 1)
- A work area from the datasource (whose database was selected in configuration step 1 task 1) has been associated to this ProjectWise project where ProjectWise Project Insights is turned on (configuration step 1, task 2)
Once step 2 is complete, the configuration map will automatically advance to step 3.
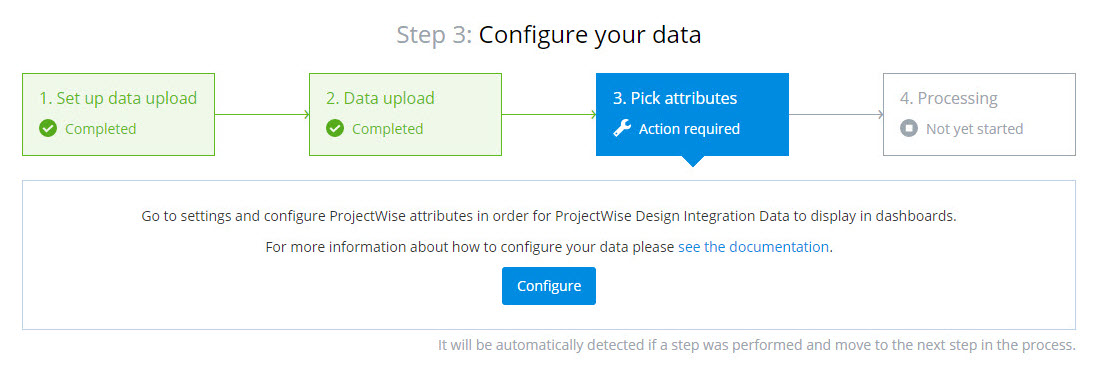
Step 3 - Pick attributes
Step 3 involves going to the Settings page and selecting which ProjectWise document attributes you want to use to group documents by in the dashboard reports.
Click Configure to go to the Settings page to begin this configuration, or click the see the documentation link to go to the section of this ProjectWise Project Insights help that describes how to select and configure your ProjectWise attributes in the dashboard settings.
Once step 3 is complete, the configuration map will automatically advance to step 4.
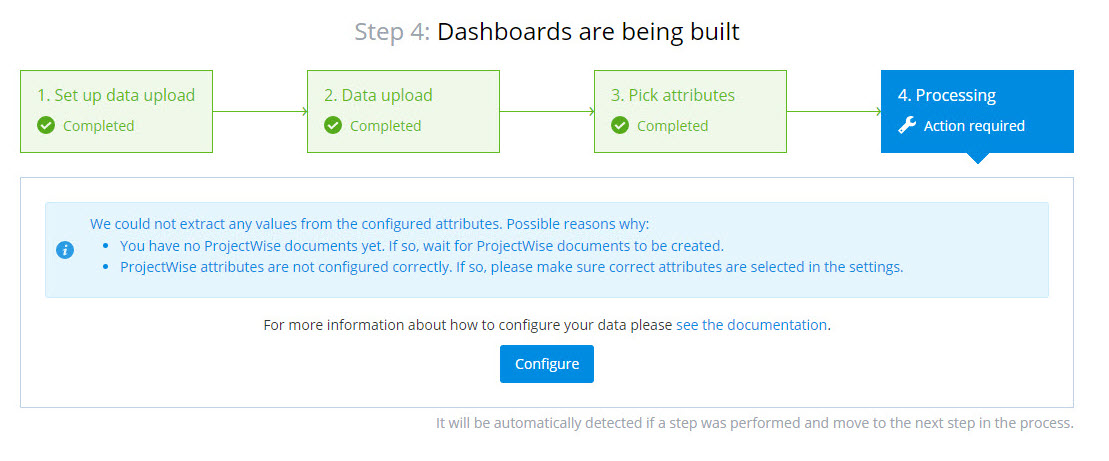
Step 4 - Processing
Step 4 is the step in which the uploaded ProjectWise document data gets processed for display in the charts that appear on the ProjectWise dashboard tabs.
Step 4 will either show you that processing is in progress, or that something still needs to be done in order to process the ProjectWise data.
If action is required, if could mean that ProjectWise attributes were actually configured correctly in the dashboard settings, but the ProjectWise work area has no documents yet, and therefore there is no data to be processed. If that is the case, then all you have to do is wait for the work area to fill up with documents. Eventually the data will become available here in the portal.
Or, if action is required, it could also mean that ProjectWise document data is available to be processed, but the ProjectWise attributes were not configured correctly in the dashboard settings. In that case, click the Configure button to go to the Settings page so that you can make changes to your ProjectWise attribute settings.
Click the see the documentation link if you want to go to the section of this help that describes how to select and configure ProjectWise attributes.
Once step 4 is complete, the dashboard tabs will become enabled and will display visual reports about your documents.