To Install Bentley i-model Composition Server for PDF (standard installation)
- Download ProjectWise Server Setups (https://softwaredownloads.bentley.com/en/ProductDetails/2547) and run the installer by right-clicking the Setup_ProjectWise_Serverx64_<version>.exe file and selecting Run as administrator.
-
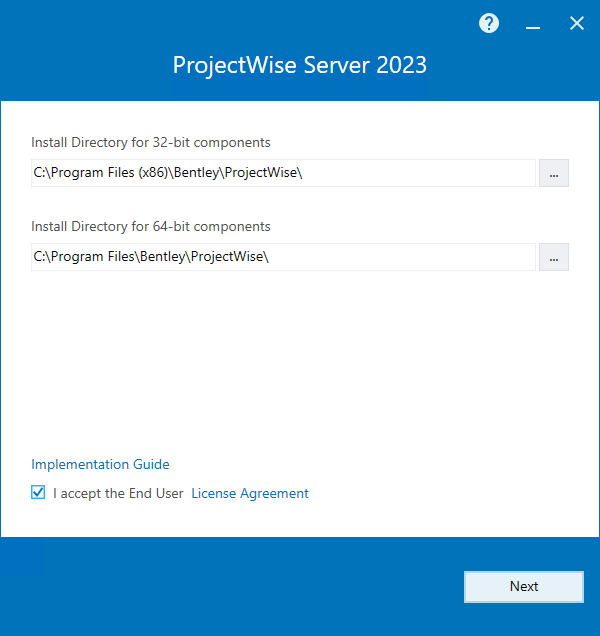
When the
installer opens, accept the license agreement, change the installation location
if needed (if possible), and click
Next.
The default installation location is C:\Program Files\Bentley\ProjectWise.
The option to change the installation location is hidden if another application from this release is already installed.
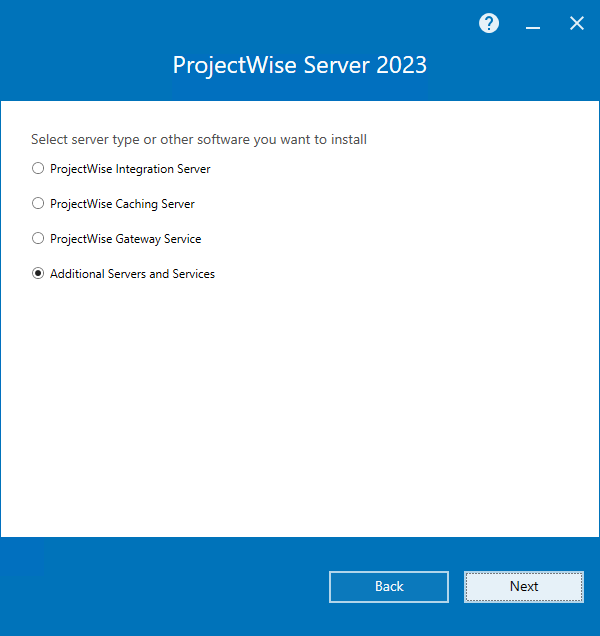
- On the Select server type page, select Additional Servers and Services and click Next.
-
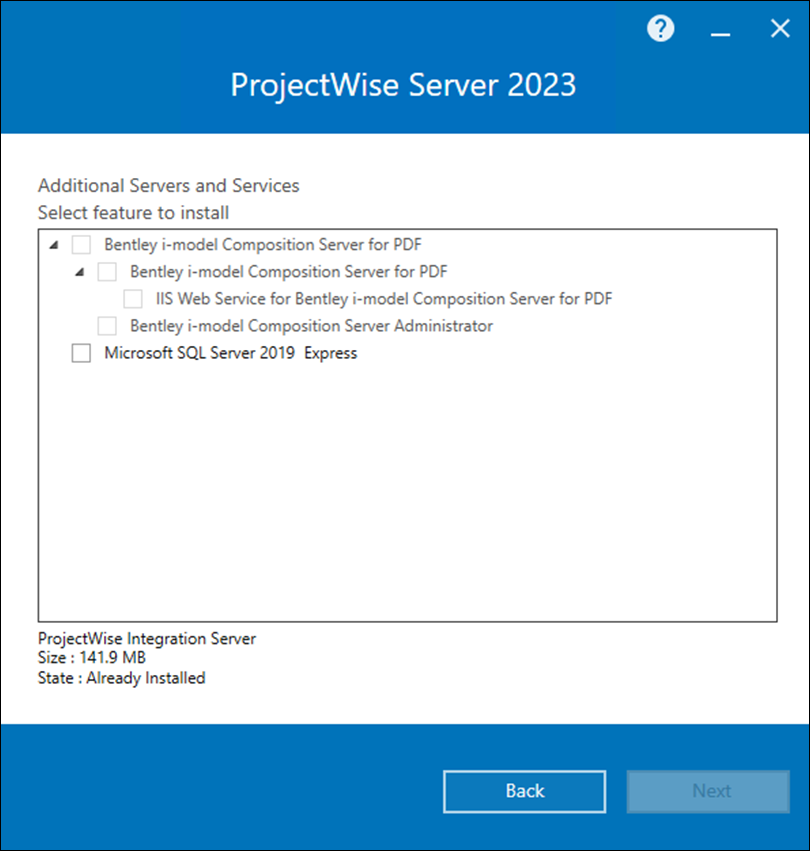
On the
Select feature to install page, turn on
Bentley i-model Composition Server for PDF and
the subfeatures you want and click
Next.
The following items can be installed:
- IIS Web Service for Bentley i-model Composition Server for PDF (required for ProjectWise Explorer jobs)
- Bentley i-model Composition Server Administrator (installs Orchestration Framework Administrator with the Bentley i-model Composition Server for PDF extension; required to configure batch rendition jobs)
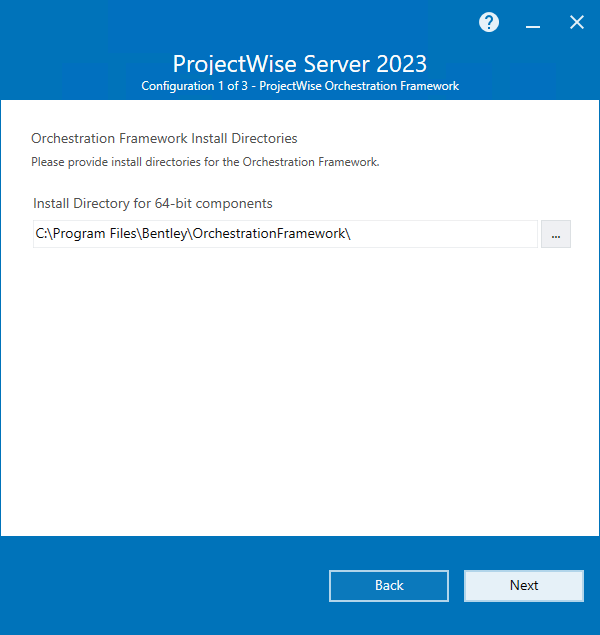
- On the Orchestration Framework Install Directories page, change the default installation locations if needed and click Next.
-
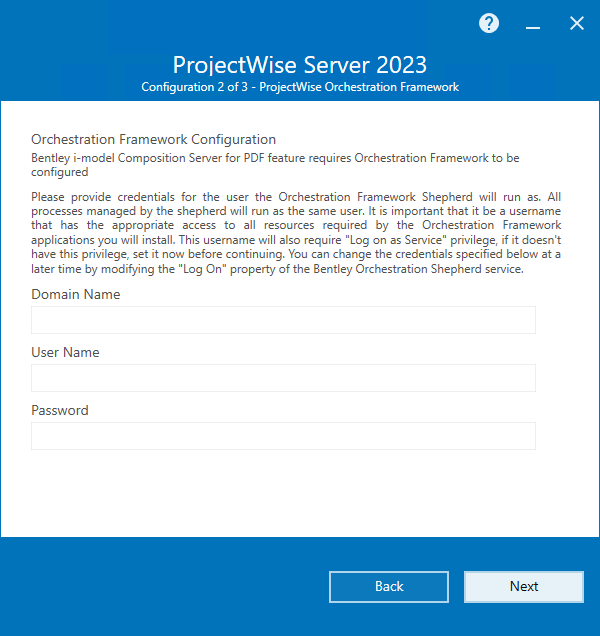
On the
Orchestration Framework Configuration page,
enter the
Domain Name,
User Name, and
Password of the account that
ProjectWise Orchestration Framework Service
will run under, then click
Next.
This should be the same user account you set up in the procedure, Configuration Checklist for Bentley i-model Composition Server for PDF. If the user is a Windows account, enter the name of the domain to which the user belongs in the Domain Name field. If the user is a local account, enter the user’s computer name in the Domain Name field.
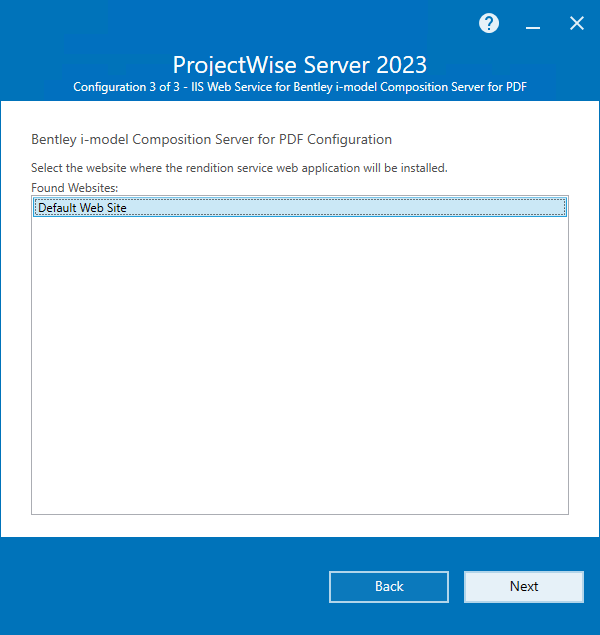
-
On the
Bentley i-model Composition Server for PDF
Configuration page (which opens if you selected to install the
IIS Web Service for Bentley i-model Server for
PDF feature), select the IIS website (for example,
Default Web Site) on this computer that you
want to deploy the service to and click
Next.
If, for testing purposes, you have already deployed another Bentley application to IIS, then make sure you select a different website to deploy this web service to.
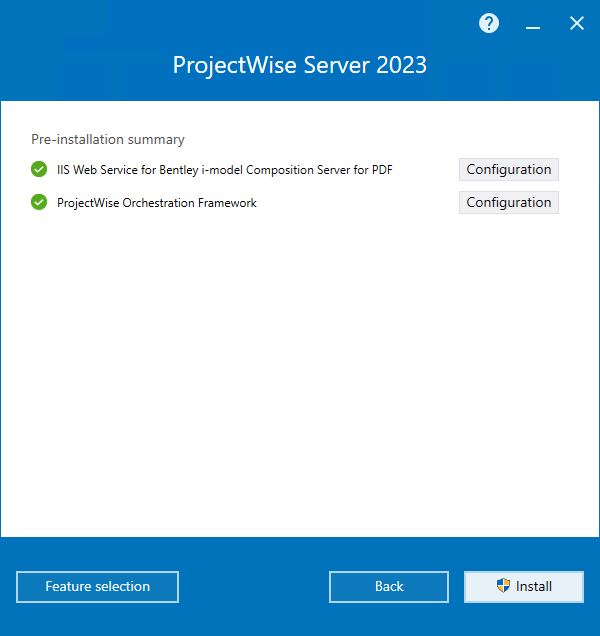
- On the Pre-installation summary page, review your selections, make any last minute changes if necessary, then click Install.
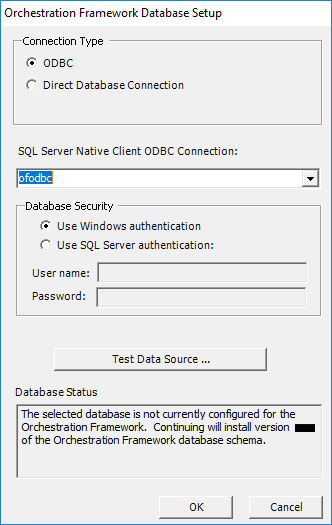
-
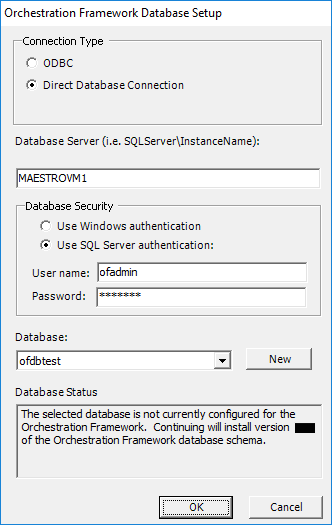
When the
Orchestration Framework Database
Setup dialog opens, select which SQL Server database you want to use
as your
Orchestration Framework database and click
OK.
You can connect to the selected database using either an ODBC data source or a direct database connection. Using an ODBC connection assumes that you have already created an empty database in SQL Server, and that you have already created a 64-bit ODBC data source on this computer that connects to the empty database in SQL Server. If you are going to use a direct database connection, either you can create the empty database in SQL Server before installing this server, or you can use the Orchestration Framework Database Setup dialog to create a new database in SQL Server.
Left: connecting to SQL Server using an ODBC data source; Right: connecting to SQL Server using a direct database connection
To connect using an ODBC data source:
- Set Connection Type to ODBC.
- Select the ODBC data source you created for this purpose from the ODBC Connection list.
-
In the
Database Security section, select the same
authentication method that you configured the selected ODBC data source to use.
If you select Use Windows authentication, you must already be logged in with a Windows account that is able to log in to the database that the ODBC data source points to.
If you select Use SQL Server authentication, enter the User name and Password of the SQL Server account that the ODBC data source is configured to log in to the database with.
-
Click
Test Data Source to make sure the
specified Windows or SQL Server account can connect to the selected ODBC data
source, and ultimately, the SQL Server database.
If the specified account is able to connect, a dialog opens with the message, TEST COMPLETED SUCCESSFULLY!!
Once connected, the Database Status field informs you that the database pointed to by the ODBC data source needs the latest Orchestration Framework database schema.
- Click OK to install the latest Orchestration Framework database schema into the database.
To use a direct database connection:
- Set Connection Type to Direct Database Connection.
-
In the
Database Server field, enter name of the
computer where SQL Server is installed.
This field defaults to the local computer name. If your SQL Server installation has named instances, enter the name of the computer, followed by a backslash, followed by the SQL Server instance name you want to connect to. For example: computername\SQLServerinstancename
-
In the
Database Security section, select the
authentication method and account that you want to use to connect to the
database.
The account you specify here must be the same account you specified on the Orchestration Framework Configuration page of this server installer.
If you select Use Windows authentication, you must already be logged in with a Windows account that is able to log in to the specified SQL Server instance.
If you select Use SQL Server authentication, enter the User name and Password of a SQL Server account that is able to log in to the specified SQL Server instance.
Tip: To quickly verify that the specified account can connect to SQL Server, try to select the Database list. If connection is successful, the list will be populated with databases. If connection is not successful, you will get an error and the list will be empty. If that is the case, one of the following may be true:- The service for the specified SQL Server instance may not be running. Make sure that it is running, then try again.
- The SQL Server computer name specified, or instance name, or both, may be incorrect. Make sure you typed the names correctly, then try again.
- The account you are trying to use does not exist in SQL Server. Make sure this account (whether local or Windows) exists in SQL Server with appropriate database permissions, then try again.
-
Once you have established a connection to SQL Server, the next
step is to either create a new database in it, or select an existing empty
database:
Click the New button next to the Database list, then in the Create Database dialog, enter a name for the database and click OK. The database is added to SQL Server and selected in the Database list.
or
If you already have an empty database in SQL Server, select that database from the Database list.
The Database Status field informs you that the selected database needs the latest Orchestration Framework database schema.
- Click OK to install the Orchestration Framework database schema into the selected database.
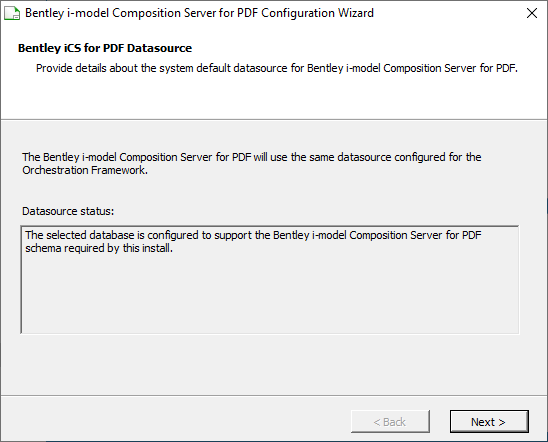
-
When the
Bentley i-model Composition Server for PDF
Configuration Wizard opens, click
Next.
(The Configuration Wizard automatically finds the Orchestration Framework database you selected in the previous step.)
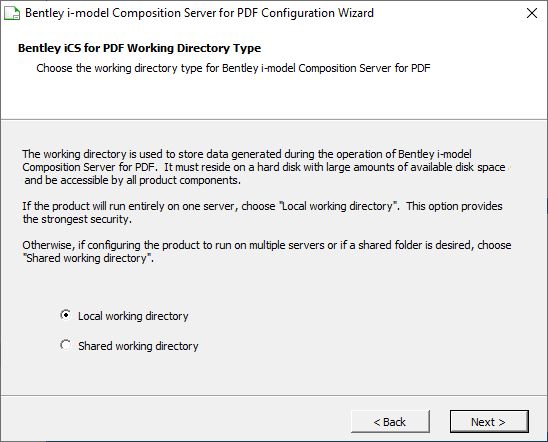
-
On the
Working Directory Type page opens, select
whether you want to use a shared or non-shared folder for the working directory
for
Bentley i-model Composition Server for PDF
jobs and click
Next.
- Local
working directory - Select this option if you want to use a local,
non-shared folder for the working directory.
This option requires that Bentley i-model Composition Server for PDF and Bentley i-model Composition Server Administrator are both be installed on the same computer.
- Shared
working directory - Select this option if you want to use a shared
folder for the working directory located on this or another computer in the
network.
Use this option if you need to install Bentley i-model Composition Server for PDF on multiple computers, or if you need to install Bentley i-model Composition Server for PDF and Bentley i-model Composition Server Administrator on separate computers.
- Local
working directory - Select this option if you want to use a local,
non-shared folder for the working directory.
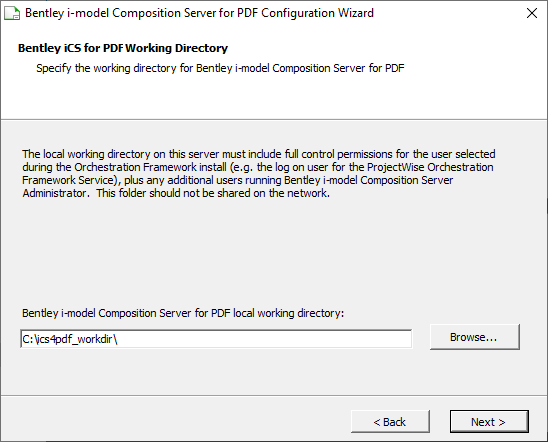
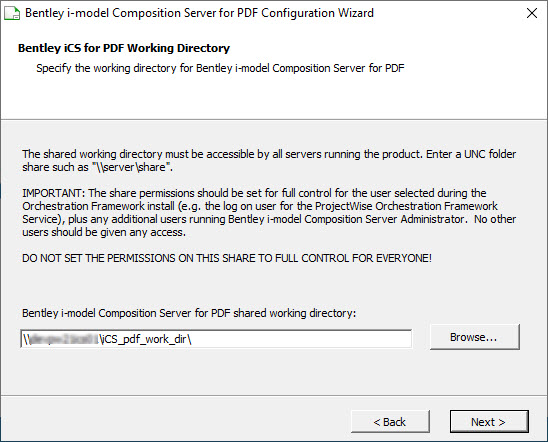
-
On the
Working Directory
page, specify the location of the working directory and
click
Next.
(If you have not yet created and shared the folder you want to use for the working directory, do so now before continuing.)
You can either type the location of the working directory in the field provided, or click the Browse button to locate and select the working directory folder. When typing the path to a local, non-shared folder, use the local file system path (C:\ics_localworkdir).
When typing the path to a shared folder, use the UNC path (\\computername\ics_sharedworkdir).
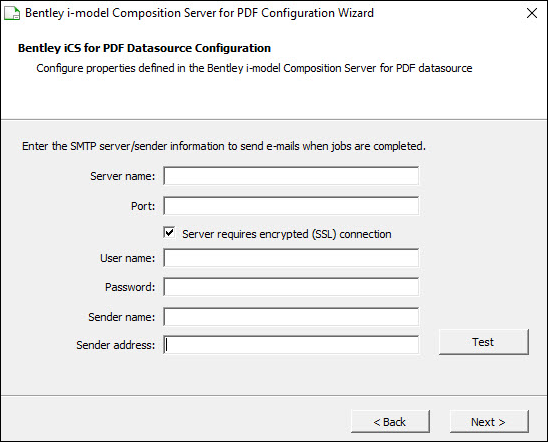
- On the Email Server page, specify information about the email server that will be used to send automatic email notifications when rendition jobs are complete, and click Next.
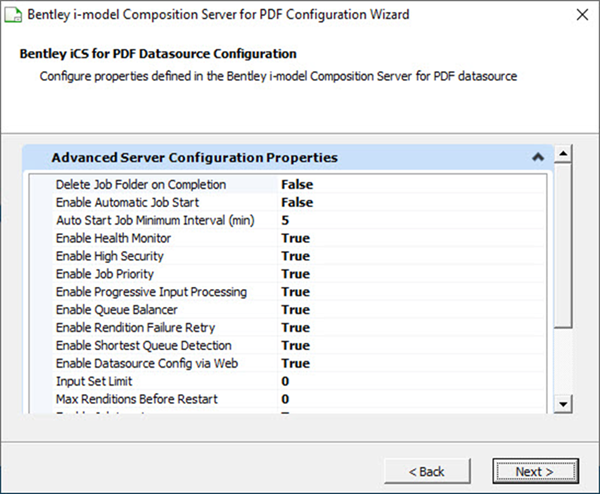
- On the Advanced Configuration Properties page, review the default settings, change any settings as needed, and click Next.
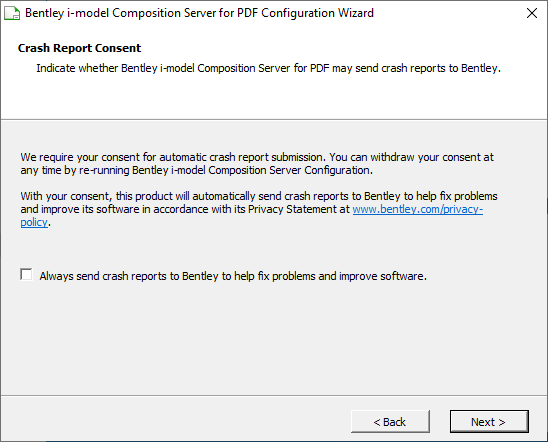
- On the Crash Report Consent page, select whether or not you want crash reports to be automatically sent to Bentley, then click Next.
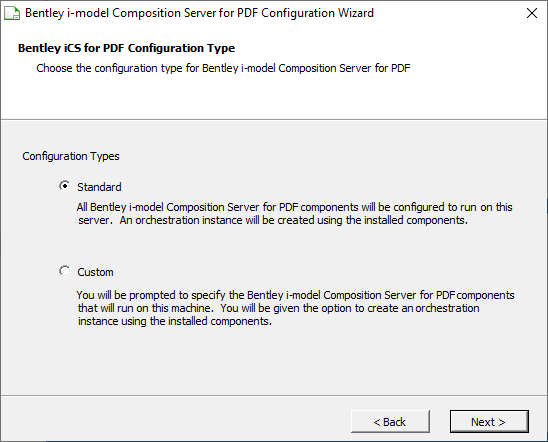
- On the Configuration Type page, select Standard and click Next.
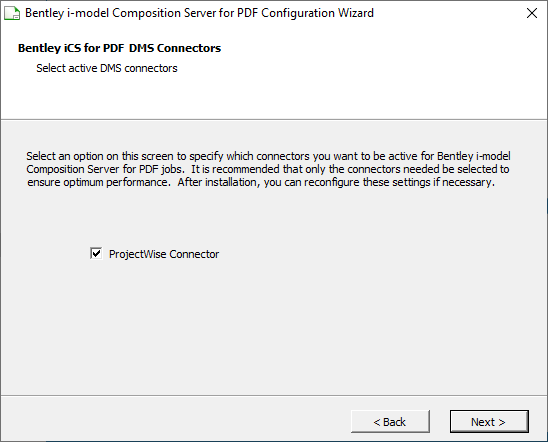
-
On the
DMS Connectors page, select the
ProjectWise Connector and click
Next.
As delivered, Bentley i-model Composition Server for PDF only delivers one connector — the ProjectWise Connector. This connector is selected by default, and is required to store the newly created rendition documents in the same or other datasource.
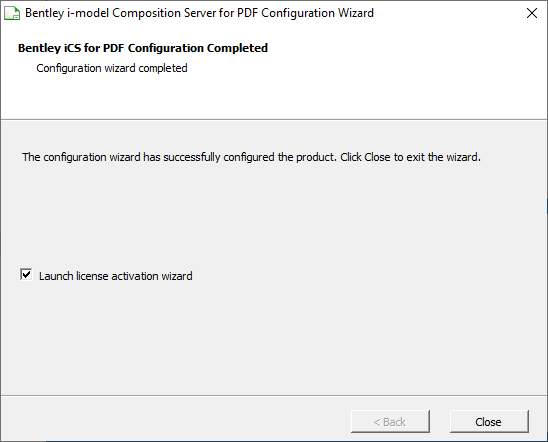
- When the Configuration Completed page opens, click Close.
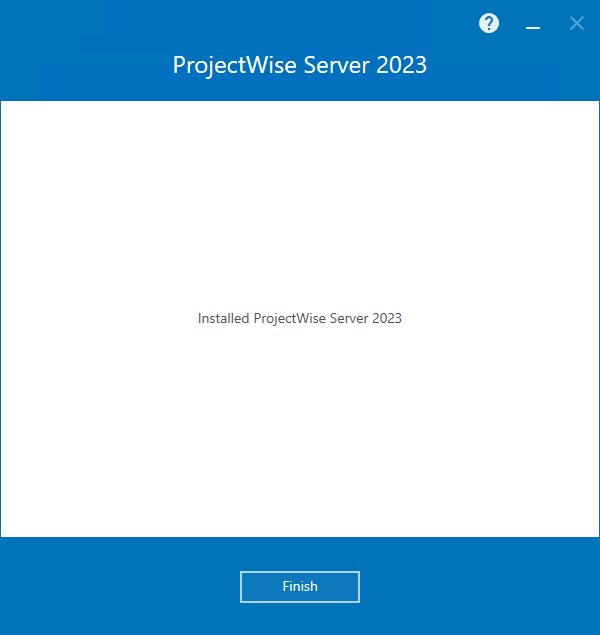
- Click Finish on the ProjectWise Server installer.
- When the Bentley Login Client dialog opens, sign in using your Bentley IMS account.
-
After you have signed in, select
Register Server in the
Bentley Activation Wizard, and and then
click
Next.
The wizard advances to Step 2.
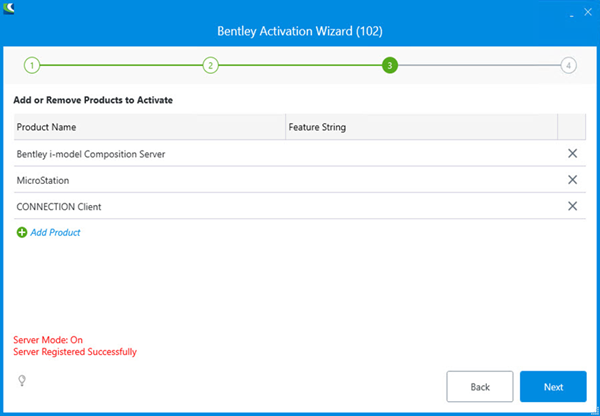
- Select the Country where the server is located, and then click Next. The wizard advances to Step 3. Bentley i-model Composition Server, CONNECTION Client, and any desktop products such as MicroStation, should appear in the product name list. For example,
- Click Next. The wizard advances to Step 4.
- Click OK to close the Bentley Activation Wizard.