To Create a ProjectWise Datasource
-
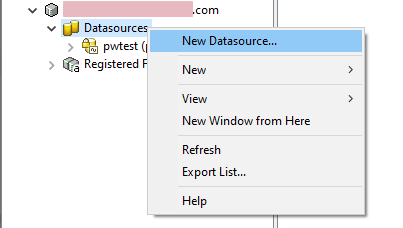
In
ProjectWise Administrator, right-click the
Datasources node under your server and select
New Datasource.
If you do not see your server listed, make sure it is added to the network and that the service is running (see Adding Servers to the Network Configuration Settings Dialog).
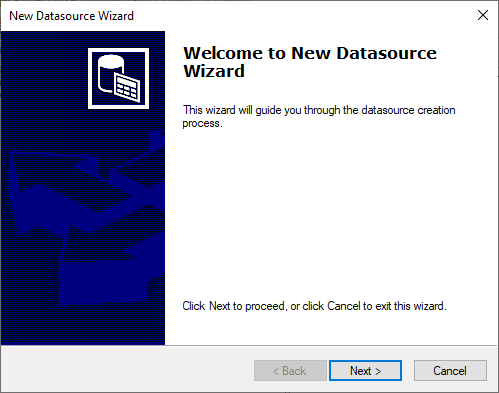
- When the New Datasource Wizard opens, click Next.
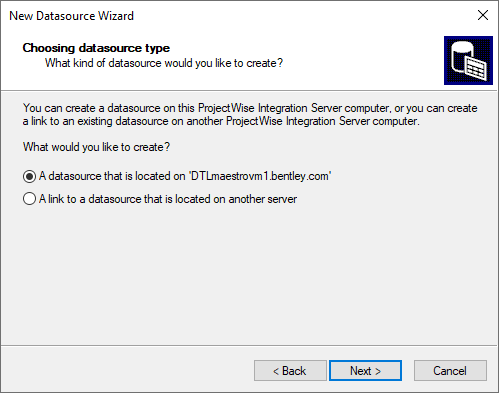
- On the Choosing datasource type page, select the default option, A datasource that is located on <servername>, then click Next.
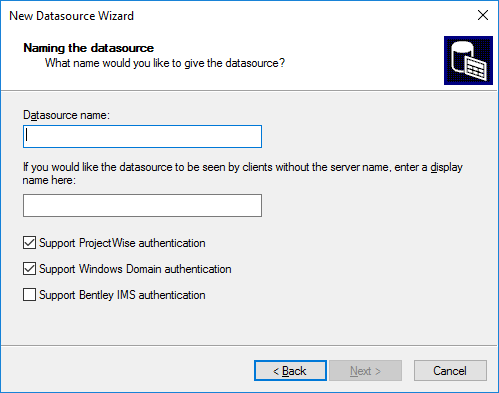
-
On the
Naming the datasource page, set the name for
the datasource and select the authentication types that this datasource will
support.
- In the Datasource name field, enter a name for your datasource (this is the internal name for your datasource).
- (Optional)
In the
Display name field (below the Datasource
name field), enter a display name for the datasource (this is the external name
for your datasource).
You can leave the external display name blank. You can also make the external display name the same as the internal datasource name.
Entering an external display name lets you use a name that is more recognizable (or easier to remember) for your users.
If you do not enter an external display name, the datasource will appear to users as <servername>:<internaldatasourcename>, for example, maestrovm.bentley.com:pwtest.
- (Optional) Turn on the types of authentication you want this datasource to allow and support:
- When finished, click Next.
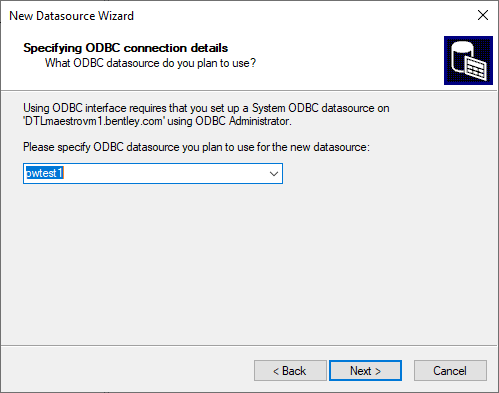
- On the Specifying ODBC connection details page, select the ODBC datasource that you have configured to connect to your ProjectWise database instance, then click Next.
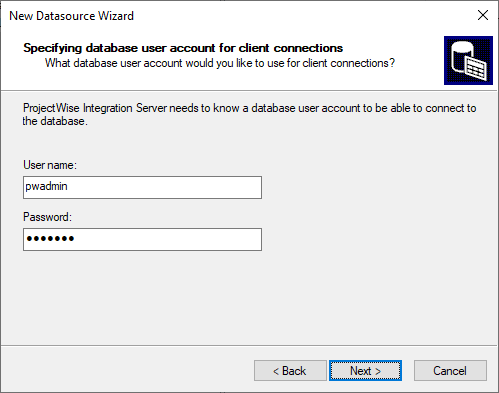
- On the Specifying database user account for client connections page, enter the user name and password that matches the user name and password of an existing account in your database instance, then click Next.
-
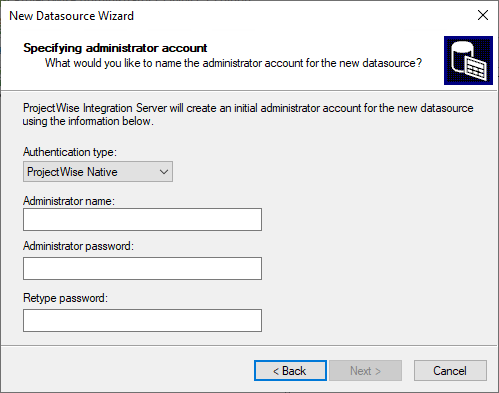
On the
Specifying administrator account page, create
the initial
ProjectWise administrator account for this
datasource.
-
Select an
Authentication type to determine which
type of authentication the new administrator account will use by default.
The admin account can use ProjectWise Native authentication, Windows Domain authentication, or Bentley IMS authentication. While you can only set one authentication type here, you can assign additional authentication types to the admin account in ProjectWise Administrator after the datasource is created.
Note: To be able to select ProjectWise Native or Windows Domain or Bentley IMS here, support for the corresponding authentication type must first be turned on, on the Naming the datasource page of this wizard (step 4). -
Specify the credentials for the new administrator account.
If you select ProjectWise Native as the authentication type, then you will create the account by entering a new user name and password here (and re-entering the password to confirm). Make a note of these credentials as you will need them later to log in to this datasource in ProjectWise Administrator.
If you select Windows Domain as the authentication type, you can either the enter user credentials of a specific Windows account that will be used to create the admin account in ProjectWise (or click the Browse button to find the user you want to use), or you can turn on the SSO option so the credentials of the current Windows user will be used to create the admin account in ProjectWise.
If you select Bentley IMS as the authentication type, credentials of the current Bentley IMS user (the user who is currently signed in to the CONNECTION Client on this computer) will be used to create the admin account in ProjectWise.
- When finished, click Next.
-
Select an
Authentication type to determine which
type of authentication the new administrator account will use by default.
-
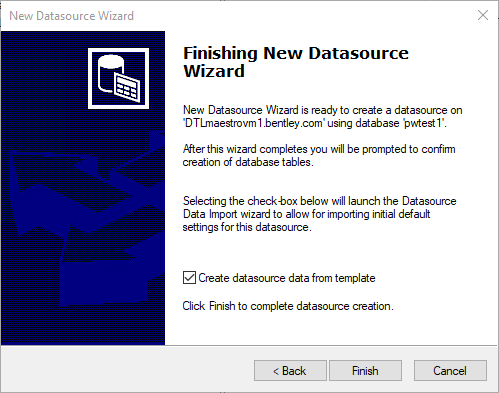
On the
Finishing New Datasource Wizard page, turn on
Create datasource data from template if you
want to import datasource settings from a template, and click
Finish.
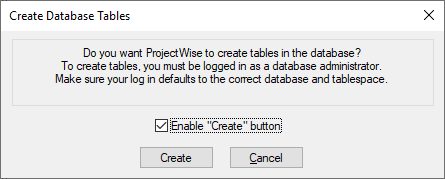
The Create Database Tables dialog opens.
-
Turn on
Enable "Create" button and then click
Create.
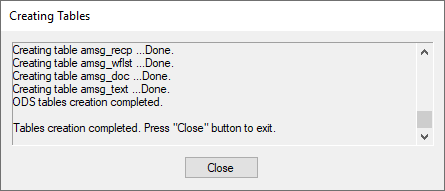
The Creating Tables dialog opens, displaying the progress of the creation of the ProjectWise tables.
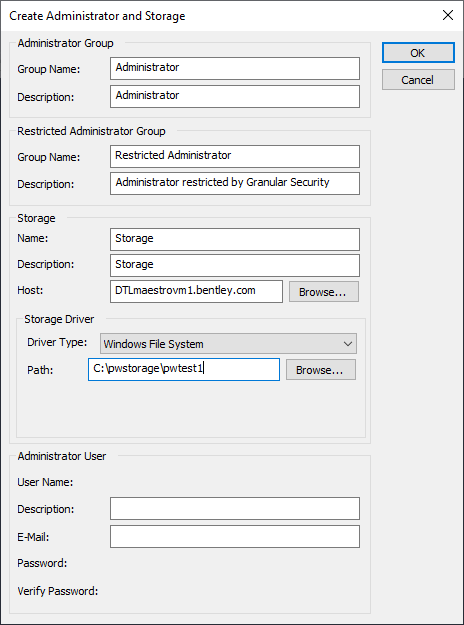
Soon after the Creating Tables dialog opens, the Create Administrator and Storage dialog opens to create administrator group accounts, establish a storage area, and verify administrator account password.
-
On the
Create Administrator and Storage
dialog, do the following:
- (Optional)
In the
Administrator Group section, change the
name and description of the default Administrator group if needed.
By default, the name is set to "Administrator". You can leave it as is for now, and rename it later if necessary in ProjectWise Administrator, after the datasource is created. After datasource creation, any user you add to this group will be able to log in to the datasource in ProjectWise Administrator and will have full control over all areas of the datasource.
- (Optional)
In the
Restricted Administrator Group section,
change the name and description of the default Restricted Administrator group
if needed.
By default, the name is set to "Restricted Administrator". You can leave it as is for now, and rename it later if necessary in ProjectWise Administrator, after the datasource is created. After datasource creation, any user you add to this group will be able to log in to the datasource in ProjectWise Administrator, but will only have access to the areas of the datasource to which they are explicitly assigned access.
-
In the
Storage section, select which type of file
driver this storage server should use and set the location for the storage
area.
- Driver Type - Select Windows File System.
- Path - In the Path field, enter the location where you want the storage area folder for this datasource to be created. For example, C:\pwstorage\pwtest. The folder you specify cannot already exist - clicking OK in this dialog will create it for you. Only use the Browse button to help you find the root storage folder you want to use, if one exists, for example, C:\pwstorage.
- The storage area Name, Description, and Host computer fields are already filled in by default. You can accept the defaults or change them as necessary. The computer name listed in the Host field defaults to the computer on which you are working (that is, the ProjectWise Administrator computer). If you change the host, remember that either a ProjectWise Integration Server or a ProjectWise Caching Server must be installed on that computer in order to create the storage area on that computer.
- In the Administrative User section, if the new ProjectWise administrator account (created in step 7) uses ProjectWise Native authentication, then enter the new password in the Verify Password field.
-
Click
OK.
At this point, the Creating Tables dialog resumes showing progress of the ProjectWise tables being created in the database.
- (Optional)
In the
Administrator Group section, change the
name and description of the default Administrator group if needed.
- When the dialog informs you that the tables have been created, click Close.
-
If you turned off
Create datasource data from template on the
last page of the New Datasource Wizard, then at this point, datasource creation
is complete and you are logged in to the datasource. You can now manually
configure each node in your datasource as required.
or
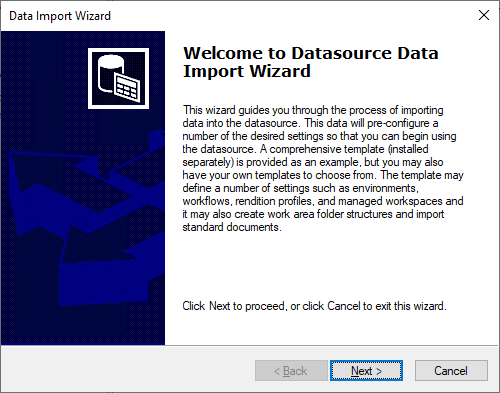
If you turned on Create datasource data from template on the last page of the New Datasource Wizard, then at this point the Data Import Wizard opens; click Next.
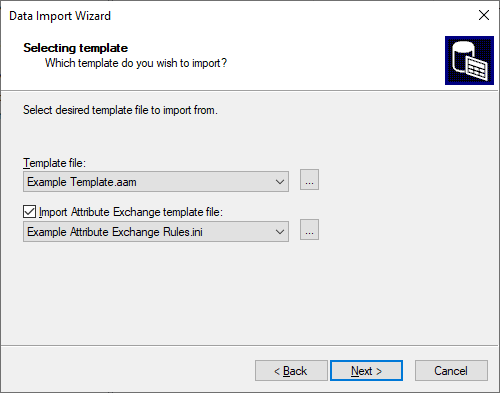
The Selecting template page opens for you to select which data template file you want to import, and optionally, which attribute exchange template you want to import.
If you have installed the delivered example dataset, the wizard automatically loads the Example Template.aam file and supporting Example Attribute Exchange Rules.ini file.
You can import these files to set up an example datasource for testing, or you can import your own data from a previously exported datasource. The Example Template.aam file is in the same format used by the ProjectWise Export and Import Wizards. The Data Import Wizard accepts .AAM files exported from ProjectWise versions 2.x, 3.x, 8.x, and 10.x
-
On the
Selecting template page:
- Either leave the default template selected, or click the Browse button (...) to select another template.
- (Optional) Either leave the default Attribute Exchange template selected, or click the Browse button (...) to select another template. You can also turn off Import Attribute Exchange template file altogether if you do not want to import any Attribute Exchange template.
- When finished, click Next.
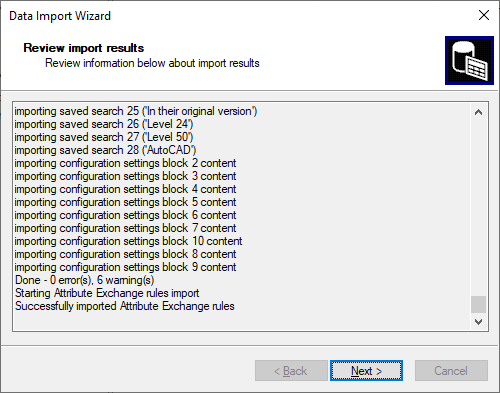
The results of the import are displayed on the Review import results page.
- Review the import results and click Next.
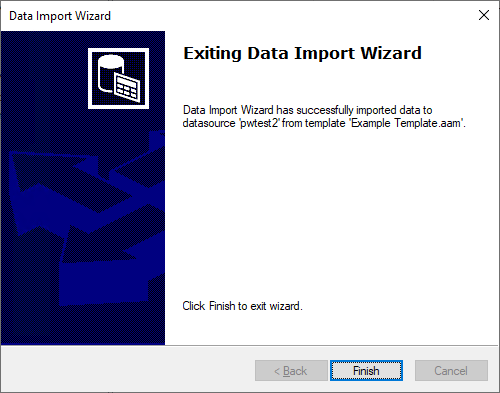
- Click Finish.