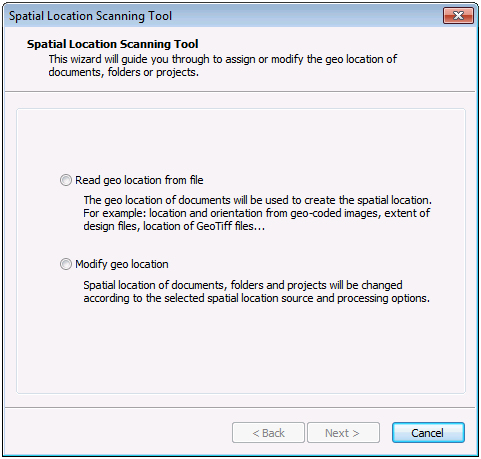
To Create a Spatial Location from a Document's Geo Location
-
Before you begin, make sure the LL84 coordinate system is added under the Coordinate Systems node in ProjectWise Administrator.
This step is required to enable the Read geo location from file option in the Spatial Location Scanning Tool.
-
Select Tools > Scan Spatial Location.
The Spatial Location Scanning Tool opens.
-
Select Read geo location from file and click Next.
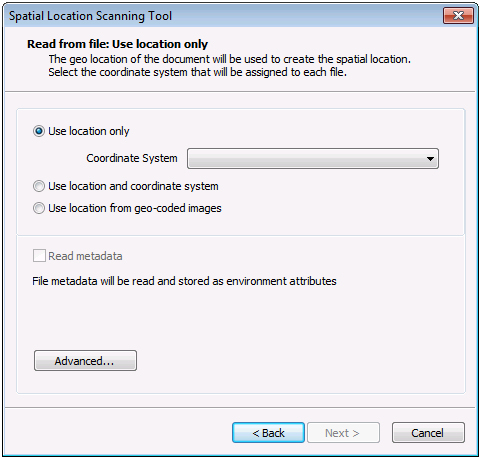
The Read from file page opens with the first option selected, Use location only.
-
Do one of the following:
Select Use location only, then select a coordinate system from the list. With this option, the geo location of the document will be used to create the spatial location, and the selected coordinate system will be assigned to each file. The minimum bounding rectangle of the scanned file, along with the selected coordinate system will be use to create the scanned file's spatial location in the datasource. To create a spatial location for the document, the bounding rectangle must be successfully extracted and it must have a valid extent.
or
Select Use location and coordinate system. With this option, the geo location and the coordinate system of the document will be used to create the spatial location. The tool extracts both the minimum bounding rectangle and the coordinate system from the scanned file. To create a spatial location for the scanned file, both the bounding rectangle and the coordinate system must be successfully extracted and the bounding rectangle must also have a valid extent.
or
Select Use location from geo-coded images. With this option, the geo information of scanned images will be used to create the spatial location. The tool will read the tags of the scanned file and use them to create the scanned file's spatial location in the datasource. To create a spatial location for the image, the required tags must exist.
- (Optional) Turn on Read metadata option if you want the metadata information contained in raster tags to be read and saved as ProjectWise environment attributes.
- (Optional)
Click Advanced to set scanning options as needed.
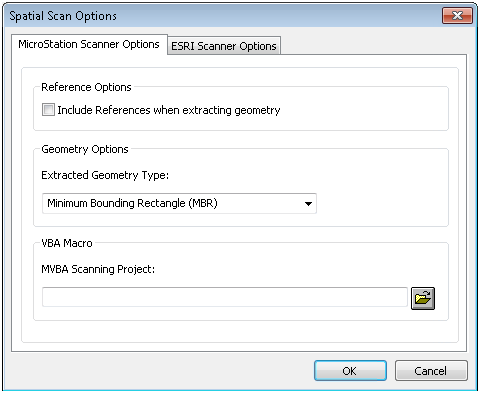
The Spatial Scan Options dialog opens with options pertaining to the Use location option selected in step 3.
If Use location only or Use location and coordinate systems is selected, the Spatial Scan Options dialog opens with MicroStation and ESRI scanner options.
MicroStation Scanner Options tab:
- Include References when extracting geometry
- Extracted Geometry Type - Set the type to Minimum Bounding Rectangle (MBR), Convex Hull, or Oriented Rectangle
- MVBA Scanning Project
ESRI Scanner Options tab:
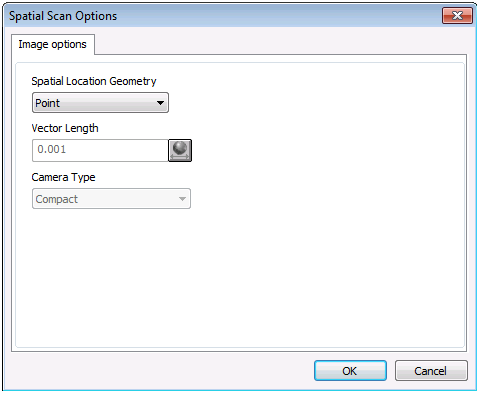
If Use location from geo-coded images is selected, the Spatial Scan Options dialog opens with Image options (click here for details).
-
When finished setting scanning options, click Next.
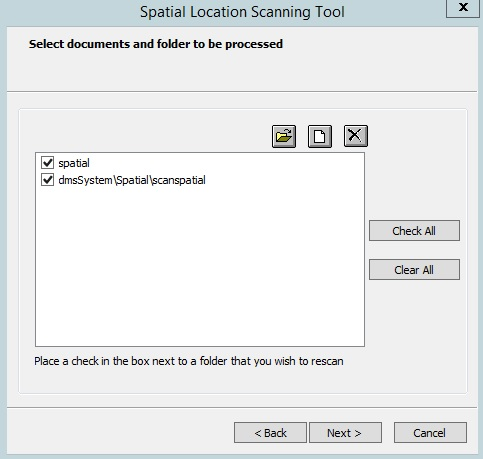
The Select documents and folders to be processed page opens.
-
Select the folders and/or individual files to be scanned for spatial information, then click Next.
Apply to documents: If on, documents will be considered during the scan process.
Apply to folders: If on, folders and subfolders will be considered during the scan process.
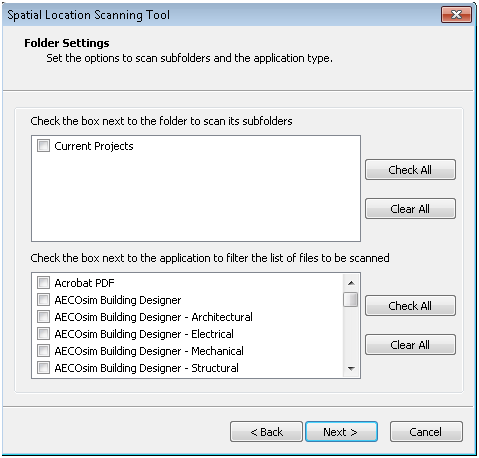
If one or more folders were selected on the previous page, the Folder Settings page opens next.
-
Specify the subfolders you want to scan and click Next.
You can also specify what file types within the selected folders will be scanned by using application filters.
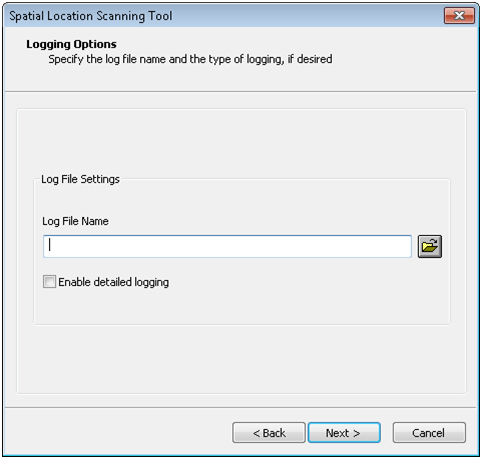
The Logging Options page opens.
- (Optional) Enter the name of a logging file to output the scanning results to, then click Next.
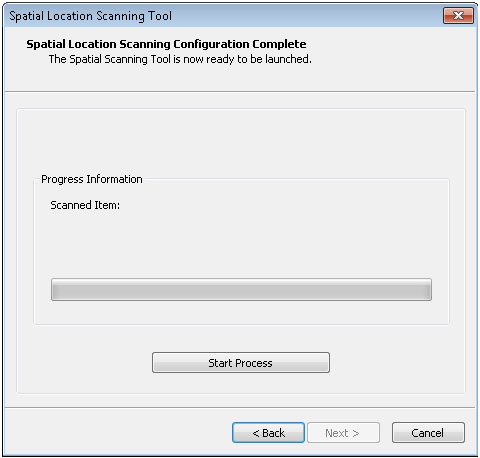
- When the final page of the wizard opens, click Start Process.
- When the scan is done, click OK and close the wizard.