Changing View Details (property columns)
The details (or property columns) that you see in the document list when you select a folder or work area (and is on) are determined by the view that is applied.
Views can also be used to control the properties that display in various document selection dialogs, as well as the properties that display in the preview pane when a document is selected in the document list. For searches (saved or not), views can be used to control the properties that display in the search results list.
Global views are created by the administrator from either ProjectWise Administrator or ProjectWise Explorer, and are available to all users in the datasource. Personal views are created by users in ProjectWise Explorer, and are only available to the user who created them. Views are stored in the ProjectWise database, so that a user's personal views are always available to them, even if they log in to their datasource in ProjectWise Explorer from another computer. Views are not available across datasources; they are only available in the datasource in which they were created.
You can set up a view to display as many properties as you need from any of the following categories:
- Basic Columns - Includes general document properties.
- Folder Columns - Includes general folder properties of the folder or work area.
- <environment name> - Includes the custom attributes from the selected environment.
- File Properties Columns - Includes all general file properties in the datasource, if file property extractions have been enabled and run in the datasource.
- Work Area Properties Columns - Includes all of the custom work area properties from all of the work area types in the datasource.
Once a view exists in a datasource, you can assign it to any folder or work area in the datasource either using the View tab of a folder's or work area's Properties dialog, or from the View Properties dialog. On the View tab of the Properties dialog you can also set the view to be used on the Document Properties tab of the preview pane when documents at the root of that folder or work area are selected.
The View toolbar () will display the default view that is assigned to the selected folder or work area, and can be used to temporarily switch the view for that folder or work area. The View toolbar will display all of the global and personal views available to you. Any personal views you have will be labelled (Personal) in the View toolbar. The View menu on the Document Properties tab also displays the default view that is assigned to the selected folder or work area, and can also be used to temporarily switch the view for that folder or work area, but is not otherwise tied to the View toolbar; changing the view from one does not affect the view currently selected in the other.
It is possible your administrator has already set one of the existing global views as the default active view for the datasource. This means that when you log in to this datasource in ProjectWise Explorer, this view automatically displays in the View toolbar, and is applied to all folders that do not otherwise have other global or personal views assigned to them. If a folder has a different view assigned to it, that view displays in the View toolbar (instead of the default active view) when the folder is selected. Again, you can temporarily override any folder's view using the View toolbar.
If you are an administrator, you can set the default view for a particular folder, for all users. You can also set the default view for the Document Properties tab of the preview pane, which displays when users select documents in this folder.
As a user, you can either leave the default view assignments for a folder as is, or you can override them by assigning different views for this folder. What you set here only affects the user you are logged in as and does not change the default view of the folder for other users.
You can set a default view to be used for all folders and work areas in the datasource. When a default view is set, anywhere a view is not defined, then the default view is used.
You can also use the View toolbar to temporarily override a folder's or work area's assigned view.
To Create a View
-
Select .
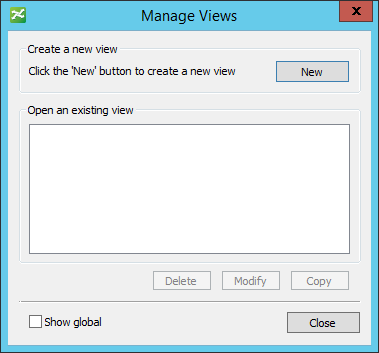
The Managed Views dialog opens.
-
Click New.
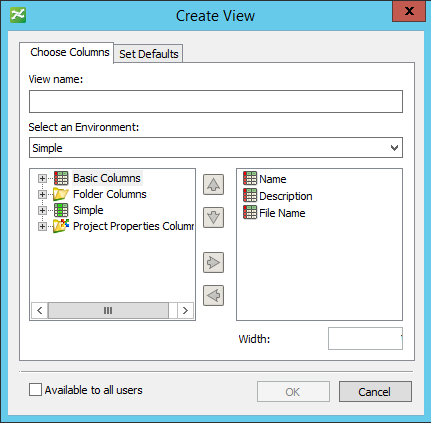
The Create View dialog opens.
- Enter a name for the view.
- Required:
Select an environment to associate to this view, or select <none> if you do not want to associate any environment.
Associating an environment to the view enables you to add attributes from that environment to the view.
- In the Available Columns list, double-click a category to expand it and show the property columns that exist for that category:
-
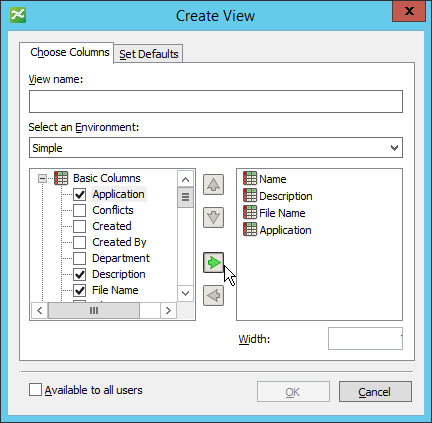
To add a property column to the view, double-click the property in the Available columns list on the left, or select the property in the list and click the right-arrow button in the center of the dialog.
This adds the property to the Selected columns list on the right, which adds it to the view. Once a property is added to the view, a check mark displays next to that item in the Available columns list.
- (Optional) To remove a property column from the view, double-click the property in the Selected columns list, or select the property in the list and click the left-arrow button.
- (Optional) To change the default order for columns in the view, select a property in the Selected columns list and click either the up or down arrow button to move the item up or down in the display order.
- (Optional) Each column comes with its own default width. To change the width as it will be used in this view, select the property in the Selected columns list, then in the Width field change the value as necessary.
- (Optional)
If you want this to be a global view which other users can use, turn on Available to all users.
This adds the view to the list of global views in the datasource in ProjectWise Administrator. (This option is only enabled if you are an administrator.)
-
Click
OK.
To Make a Copy of an Existing View
-
Select .
The Manage Views dialog opens.
By default, only personal views are displayed in the list.
- (Optional) To also display global views in the list, turn on Show global.
-
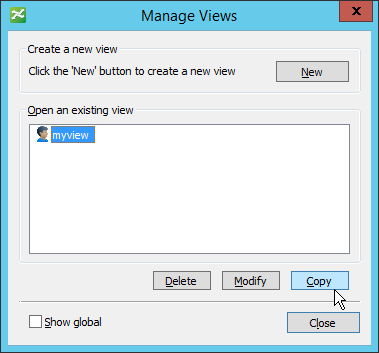
In the Open an existing view list, select a view and click Copy.
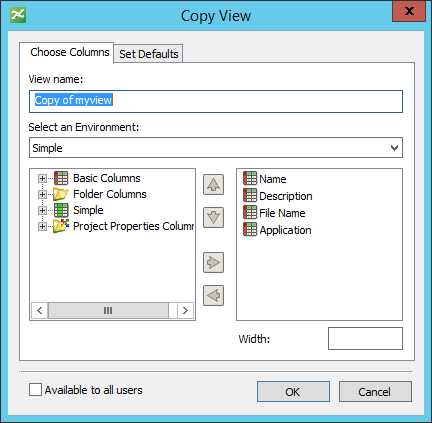
The Copy View dialog opens, containing a copy of the selected view.
- In the View name field, enter a name for the new view.
- Edit the columns as needed.
-
Click
OK.
To Set Default Assignments for a View
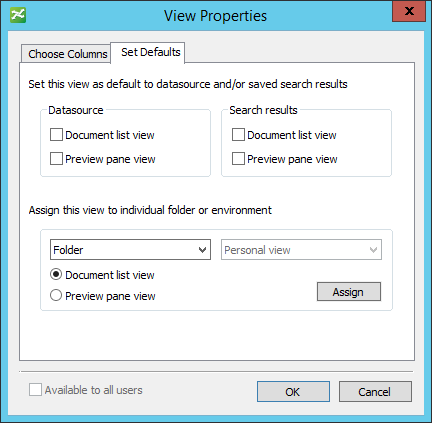
- Open the Set Defaults tab of the Create View dialog (when creating a view) or the View Properties dialog (when editing a view).
- (Optional) In the Datasource section, turn on Document list view to set this as the default view for the document list when a folder is selected.
- (Optional) In the Datasource section, turn on Preview pane view to set this as the default view for the Document Properties tab of the preview pane when a document is selected from a folder.
- (Optional) In the Search results section, turn on Document list view to set this as the default view for the search results list after a document search is run.
- (Optional) In the Search results section, turn on Preview pane view to set this as the default view for the Document Properties tab of the preview pane when a document is selected from the search results list.
- (Optional) To assign this view as the default view for one or more folders, click Assign. In the dialog that opens, set the check box next to every folder you want to assign this view to, then click OK. You can open this dialog as necessary to change the folder assignments for this view.
(admins) To Set the Default Views for the Document List and Preview Pane of a Folder or Work Area
-
Select a folder or
work area.
- Select .
- On the Properties dialog, select the View tab.
- In the Document list view section, select a view from the Global view assigned to this folder list.
-
In the
Preview pane view section, select a view from
the Global view assigned to this folder list.
Assuming the user has not overridden these defaults, the assigned view's columns display in the document list when the user selects this folder, and the name of the folder's assigned view displays in the View toolbar. When a user selects a document in this folder, the properties of the view assigned to the preview pane display in the Document Properties tab of the preview pane, and the name of the assigned view displays in the View menu on this Document Properties tab.
(users) To Set Your Own Default Views for the Document List and Preview Pane of a Folder or Work Area
-
Select a folder or
work area.
- Select .
- On the Folder Properties or Work Area Properties dialog, select the View tab.
- In the Document list view section, select a view from the Personal view assigned to this folder list.
-
In the
Preview pane view section, select a view from
the
Personal view assigned to this folder list.
Whenever you select this folder or work area now, only the views you specified in the above sections will apply to this folder or work area, instead of any default views set by your administrator.
To Temporarily Override the View for a Folder or Work Area
-
Select a folder or
work area that has a view assigned to it.
The view currently assigned to the folder or work area displays in the View toolbar.
-
In the
View toolbar, select another view.
The selected folder or work area now displays columns based on the view selected in the View toolbar rather than its assigned view. The view remains active for the selected folder or work area until you select another item in the datasource. The next time you select this folder or work area, the assigned view is restored.
To Modify a View
-
Select .
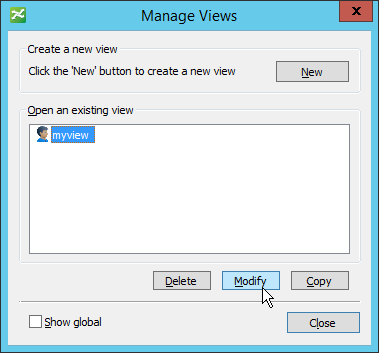
The Manage Views dialog opens.
By default, only personal views are displayed in the list. If you are an administrator, you can modify global views and any personal views you may have created for yourself. If you are not an administrator, you can only modify those views which you have created.
- (Optional) To also display global views in the list, turn on Show global.
-
In the Open an existing view list, select a view and click Modify.
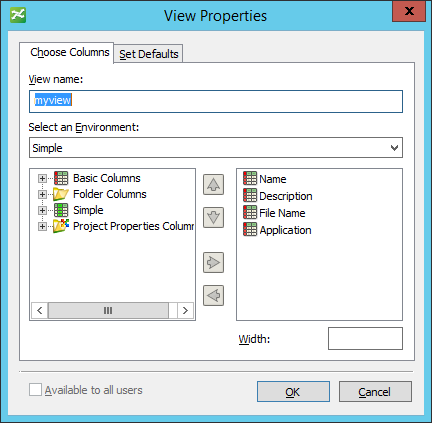
The View Properties dialog opens.
- Modify the view as needed (rename the view, add/remove columns, change column order and widths, change view assignments).
-
Click
OK.
To Delete a View
-
Select .
The Manage Views dialog opens.
By default, only personal views are displayed in the list. If you are an administrator, you can delete global views and any personal views you may have created for yourself. If you are not an administrator, you can only delete those views which you have created.
- (Optional) To also display global views in the list, turn on Show global.
- In the Open an existing view list, select a view and click Delete.
-
When prompted,
click
Yes to confirm.