Configuring Attribute Mapping
Attribute mapping is the linking of selected source attributes to selected destination attributes, for the purpose of copying attribute values from one document to another when documents are published to or opened from ProjectWise. Attribute mappings are stored in attribute mapping definitions inside the advanced integration project.
There are two types of attribute mapping definitions you can create:
- environment mapping (Revit-to-ProjectWise) - This is the mapping of Revit document properties (source attributes) to ProjectWise environment attributes (destination attributes). Create this type of attribute mapping definition if you are publishing or eTransmitting documents to ProjectWise and you want certain Revit document properties values to be carried over to the corresponding environment attributes on the new documents that get created as a result of the publishing or eTransmitting.
- project mapping (ProjectWise-to-Revit) - This is the mapping of custom work area attributes and/or ProjectWise project properties (source attributes) to Revit document properties (destination attributes). Create this type of attribute mapping definition if you are opening or eTransmitting (or detaching from central) Revit documents (stored in ProjectWise) from a particular work in progress folder and you want certain Revit document properties within the Revit document to be populated with the values from the corresponding custom work area attributes (based on assigned work area type) and/or ProjectWise project properties.
Create an Environment Mapping and Assign It to a Location
To use environment mapping, first you create an attribute mapping definition that maps the selected source and destination attributes, and then you assign the attribute mapping definition to a new or existing publish location, family publish location, or eTransmit location. When you use that location to publish or eTransmit, the selected source attribute values will be copied over to the mapped attributes on the new document(s) that get created in ProjectWise as a result of the publishing or eTransmitting.
To use a simple example, suppose that you want to publish a sheet in the current Revit model to a DWG document in ProjectWise, and you need the new DWG document in ProjectWise to have the same Drawn By attribute value as the original Revit sheet from which the DWG was created. To accomplish this, first you create an attribute mapping definition in the project that maps the source Drawn By property in Revit to the destination Drawn By attribute in ProjectWise, then you assign that attribute mapping definition to the publish location you will use to publish the Revit sheet to DWG. When you finally publish the sheet, the value of the source Drawn By property (for example, John.Smith) will be copied to the destination Drawn By attribute on the published DWG document.
Different operations require different attribute mappings, therefore you will need to create different attribute mapping definitions for each of the following location types:
In other words, the attribute mapping definition you create for one type of location should not be assigned to any other type of location. Also, you might need to create more than one attribute mapping definition for a particular location type (for example, if you have two publish locations, and each publishes to a different ProjectWise folder, and the destination folders have different environments assigned).
- Open the Revit project or
family that contains the source attributes you want to map:
- If this environment mapping is to be assigned to a publish location or an eTransmit location, open a Revit project.
- If this environment mapping is to be assigned to a family publish location, open a Revit family.
This determines which source attributes will be available in the environment mapping form.
- Open your project in the ProjectWise browser.
- Right-click
Environment Mappings and click
Create.
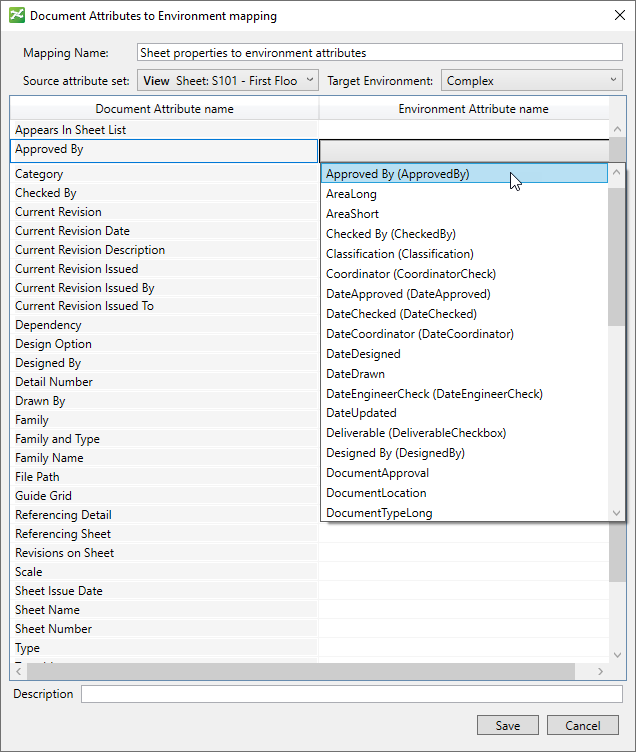
The Document Attributes to Environment mapping dialog opens.
- In the Mapping Name field, enter a name for the attribute mapping definition.
- From the
Source attribute set list, select the object
in the current Revit project or family that contains the source attributes you
want to map.
The object you select depends on whether the current document is a Revit project or family, and which type of location it will be assigned to:
If the current document is: and you plan to assign this attribute mapping definition to: then select: a Revit project a publish location a view or sheet from the list a Revit project an eTransmit location the model from the list a Revit family a family publish location the family from the list The properties of the selected object are listed in the Document Attribute name column (these are the source attributes).
- From the
Target Environment list, select the
ProjectWise environment containing the
attributes you want to map to (these are the destination attributes).
The Target Environment list contains the environments that exist in the current ProjectWise datasource (the datasource containing the advanced integration project).
- In the Document Attribute name column, find the source attribute you want to map, then double-click the empty field next to it (in the Environment Attribute name column) and select the ProjectWise environment attribute that you want to map the source attribute to.
- Map additional attributes as needed and click OK when finished.
The attribute mapping definition is added to the Environment Mappings folder in the project.

You can now assign this attribute mapping definition to a publish location, family publish location, or eTransmit location.
- Create a new or open an
existing publish location, family publish location, or eTransmit location.
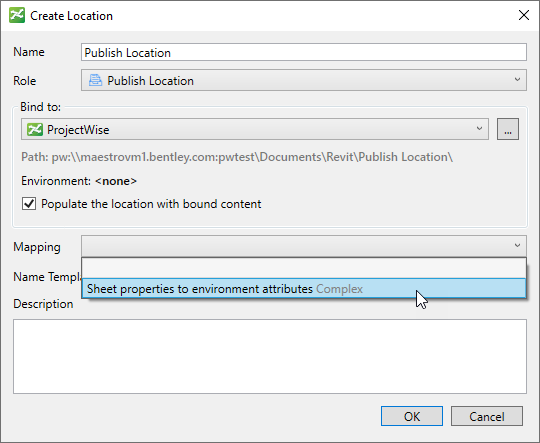
If you are creating a location, make sure you set the Role accordingly (Publish Location, Family Publish Location, or eTransmit Location), and then click the ProjectWise button to select a destination folder in ProjectWise.
- In the
Create Location or
Location Properties dialog, from the
Mapping list, select the attribute mapping
definition you configured for this location.
(If this list is empty, it means there are no attribute mapping definitions in this project under the Environment Mappings folder.)
Important: Make sure the destination folder (binding) of this location and the selected attribute mapping definition are both using the same environment. The Environment field shows the name of the environment that is assigned to the destination folder. To make it easy to tell which mapping uses which environment, each attribute mapping definition in the list displays the name of the environment it uses, grayed out and to the right of the mapping name. - Click OK.
The next time you use this location to publish, family publish, or eTransmit, source attribute values will be copied over to the mapped destination attributes on the new document(s) that get created as a result of the publishing or eTransmitting.
Create a Project Mapping and Assign It to the 'Work in progress' Folder
- Open the Revit project
document that contains the destination attributes you want to map to.
This determines which destination attributes will be available in the attribute mapping form.
- Open your project in the ProjectWise browser.
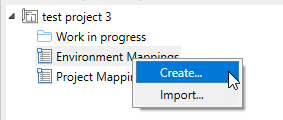
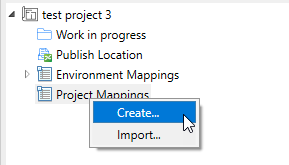
- Right-click
Project Mappings and click
Create.
The Project Attributes to Document mapping dialog opens.
- In the Mapping Name field, enter a name for the attribute mapping definition.
- Define the available
source attributes by creating one or more source attribute lists.
Each source attribute list can be linked to a work area, a ProjectWise project, or both.
- Click the
Create new source attributes button.
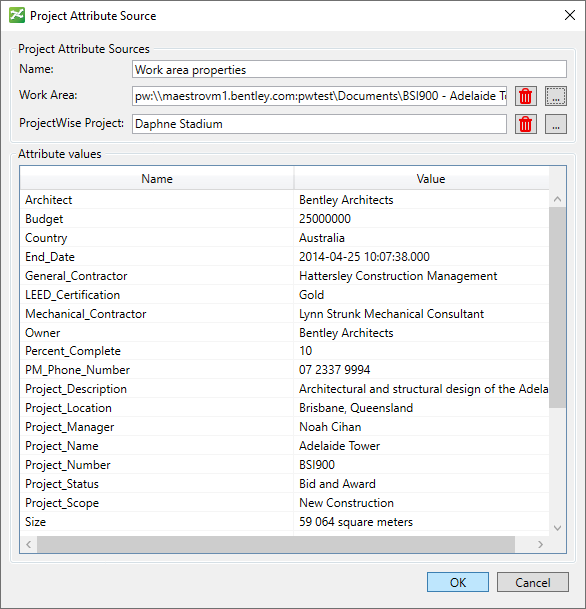
The Project Attribute Source dialog opens.
- Enter a name for the source attribute list you are creating.
- If you want this source attribute list to get attributes from a particular work area, click the Browse (...) button next to the Work Area field and select the work area you want to use.
- If you want this
source attribute list to get attributes from a particular
ProjectWise project, click the
Browse (...) button
next to the
ProjectWise Project field and select the
ProjectWise project you want to use.
The custom attributes of the selected work area and/or the properties of the selected ProjectWise project display in the attribute list (these are the source attributes).
If the selected work area is already associated to a ProjectWise project, then that ProjectWise project is automatically selected here.
- Click OK.
The new source attribute list is added to the Source list of the Project Attributes to Document mapping dialog. Repeat these steps to create more source attribute lists as needed.
- Click the
Create new source attributes button.
- From the Source list, select the source attribute list want to use.
- From the Target list, select the Model (this contains the destination attributes).
- In the Project Attribute name column, find the source attribute you want to map, then double-click the empty field next to it in the Document Attribute name column, select the Revit property that you want to map the source attribute next to.
- Map additional attributes as needed and click Save when finished.


The attribute mapping definition is added to the Project Mappings list in the project.
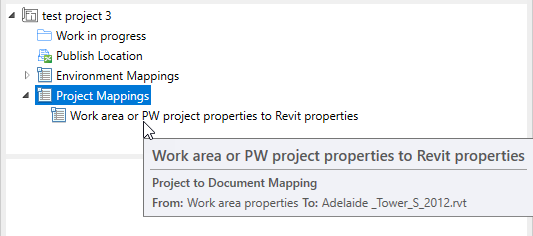
You can now assign this attribute mapping definition to the default Work in progress folder (or any working folder) in the project.
- Right-click the
Work in progress folder (or any working
folder) and select
Properties.
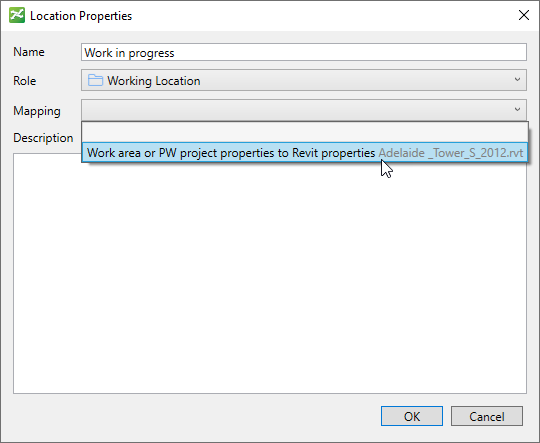
The Location Properties dialog opens.
- From the
Mapping list, select the attribute mapping
definition you configured for this working folder.
(If this list is empty, it means there are no attribute mapping definitions in this project under the Project Mappings folder.)
To the right of each attribute mapping definition name, and grayed out, is the name of the Revit file that was used to configure the destination attributes of that attribute mapping definition.
- Click OK.
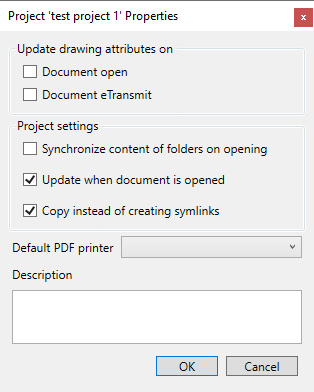
Finally, turn on the following project settings to make sure your Revit document attributes get updated when you want them to:
Once all this is configured, the next time you open or eTransmit or detach from central a Revit document that is stored in ProjectWise from this Work in progress folder, the mapped Revit document properties (destination attributes) within the document will be populated with the values from the corresponding custom work area attributes and/or ProjectWise project properties (source attributes).
Import an Attribute Mapping Definition from Another Project
- Export the attribute
mapping definition from the current project:
- In the ProjectWise browser, open the project that contains the original attribute mapping definition.
- Expand Environment Mappings or Project Mappings.
- Right-click an
attribute mapping definition and select
Export.
The Save Document As dialog opens, prompting you to save the selected attribute mapping definition to a mapping file (.docmap for environment mappings, .projmap for project mappings) and store it in the current datasource (the datasource that the current project is stored in).
- Select the ProjectWise folder to save the mapping file to, or click Save to disk to save the mapping file to a local folder.
- Import the exported
attribute mapping definition into another project:
- In the ProjectWise browser, open another project.
- Right-click Environment Mappings or Project Mappings (depending on which type of mapping you are importing) and select Import.
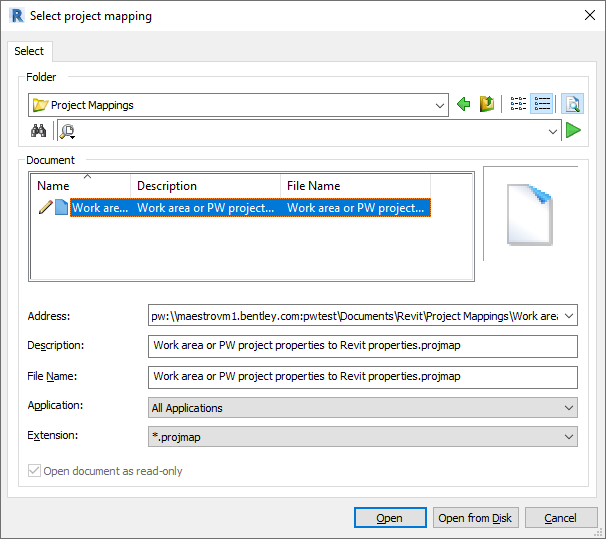
- Select the previously exported mapping file in ProjectWise and click Open, or click Open from Disk if you exported the mapping file to a local folder.
The attribute mapping definition is added to the project under the selected mapping folder.