Adding Documents to ProjectWise from MicroStation
In integrated MicroStation you can select to create and store new MicroStation documents in ProjectWise.
If you have a ProjectWise document open in MicroStation, you can select to save a copy of the document under a new name or to another location in ProjectWise. If you have a local document open in MicroStation, you can use File > Save As to save a copy of that document to ProjectWise.
To Create a New ProjectWise Document from MicroStation, Using the Integrated New Dialog
- Select .
-
If the
Select a Wizard dialog opens, select
No Wizard and click
OK.
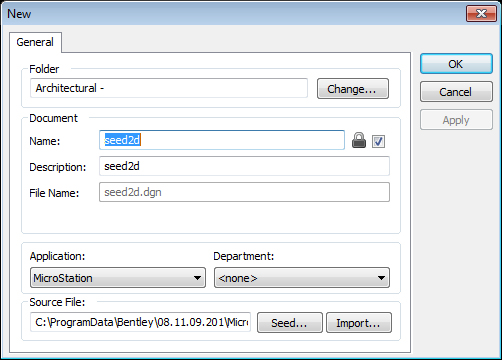
ProjectWise's New dialog opens.
-
Select whether to create the new document based on an existing
ProjectWise document or an external file:
Using an existing ProjectWise document's file: Click Seed. In the dialog that opens, navigate to the folder containing the seed document, select the document, and click Open. The seed document's name and description display in the New dialog's Source Document section.
or
Using an external file: Click Import. In the dialog that opens, navigate to and select the file to import, and click Open. The imported file's path name appears in the New dialog's Source File section.
- To change the location in which the new document will be stored, click Change in the Folder section.
- For the check box next to the Document Name field:
-
Edit the
Name,
Description and
File Name fields as needed.
A description for the document is optional, but the document must have a name and a file name, and both the (document) name and file name must be unique in the folder or work area in which you select to store the document.
- (Optional) Assign a ProjectWise application and department to this document from the respective Application and Department lists. You can also set either property to <none> if you do not need them.
-
Click
Apply or
OK to finish creating the document.
Option Description Apply Creates the document without closing the document you are in. OK Creates and opens the new document, while also closing and prompting you to check in the previous document.
To Create a New ProjectWise Document from MicroStation, Using the Advanced Document Creation Wizard
- Select .
- If the Select a Wizard dialog opens, select Advanced Wizard and click OK.
- See To Create a Single Document Using the Advanced Document Creation Wizard for more information. Note that when using the wizard from MicroStation, you do not have the options to Launch associated application or Apply selected options to succeeding documents when you get to the Create a Document page of the wizard.
-
When finished in the Advanced Document Creation Wizard, if the previous document was checked out, the Check In dialog opens. Click Check In to check in the previous document.
Once the previous document is closed and checked in, the new document opens in MicroStation.
To Make a Copy of the Open DGN, Using the Integrated Save Document As Dialog
- Select .
-
If the Select a Wizard dialog opens, select
No Wizard and click
OK.
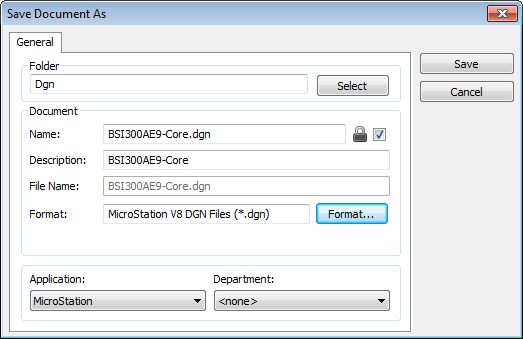
The Save Document As dialog opens, with the Folder, Name, Description, File Name, Format, Application, and Department properties being the same as the current document.
- In the Folder section:
- For the check box next to the Document Name field:
-
Edit the
Name,
Description and
File Name fields as needed.
A description for the document is optional, but the document must have a name and a file name, and both the (document) name and file name must be unique in the folder or work area in which you select to store the document.
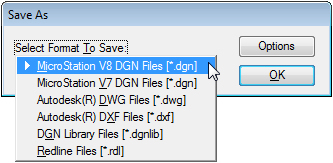
- To change the file format of the new document, click Format. In the Save As dialog that opens, select a file format from the list, click Options to configure any options for the selected file format, then click OK.
- (Optional) Assign a ProjectWise application and department to this document from the respective Application and Department lists. You can also set either property to <none> if you do not need them.
-
Click
Save.
The new document is saved to the selected ProjectWise folder.
-
If the original document was checked out, then at this point the
Check In dialog opens. Click
Check In to check in the original document.
The original document closes and the new document opens in MicroStation.
To Make a Copy of the Open DGN, Using the Advanced Document Creation Wizard
- Select .
- If the Select a Wizard dialog opens, select Advanced Wizard and click OK.
- See To Create a Single Document Using the Advanced Document Creation Wizard for more information. Note that when using the wizard from MicroStation, you do not have the options to Launch associated application or Apply selected options to succeeding documents when you get to the Create a Document page of the wizard.
-
When finished in the Advanced Document Creation Wizard, if the original document was checked out, the Check In dialog opens. Click Check In to check in the original document.
Once the original document is closed and checked in, the new document opens in MicroStation.