(Technology Preview) Named Presentations
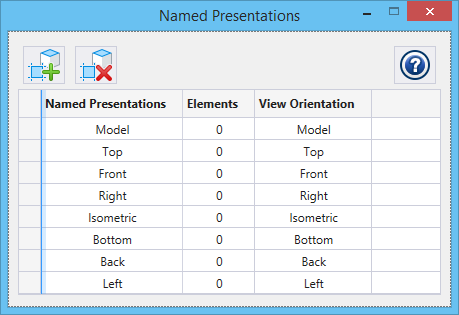
Named Presentations Dialog
 Used to manage named
presentations.
Used to manage named
presentations.
| Setting | Description |
|---|---|
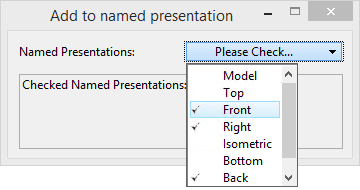
| Add to named presentation |
Starts the
Add to named presentation tool using which
you can add elements to a named presentation.
The Named presentation drop-down in the Add to named presentation tool settings window allows you to choose the named presentation in which you want the elements to be included. You can add multiple elements to any named presentation and also a single element to multiple named presentations. |
| Drop from named presentation | Allows you to remove elements from named presentations. To drop an element from the named presentation, start this tool, select the element and enter a data point. |
| Named Presentation list box | Lists the named presentations, number of elements
added to each named presentation, and the view orientation to which the named
presentation will be applied.
Selecting a named presentation row from the list box hides all elements other than the elements added to the selected named presentation. To deselect the named presentation, press <Ctrl> and click on the selected row. |

Named Presentation View Attribute
In the View Attributes dialog's Presentation section, a new icon called Named Presentation is added. If on, named presentations are applied to the selected view.
Workflow for Using Named Presentations
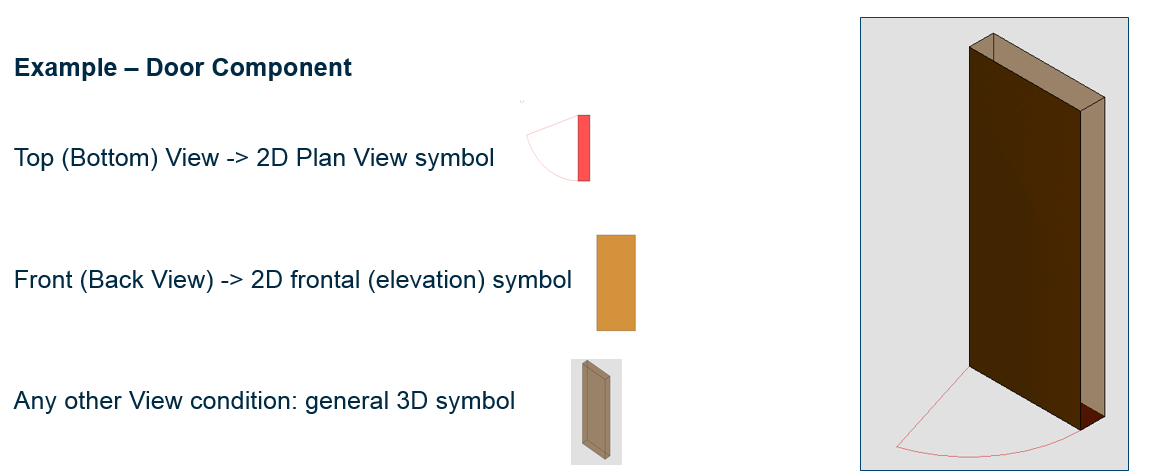
- In a model, draw the desired 3D model. For example, a door.
- In a different view orientation, place elements that you want to view for the model in that view orientation. For example, for a door model, in the Top view, you will draw the commonly used symbol of door in plan views, which is a rectangle with an arc and line indicating the door and its swing.
- Open the Named
Presentations dialog.
- Select the
Add to named presentation tool and in its tool
settings window, select the desired named presentation to which you want to add
the elements.

- Select the desired
elements and enter a data point. In our example, select the door symbol in Top
view.
The elements are added to the selected named presentation.
- Now place the model as a parametric cell.
- In the View Attributes
dialog, make sure the
Named Presentation view attribute is turned
on.
- Change the orientation to the one that have named presentation created and observe that the elements that you included for that named presentation are displayed instead of the original cell. So, in our door example, in the Top view, you will see just the door symbol, which is a rectangle with an arc and line.