To add a predefined packaged single zone air conditioning system
-
On the Ribbon > Data Managers tab, click the HVAC Systems icon.
The HVAC Manager opens.
-
Click the Application button to view the predefined HVAC systems
available in the OpenBuildings Energy Simulator application folders.
Note: OpenBuildings Energy Simulator provides predefined HVAC systems that can be added to any project building. These predefined systems have the necessary subsystems, connections and required properties predefined, and require only a few easy steps to apply them to your project building. The following steps apply to most of the sample systems with only a few exceptions. The sample systems applicable to this procedure are:
- On the HVAC Systems tab, expand the HVAC Systems category, and navigate the folder structure to HVAC Systems > Rooftop Packaged Units > Constant Air Volume. Select the Packaged Single Zone AC Air-Cooled DX with Gas Heat system, and click the Copy to Project menu button. The selected single zone AC system is copied into the Project folders, and can now be incorporated into the project building.
-
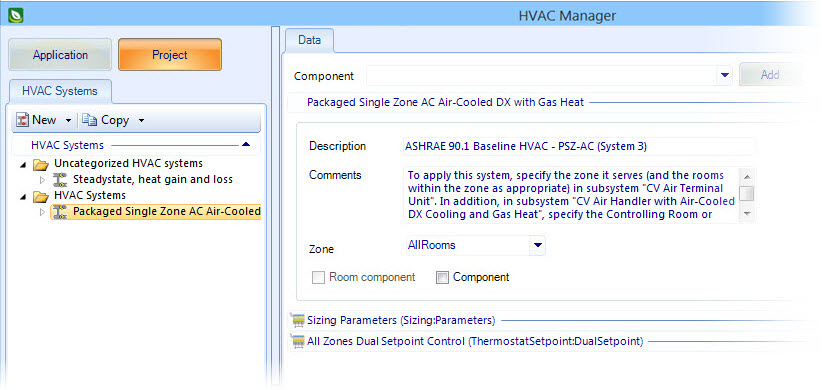
Click the Project button.
The copied single zone AC system appears in the Project HVAC Systems category inside the HVAC Systems folder.
-
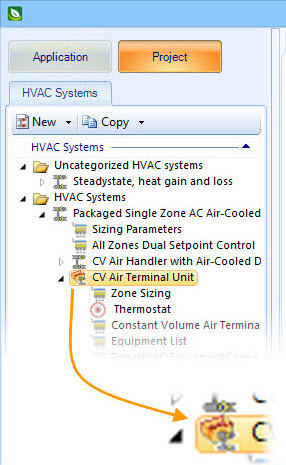
Select the single zone AC system. Then click the arrow to expand
it’s contents.
This reveals the CV Air Handler with Air-Cooled DX Cooling and Gas Heat and CV Air Terminal Unit objects which themselves have underlying structures of base HVAC components.
-
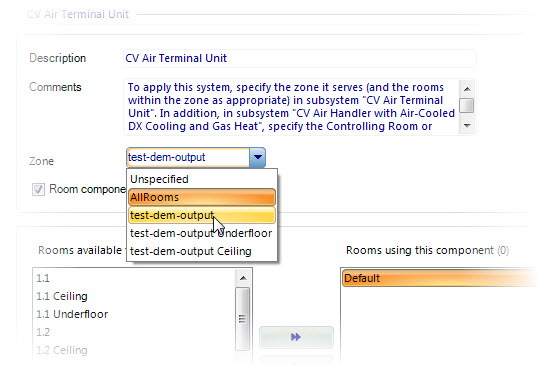
Select the CV Air Terminal Unit room component.
The HVAC Manager's Data tab displays all the base HVAC components that comprise the CV Air Terminal Unit room component. Under each base HVAC component, is a properties panel containing EnergyPlus object properties assigned with default values.
-
Select the zone to be served with CV Air Terminal Unit room
components from the Zone list box.
The rooms in the selected zone appear in the Rooms available to component list box.
- All the rooms within this zone are to be served by this HVAC system by clicking the double right arrow button.
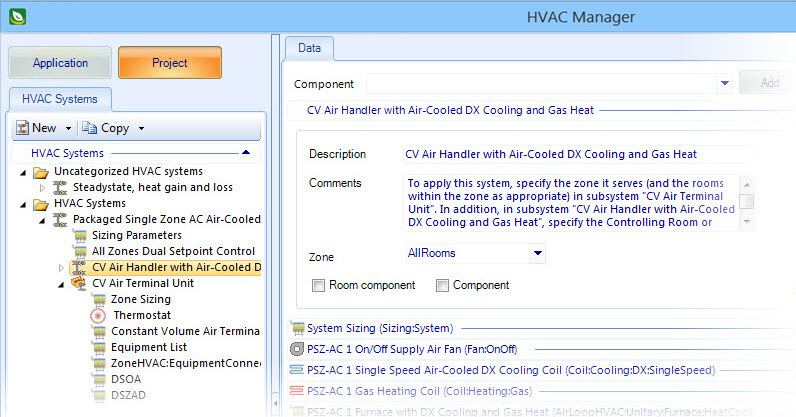
- The system is controlled by a thermostat located in one of the rooms being served by this system. Select the subsystem CV Air Handler with Air-Cooled DX Cooling and Gas Heat from the HVAC Systems tab.
- Select the zone to be served with the CV Air Handler with Air-Cooled DX Cooling and Gas Heat subsystem from the Zone list box.
-
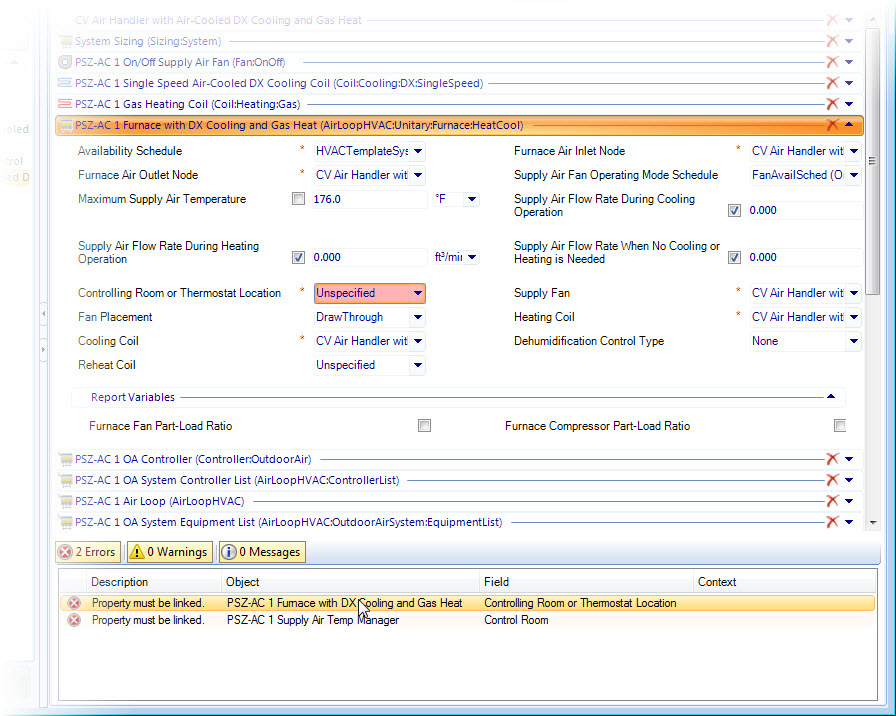
There are two errors listed in the
Notifications
panel. Double click on the error for the PSZ-AC 1 Furnace
with DX Cooling and Gas Heat object.
The PSZ-AC 1 Furnace with DX Cooling and Gas Heat object properties panel expands.
The Cooling Room or Thermostat Location property is highlighted. The value is set to Unspecified. A value must be defined. - Select one of the rooms in the zone from the Cooling Room or Thermostat Location property list box designating it as the room where the thermostat is to be located. Immediately after selecting the room, the error is removed from the Notifications panel.
-
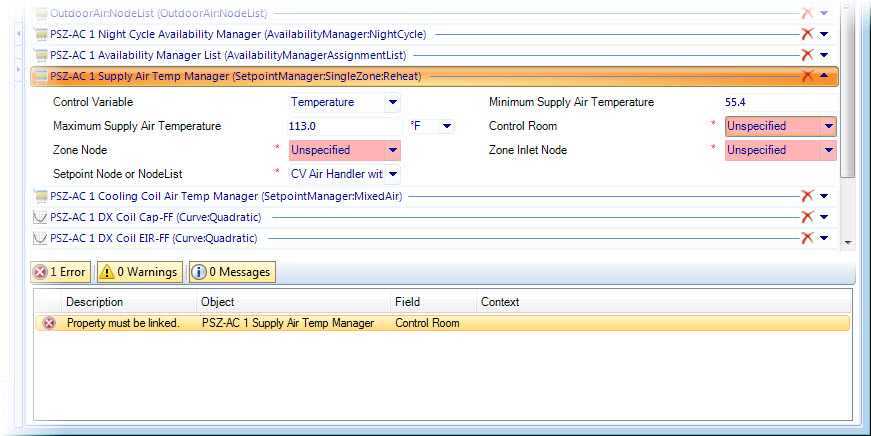
Return to the Notifications
panel, and double click on the error for the PSZ-AC 1 Supply Air Temp Manager
object.
The PSZ-AC 1 Supply Air Temp Manager object properties panel expands.
Several properties are highlighted. The error is calling for the Control Room property to be specified. - Select the same room you selected for the Cooling Room or Thermostat Location from the Control Room property list box. Immediately after selecting the room, the error is removed from the Notifications panel.
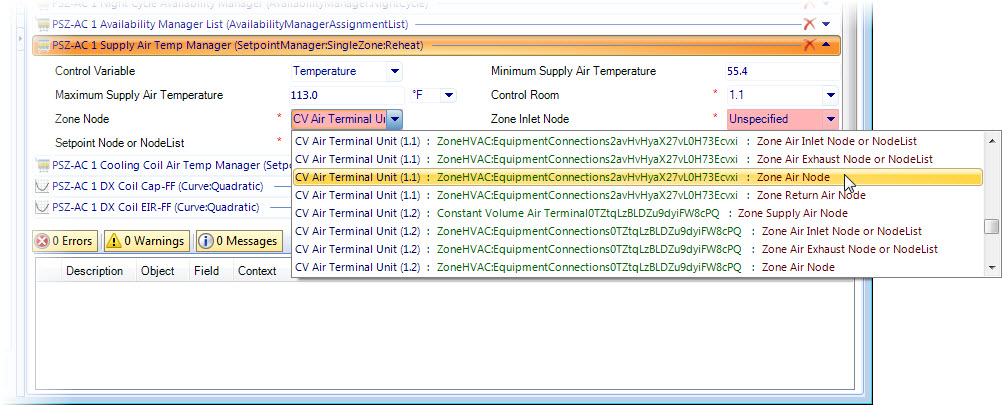
- While still in the PSZ-AC 1 Supply Air Temp Manager object properties panel, change the Zone Node property value from Unspecified to CV Air Terminal Unit (1.1) : ZoneHVAC:EquipmentConnections[GUID]: Zone Air Node.
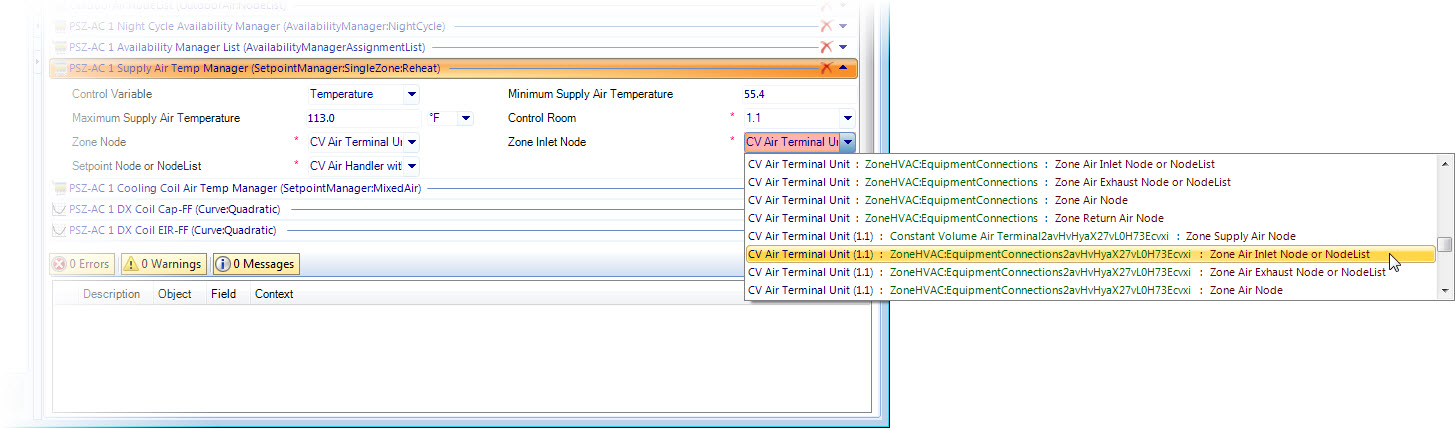
- While still in the PSZ-AC 1 Supply Air Temp Manager object properties panel, change the Zone Inlet Node property value from Unspecified to CV Air Terminal Unit (1.1) : ZoneHVAC:EquipmentConnections[GUID]: Zone Air Inlet Node or Node List.
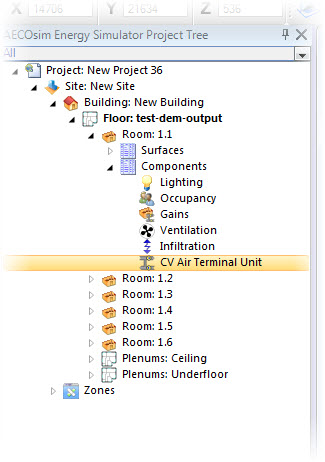
- Complete the system by clicking the OK button (bottom left corner of HVAC Manager). The zone selected is to be served by this system. The room selected for the thermostat location contains an CV Air Terminal Unit subsystem object in its project tree hierarchy.