To set superelevation flag
To assign points on a deck template to match a superelevation profile, use the following procedure.
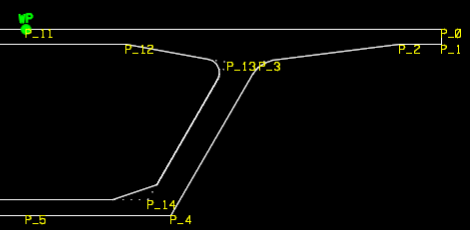
Superelevation data from a civil engineer can be used to automatically superelevate the deck. To do so, you must first identify the points on a template which the road profile will guide.
- In the Template Creation dialog, select the Point Details tab.
- Select a corner of the template shape that represents the roadway surface edge. This is typically the top-left or top-right corner of the deck.
- In the Edit Details group, set the Superelevation Flag option. This indicates that this point should be matched to the road profile.
In the following segmental box example, P_0 is the top-right corner of the deck. The as the profile goes through superelevation, this point will rise or fall to match. Therefore, it should have the Superelevation Flag set. The location of points P_1 and P_2 should remain fixed relative to P_0, so they must have Point Constraints assigned fixing the relative vertical and horizontal distances.