Horizontal Geometry Report
 Used to generate a printable PDF file of information from selected elements.
You can access this tool from the following:
Use the Horizontal Geometry Report to generate a printable PDF file of information from selected elements.
-
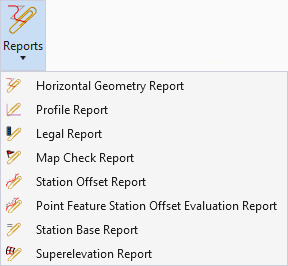
Open the Civil Tools task pane to the Horizontal Geometry section then click the Horizontal Geometry Report icon.
-
When you move the cursor into the View, it is equipped with a command prompt requesting that you "Locate First Element", so move the cursor to an element you wish include in the report then left-click on it.
-
The prompt says, "Locate Next Element", so move the cursor to another element you wish to include in the report then data point, example, left-click.
-
When you've selected all of the elements you wish to include in the report, right-click in an empty area.
-
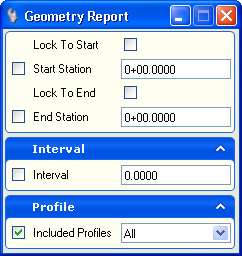
When prompted to "Select Profiles", strike the down arrow key to navigate the available options then strike the Enter key.