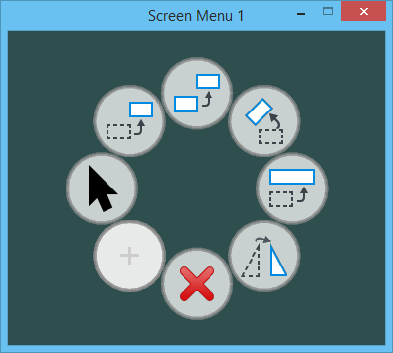
Opening Screen Menus
There are different ways in which you can open and display screen menus.
Opening Screen Menu in a Window
Screen menus can be used as permanent menus that occupy a window on the screen until closed. The size of the screen menu window is the size of the view window when the saved view is created. To make a screen menu permanent, open it with the key-in:
ATTACH MENU <filename>,<model_name>,<saved_view_name>,S<n>
- filename - is either file name with full path or a file that is found using MS_GUIDGNLIBLIST configuration variable.
- model_name - is the model that is displayed.
- saved_view_name - is the initial saved view. If this argument is omitted or if the designated saved view is not found, the initial saved view is as it was when the most recent Save Settings was executed.
- n - can be the number 1 through 5.
Screen menus in a window stay attached until they are closed, and are reopened when you restart the product.
Opening Screen Menu as Pop-Up Menu
Screen menus can be opened as pop-up menus. The pop-up menus overlay existing graphics rather than opening within a window. They are dismissed when input that isn't directed to the pop-up menu is entered; for example, by entering a data point in a view. Such pop-up menus can be opened using the following key-in:
SCREENMENU OPENPOPUP <filename>,<model_name>,<saved_view_name>|<position_string>
Where, <filename>,<model_name>,<saved_view_name> are same as mentioned above.
<position_string> is an optional argument that allows you to override the default positioning set in the Menu Settings dialog. This argument has one of the two forms:
|<xx>,<yy>,<screen>
Or |<justification_string>(<xx>,<yy>,<screen>)
In the first case, the position is treated as an absolute position within the area reserved for views in the product's top window. The <xx> and <yy> are treated as offset of the center of the screen menu view in percentage of the available area. The <screen> argument is optional and designates which top window should be used, and if included must be either 1 or 2. For example, the key-in, SCREENMENU OPENPOPUP ScreenMenus.dgnlib,Menu1,StartMenu1|50,50,1, opens the popup menu "Menu1" in the ScreenMenus.dgnlib, with the initial view defined by the saved view "StartMenu1", at a position in the center of the view area of top window 1.
In the second case, <justification_string> indicates the justification of the menu relative to either the current cursor position (the default), the current view, or the area reserved for views in the top window. It consists of three letters. The first letter determines the vertical justification - U for upper, C for center, or L for lower. The second letter determines the horizontal justification - L for left, C for center, or R for right. The third letter determines which of the three references to use - C for cursor, V for view or S for screen. The justification is followed by offsets in the x and y direction and an optional screen designation enclosed by parentheses. In this case, the x and y offsets are defined in percentage of the width and height of the screen menu. The screen designation (1 or 2) is relevant only if the position is designated as relative to the screen. Following are some examples:
SCREENMENU OPENPOPUP ScreenMenus.dgnlib,Menu1,StartMenu1|ULV(10,20)
The above key-in opens the screen menu at the upper left of the current view, which is the view that the cursor is currently over, or the active view if the cursor is not over a view, displaced by 10 percent of the menu width in the x direction and 20 percent of the menu height in the y direction.
SCREENMENU OPENPOPUP ScreenMenus.dgnlib,Menu1,StartMenu1|CRC
The above key-in opens the screen menu such that the center right of the screen menu is at the current cursor position. Since the offset is omitted, there is no displacement.
SCREENMENU OPENPOPUP ScreenMenus.dgnlib,Menu1,StartMenu1|LRS (-20,-20,1)
The above key-in opens the screen menu such that it is positioned in the lower right of the area reserved for views in the first MicroStation top window. The displacement is 20 percent of the menu width to the left and 20 percent of the menu height up.
Opening One Screen Menu from Another
Sometimes it is useful for a screen menu to open another screen menu while remaining active itself. The SCREENMENU OPENSUBPOPUP key-in is used for that purpose. The arguments are the same as for the SCREEMENU OPENPOPUP key-in.
Controlling Display of References
As mentioned above, you can attach references to other models within the same file to a screen menu model. The initial display of the references is controlled by the saved view specified when you open the popup menu. You can turn references on or off using the following key-in:
SCREENMENU REFDISPLAY <Attachment1>=on,<Attachment2>=on,<Attachment3>=off
Where, <Attachment1> is replaced by the name of the attachment model. Since all attachments are in the same file, the model name identifies the attachment. <Attachment1> can also be replaced by "*", which means to process all reference attachments. Frequently, a key-in like SCREENMENU REFDISPLAY *=off,OtherModel=on is useful to turn off all attachments and turn on just one, "OtherModel" in this case.


