Models Dialog
 Used to create,
manage, and switch between models in the open DGN file.
Used to create,
manage, and switch between models in the open DGN file.
You can access this dialog from the following:
You can dock the Models dialog to the top or bottom edge of the application window.
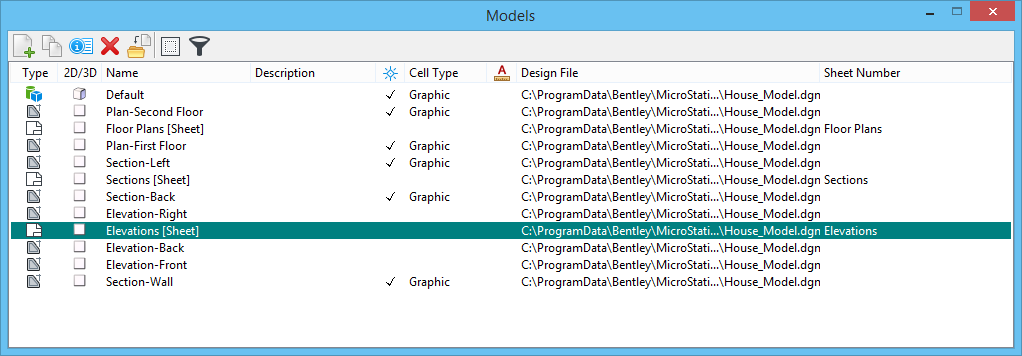
Each DGN file contains one or more models, each of which has its own set of eight views. You can create a model as a 2D or 3D Design type, as a 2D Drawing type or as a 2D or 3D Sheet type. Sheet models let you attach references to create a set of working drawings for the model file. Icons at the top of the Models dialog give you access to its various functions.
| Setting | Description |
|---|---|
| Create a new model |
Opens the
Create Model dialog,
which lets you create a new model in the open DGN file.
|
| Copy a model |
Opens the
Copy Model dialog,
which lets you make a copy in the open DGN file of the model selected in the
list box.
|
| Edit Model Properties | Opens the Properties dialog in which you can modify the properties of the model selected in the list box. |
| Delete a model | Deletes the model selected in the list box. |
| Import a model |
Opens the Import Model From File dialog, which is similar to
the Open dialog. This lets you select a DGN or DWG file from which to select
the model to import. After clicking
OK, the
Select Models
dialog opens from which you can select the model to import
into the open DGN file.
|
| Define Sheet Boundary | (Active Sheet model only) Opens the Sheet Boundary tool settings window, which lets you to set the size (height and width), scale, rotation, and border attachment of the paper. |
| List Filter |
If on displays a filter row in the list box that lets you
define a filter for any of the list columns.
To define a filter, click on the required filter field and enter the filter parameters. For information on defining filters by string, integer, or boolean expression, refer to the tables in the section Using Filters. For some columns, the boolean expressions in the filter field represent parameters as listed below: When you click the filter field in the Type column, a drop-down opens that contains the filter options None, Design, Drawing, and Sheet. |
| Models List box | Lists the models in the open DGN file. An icon
displays next to the model name indicating whether the model is 2D or 3D.
You can edit the
model name and description by triple-clicking on the selected model name in the
list box. To copy, delete, or adjust properties of a model, you must first
select it here.
Double-clicking a model here makes it the active model.
You can customize the columns displayed in the list box by right-clicking in the title row of the list box and using the menu to select which options are displayed. Items that can be displayed are:
|
| Models list box right-click menu | When you right-click a model in the list box, you get
the following options:
|


