Fit to Element Range
Selecting the Fit to element range item from the Fence tab on the Print Styles dialog opens the Fit to element range dialog. This dialog allows you to specify the print area indirectly by describing a fence whose coordinates are based on the accumulated range of specified elements.
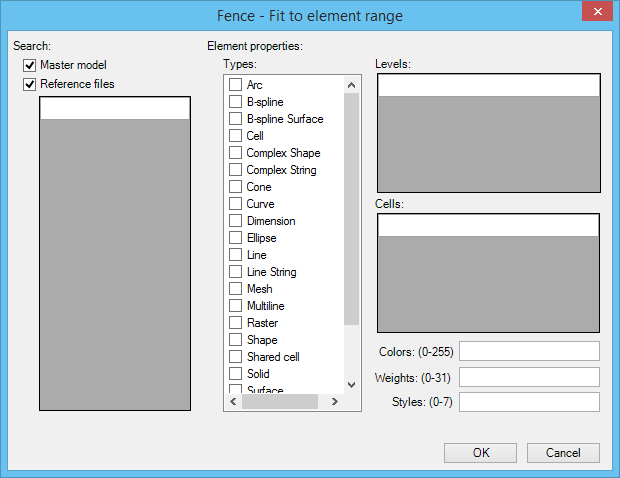
In the Search section, turn off the master model or Reference files to limit the search for specified elements. By default, Print Organizer searches the master model and all of its references. You restrict the search to specific references by typing their logical names (for example: "border") or filenames (without drives or folders, for example, "border.dgn") into the References list box. The reference filenames may be regular expressions.
In the Element properties section, you can restrict the search to specific element types. The default behavior is to fit on all elements types if none of the element types are selected. For example, suppose you select Fit to element range and click OK, the print area will be a fence whose accumulated range is based on all the elements in the master model and all reference files. If you select Fit to element range and select Line String, and then type in level six, the print area will be a fence whose accumulated range is based on all line strings on level six in the master model and all reference files.
In the Levels and Cells sections, you can restrict the search to specific levels and/or cells by typing the level and cell names into the appropriate list boxes. As with references, level and cell names can be regular expressions.
The Colors (0–255), Weights (0–31), and Styles (0–7) fields limit the search to a specific color, weight, or style. Each field accepts single integer values, dash-separated ranges of integer values, and comma-separated lists of values and ranges. Example: 1, 2, 3, 5-7.
The Fit to element range option always creates a single print definition.