Placing RPC Cells
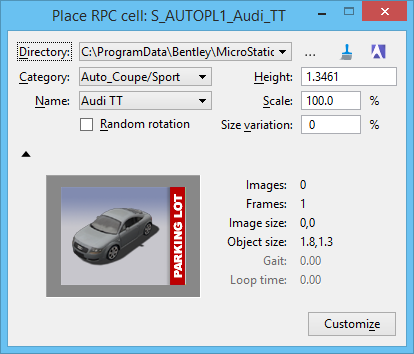
You use the Place RPC cell tool to place RPC cells in a model. Settings for this tool let you select, via combo boxes, a Directory, Category, and Name for the RPC cell. Additional controls let you browse for a directory, refresh the combo boxes, or view the RPC content via a thumbnail browser.
Where it is the first time placing an RPC cell, automatically you will be presented with the file browser. Other tool settings let you Set the Height, Scale, and Size Variation for the cells. A Random rotation setting lets you place cells with random rotation, without having to define the target direction for the cells.
When you first use this tool, all the directories in the search path will be scanned for RPC files. The search path is the list of directories defined by the configuration variables MS_PATTERN, MS_BUMP, MS_IMAGE, and MS_DEF. Any time the content of a directory is changed, it will be re-scanned. If for any reason the combo boxes do not accurately list the RPC files present, you can click the Refresh button (immediately to the right of the Browse button). A Reset will abort the scanning for RPC files.
You can adjust the Height or Scale settings to modify the size of the RPC cell. As you do this, the size of the RPC cell is scaled to reflect the current dimensions.
Setting the Size Variation to a non-zero value results in RPC cells that are scaled randomly, as specified by the percentage. That is, if Height is set to 10.0 and Size Variation is set to 20%, then RPC's will be placed with a random height from 8.0 to 12.0.
When you place RPC cells, you will first be prompted for the RPC cell position, which locates the center of the bottom edge of the RPC cell. Once you have set the cell position, you will be prompted for the RPC cell target point, which is the point at which the cell will face. In other words, it defines the rotation of the cell about the global Z axis. RPC cells are always placed such that their vertical (or Y) axis is parallel to the model's Z axis. If Random rotation is enabled, each RPC will be placed with a randomly selected orientation, and no additional data point is needed to select the target point.
RPC cells are placed using the active level and color. They appear as a rough representation of the geometry, with an enter data field that specifies the RPC file name. After placing an RPC cell, you may continue to place additional cells or Reset to finish.
Editing RPC Cells
You use the Edit RPC cell tool to edit, or replace, existing RPC cells present in a model.
After selecting the tool and the RPC cell you wish to edit, you then can change the name of the RPC file that is associated with the cell, as well as its height or scale. As you change the height or scale, the size of the RPC cell is scaled to reflect the current dimensions. If you select a different RPC filename, the new cell will replace the existing. To complete any changes to the settings, you must enter a data point in a view. Changes made to an RPC (including those made from the Customize RPC dialog) are applied only when a data point is entered in a view to accept those changes.