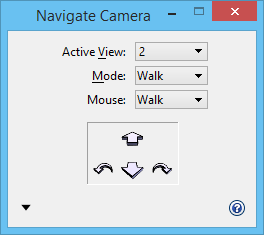
To Move the Camera Through a View Window
- Select the Navigate Camera view control.
- From the Active View option menu, select a view.
- Set Mode to Fly.
- If you want to use the mouse as well as the keyboard to control the camera, from the Mouse option menu, select a navigation option.
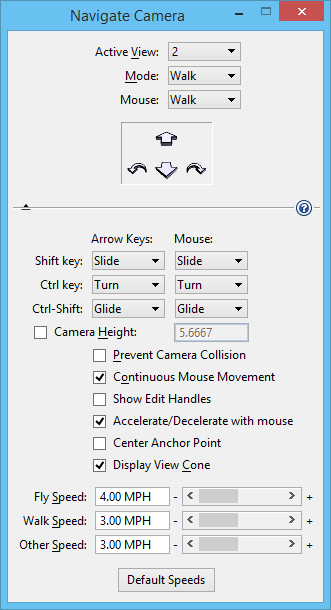
- (Optional) Click the Show Shortcuts keys (?) button for a list of the current keyboard and mouse navigation settings.
- (Optional) To display more settings and navigation options, click the Show Settings button.
- (Optional) For each of the <Shift>, <Ctrl>, and <Ctrl+Shift> combo boxes, select a navigation option.
- (Optional) Turn on Camera Height and set the height.
- (Optional) Turn on other settings as desired.
- (Optional) Turn on Display View Cone.
-
Do one of the following:
Press any of the arrow keys, letter keys, or keyboard combinations to move the camera through the active view.
or
If you are using the mouse, enter a data point to select the active view, then move the mouse to move the camera. Enter another data point to accept and stop moving the camera, or Reset to restore the view’s starting position.
Note: When using View Previous and View Next, only mouse accept points are recognized as viewing operations. For example, if in a view you Tilt the camera with the mouse, accept and then Walk forward using the keyboard, when you click the View Previous view control, the keyboard input is ignored, and the view is restored to its condition before the Tilt operation.