A Classifier is a set of one or more elements that are
linked to the reality mesh to provide a method for identifying portions of the
mesh that represent physical entities. Two dimensional shapes from GIS
(Geographic Information Systems) applications are particularly convenient and
valuable as they typically are geographically located and contain valuable
property data. By using design data to classify the reality model, you are able
to access the reality model as a set of intelligent components rather than a
single, isolated entity. The link between the reality model and the underlying
design data is bidirectional so you can either query the GIS model to locate
the associated reality mesh or select locations on the reality model to access
the underlying design data.
Example:
Classifiers of the Philadelphia Reality Model
In 2015, a reality model of Philadelphia was created to
support the Pope’s visit to Philadelphia. In order to demonstrate Reality Model
Classification, we will link this model with GIS data and explore the value of
this combination. Like most municipalities, the GIS data for Philadelphia is
readily available. The website
www.opendataphilly.org provides over 300 different
datasets. Let's start by downloading the building footprint data in SHP format.
The SHP data can be opened directly in
MicroStation and saved to DGN format for
convenience. We also directly open the reality model in the .3mx format
created by the ContextCapture software and save that to DGN.
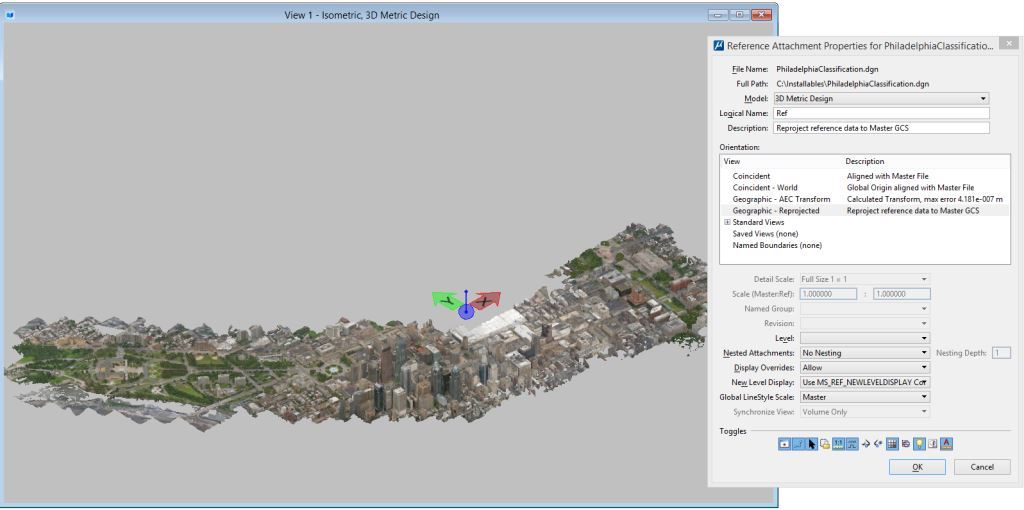
Both of the DGN files are geographically located. However,
they may not use the same geographic coordinate systems. Fortunately,
MicroStation can reproject the GIS data to
match the coordinate system of the reality model. It is not possible, however,
to reproject reality model data efficiently between geographic coordinate
systems (the sheer volume of data makes this operation impractical). Therefore,
it is important to use the reality model as the master and attach as a
reference (and potentially reproject) the design data to the reality model
geographic coordinate system.
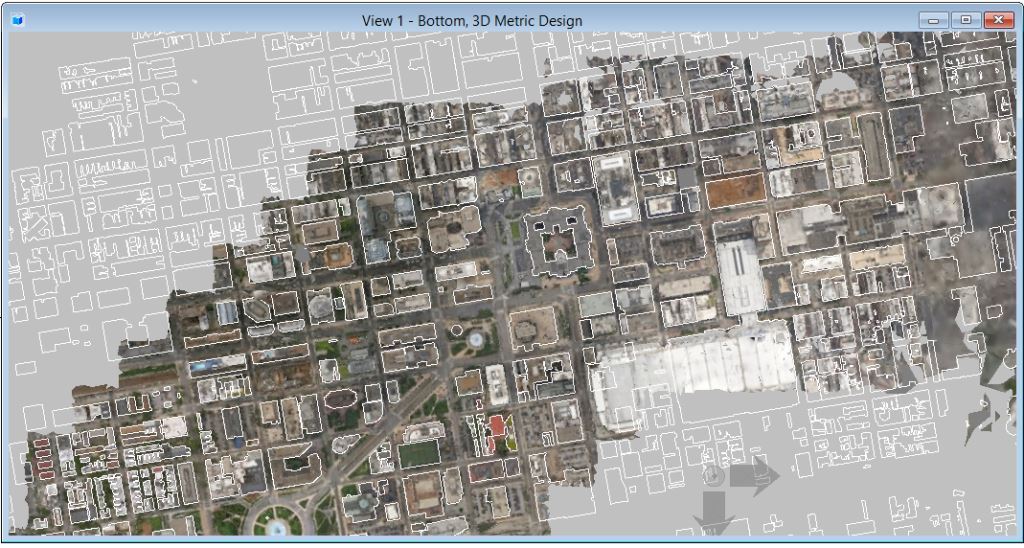
After attaching the building footprint data, you can view
the model from below and observe that the footprint data matches the reality
model very well, confirming that both the reality model and the GIS data were
geospatially accurate.
The next step is to attach the building footprint
reference as a classifier to the reality model. You can use the
Attach Reality Mesh tool for this. In the tool
settings, select
Type as
Model so that all of the building footprints in
the referenced model are part of the classification and set the
Name as
Building Footprints. Set
Margin to
1.0 (meters), which designates that each
classification volume will be one meter larger than the building footprint. A
single element within the footprint reference attachment is selected to
designate that this is the desired model for the classification.
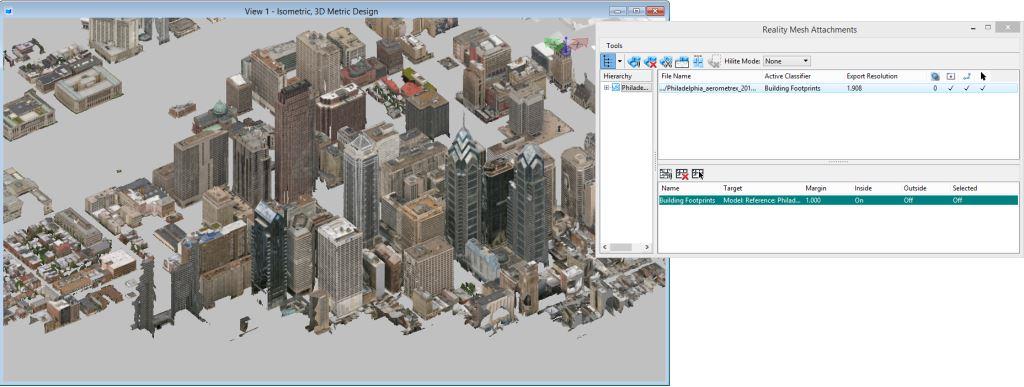
Once you attach the classification, it will appear in the
lower list box of the Reality Mesh Attachment dialog and is set to be the
Active Classifier for the reality model attachment.
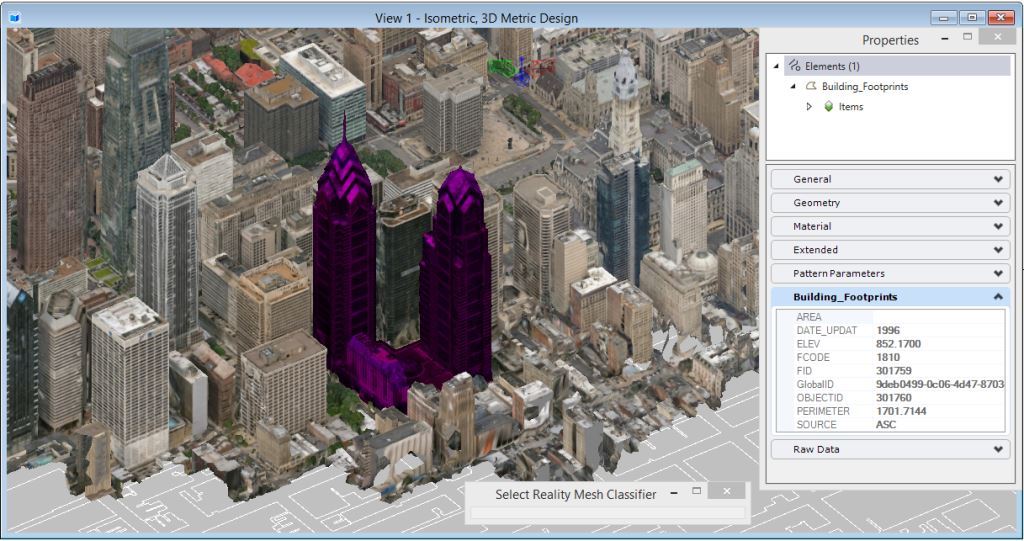
To interactively view the result of the newly attached
classification you can use the
Select Reality Mesh Classifier tool and move the
cursor over the reality model. When the reality mesh below the cursor is within
a classification boundary, the classified volume is flashed in the highlight
color. Picking the reality mesh classification will add the classification
boundary object to the current selection set and the Properties dialog can be
used to view the properties of the object.
Now that the classification object is selected, you can
use the Classifier settings to control its displayed. The
Inside and
Outside settings control how the reality mesh
data inside or outside the boundaries of the active classification boundaries
are displayed. The
Selected setting controls how the reality mesh
for selected classification boundaries is depicted. By turning both
Inside and
Outside
Off and changing
Selected to
On, you can isolate to display only the reality
mesh for the selected classification boundary (see below). Note that the
Select Reality Mesh Classifier tool continues to
function with the
Inside and
Outside settings
Off, so in this mode it is possible to continue
to interactively select from the (now invisible) reality mesh.
With different settings of the
Inside and
Outside, you can view the classification data in
interesting ways. With
Inside:
On and
Outside:
Off, you can display only the buildings.
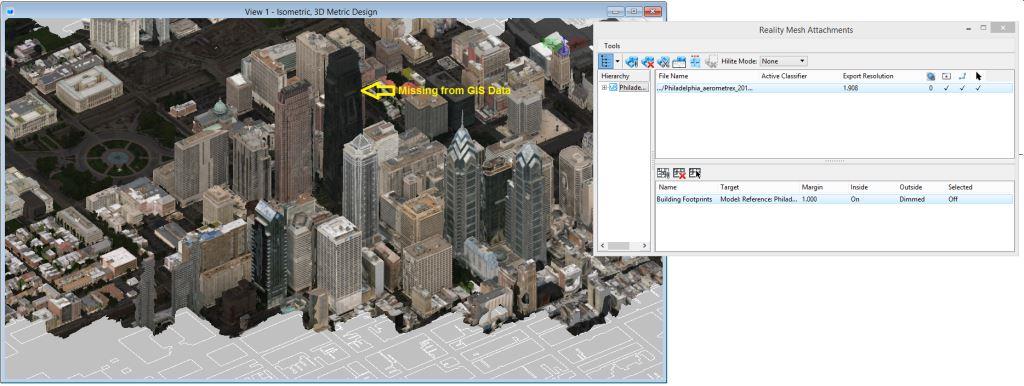
By setting the
Outside:
Dimmed, you can see the buildings against a
dimmed background of the unclassified reality mesh. Note that in this case the
dimmed building in the center is new and missing from the building footprint
data.
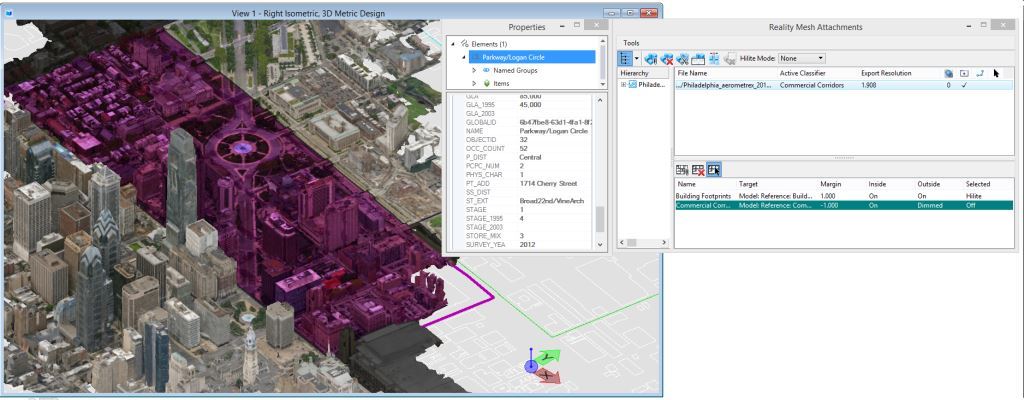
Many different classifications can be attached to a
single reality model. This provides many different ways of viewing the same
reality model. By attaching a Classifier of the commercial corridors you view
the same model as a set of zones rather than individual buildings. Note that in
this case, a negative margin distance is used to inset the commercial zones
slightly to produce a small Outside zone at their boundaries.
In most cases, it is preferable to use Classifiers to
control how the reality model is viewed without changing the reality model
attachment. It is, however, possible to use the reality mesh clipping tools to
permanently clip the model at classification boundaries. For example, in the
zoning example above, it is possible to create separate attachments for the
commercial zones by selecting the zones (<Ctrl+Click> will allow
selection of more than one classification boundary) and using the
Split Reality Mesh tool to create separate
attachments for each zone and a single attachment for areas outside the
selected boundaries.
Volumetric
Classifiers
In the previous examples, 2D GIS data has been used to
classify the reality meshes. In this case, the 3D geometry is projected to
classify all reality model geometry above (or below). It is also possible to
use 3D geometry to more precisely enclose reality mesh volumes. Currently,
volumes can be specified by slabs, cylinders and non-parametric extrusions. If
other 3D geometry is used, then the classified volume is determined by the
range of the element.
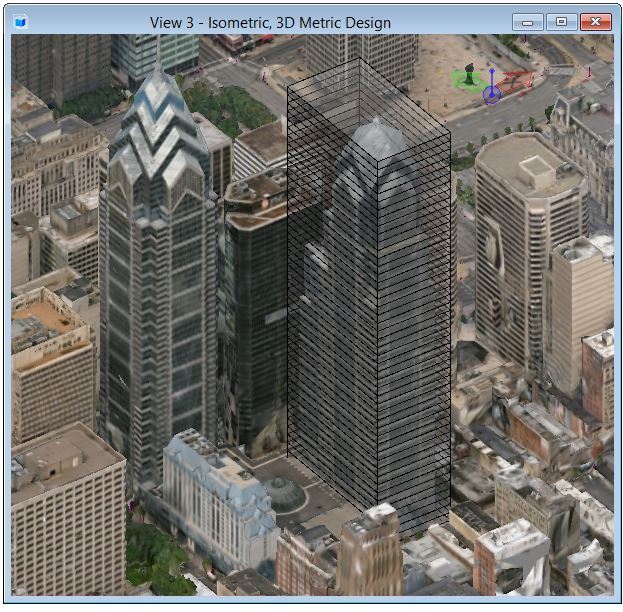
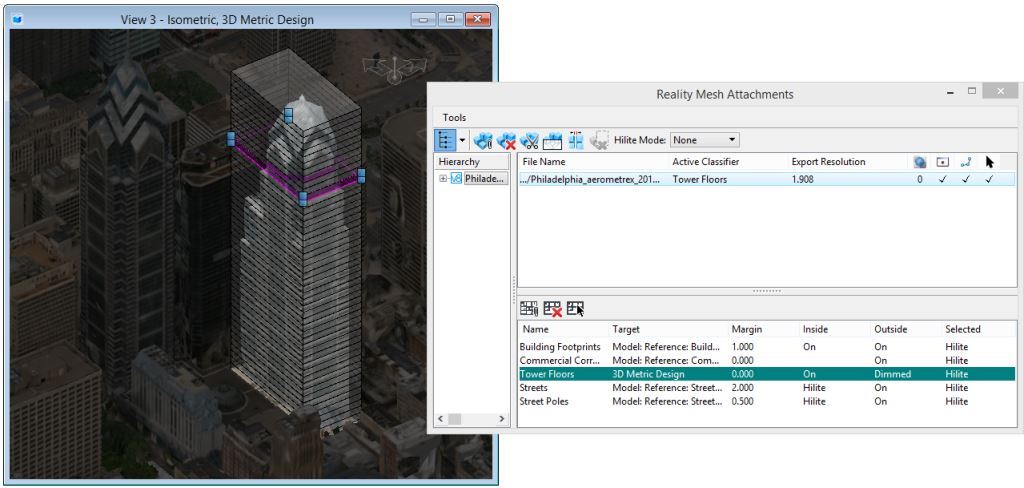
In the example below, a classification of the individual
floors of a building rather than the entire building is illustrated. A series
of slabs provide the classifiers. Properties of the floors (occupants, rental
rates, and so on) can be accessed by interactively selecting the reality model
to access these classifiers.
Activating the Tower Floor classifier and Selecting
Dimmed for the
Outside display mode highlights the building of
interest. Using the
Select Reality Mesh Classifier tool, you can
select the individual tower floors.