Database Connection
SCADAConnect can read data from a variety of sources. The Database Connection method helps to establish a communication to a SCADA file. A file can be accessed (or opened) using different methods (or drivers) such as ODBC, OLEDB or SQL. To simplify this to a general hydraulic modeler, SCADAConnect offers two additional methods where modeler can simply specify a file such as Excel or These direct file methods also uses OLEDB method. Following are the methods you can select to provide information about your SCADA data.
- Access File
- Access 2.0
- Access 2003/2002/2000 (4.0)
- Access 2007 (12.0)
- Access 97/7.0(3.0)
- Excel File
- Excel 2003/ XP /2000/97 (8.0)
- Excel 2007 (12.0)
- Excel 3.0
- Excel 4.0
- Excel 95/5.0 (5.0)
- ODBC Source
- More options are available under Connection Properties
- OLEDB Source
- More options are available under Connection Properties
- SQL Connection
- More options are available under Connection Properties
To create a new connection,
- Within SCADAConnect, go to Tools > Connection Manager.
- The Connection Manager opens.
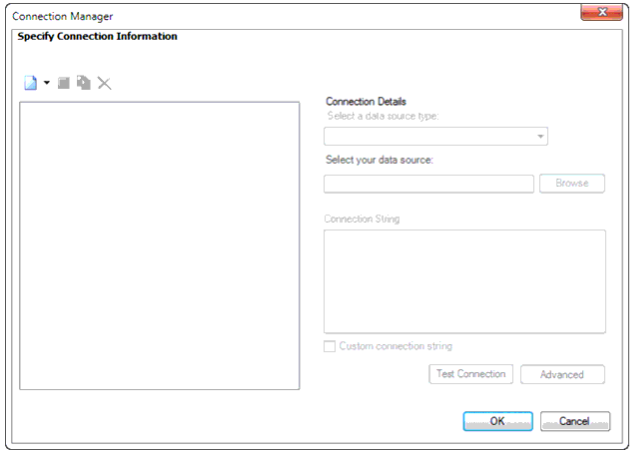
- Click the New button to create a new connection. Go to Database Connection for creating a connection using database option.
- Rename the newly created Database Connection to a suitable name such as Access DB Connection. It's always a good idea to name the Database Connection similar to the data source as this Database Connection will be used at other location such as Data Source Manager.
- Select a data source type from Database: Connection Details group.
- For Example: Select Access 2003/2002/2000 (4.0) from the drop down.
- Click on the Browse button and provide your Access file or Excel file. Connection String box will automatically be filled in with the appropriate connection string.
- Connection String is a special string which contains the information that the provider needs to know to be able to establish a connection to the database or the data file. It is a passed in code to an underlying driver or provider in order to initiate the connection.
- Click on Test Connection button. This button normally validates the path, file format, and existence of the file. You should see a "Connection Succeeded" message box.
- The Advanced button allows changing the prefixes and suffixes for the Name and Date/Time field. Under advanced circumstances only, these delimiters need changes; otherwise default should work.
Note: The Browse button will show a Connection Properties window when selected data source type is, ODBC Source or, OLEDB Source or, SQL Connection.
Note: If you receive any message other than "Connection Succeeded" like "Could not open connection" then make sure you made the right selection or provided the right options. If you are still not getting the "Connection Succeeded" message, check the log file. Go to Enable Advanced Logging for more details.