EX. To designate the wall-slab connection
To mesh the wall such that it is compatible with the slab mesh, use the following procedure.
- In the Analytical Modeling workflow bar, select Geometry. The Parametric Modeling dialog closes and the plate model is displayed.
-
On the
View ribbon tab, select the
Display Whole Structure tool in the
Tools group.

The standard view is restored, displaying the hidden portions to the view. - (Optional)
On the
Select ribbon tab, select the
All tool in the
Beams group.

-
On the
Geometry ribbon tab, select the
Wall/Slab Connection tool in the
Structure group.

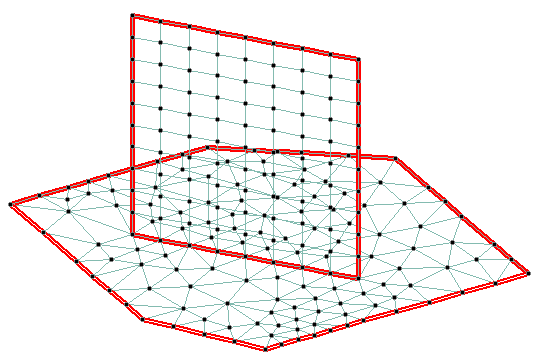
- Starting with the two nodes at the base, select the four corner nodes of the wall in a clockwise order, clicking on the first selected node a second time to complete the boundary definition. The Division along wall dialog opens.
- Click OK. The default value of 10 divisions is sufficient for this example.
- On the Utilities ribbon tab, select the tool I the Geometry Tools group. A message dialog opens indicating that no overlapping plates are found. This indicates also that the slab and wall are properly connected.