T.2 Copying Model Objects by Circular Repeat
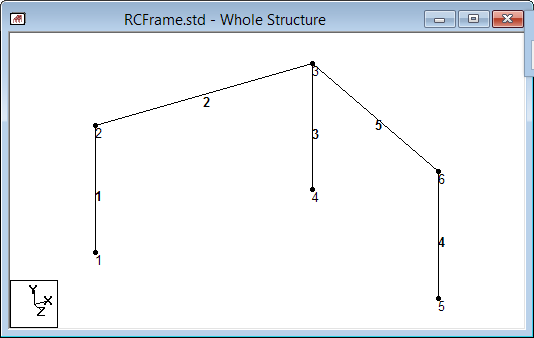
By examining the structure diagram for this tutorial exercise, you may have observed that members 4 and 5 can be easily generated if we could first create a copy of members 1 and 2 and then rotate those copied units about a vertical line passing through the point (6, 0, 0, that is, node 4) by 90 degrees. Fortunately, such a facility does exist which can be executed in a single step. It is called Circular Repeat and is available under the Geometry menu.
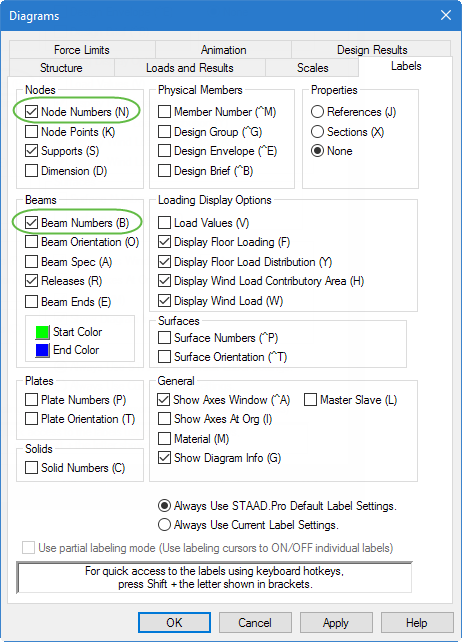
- Right click anywhere in the view window and select Labels from the pop-up menu.
- Set the Node Numbers and Beam Numbers on and then click OK.
- (Optional) You can change the font of the labels by selecting and then changing the corresponding label Font size in the Options dialog.
- Select the first column and beam for copying:
-
On the
Geometry ribbon tab, select the
Circular Repeat tool in the
Structure group.

The 3D Circular dialog opens. -
Specify the circular repeat details:
- Select Y as the Axis of Rotation.
-
Type
4 in the
Node field.
This is the node number through which the rotation axis will pass.
- Type 6 in the point X Coordinate field and type 0 in the point Z Coordinate field.
- Type 90 in the Total Angle field.
- Set the No of Steps value to 1.
- Clear the Link Steps, Geometry Only, and Use this as the Reference Point for the Beta angle generation options.
- Click OK.
- Click anywhere away from the members in the View window to deselect the members.