T.2 Creating Customized Reports
STAAD.Pro offers extensive report generation facilities.
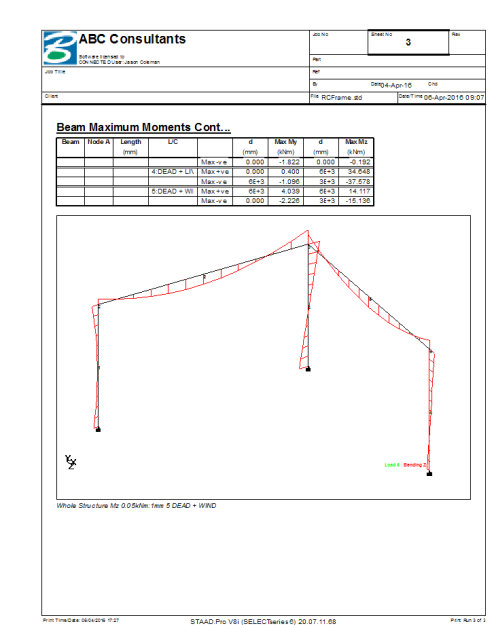
Items which can be incorporated into such reports include input information, numerical results, steel design results, etc. You can choose from among a select set of load cases, mode shapes, structural elements, etc. You can also include any picture of the screen taken using the Take Picture tool. Other customizable parameters include the font size, title block, headers, footers, etc.
- Open the Report Setup:
-
Add model Output to the report:
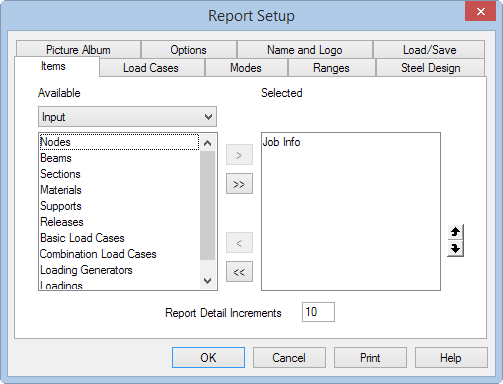
- Select Output from the drop-down list. The Available list displays output items.
- Double-click Node Displacement Summary in the Available list. This item is added to the Selected list.
- Double-click Beam Max Moments in the Available list. This item is added to the Selected list.
- Select Pictures from the drop-down list. The Available list displays the picture captured earlier in the tutorial.
- Double-click Picture 1. This item is added to the Selected list.
Leave the Report Detail Increments at 10. This is the number of segments into which a member is divided for sectional reports (i.e., displacements, forces, etc.).
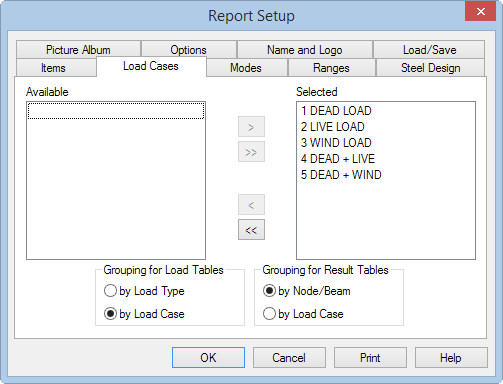
- Select the load cases to include in the report as well as how to order the results:
- (Optional) Select the Picture Album
-
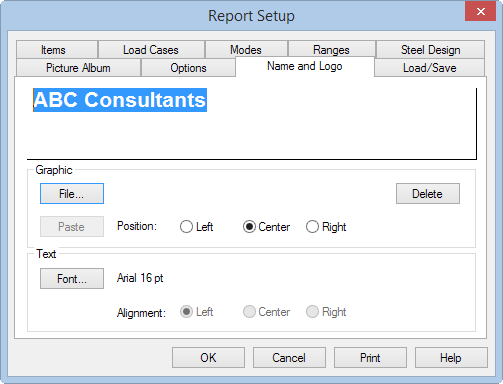
Customize the title block of your report with your organization's
information:
- Select the Name and Logo tab.
- Click in the empty text field and type the name and address of your organization.
- (Optional)
Click
File
Graphic
By default, the Bentley Systems, Inc. logo is used for STAAD.Pro reports.
- Click Font in the Text group. The Font dialog opens. You can select any Windows font, style, and size. Click OK when done.
- Click OK.
-
Select the
File ribbon tab and then select
.
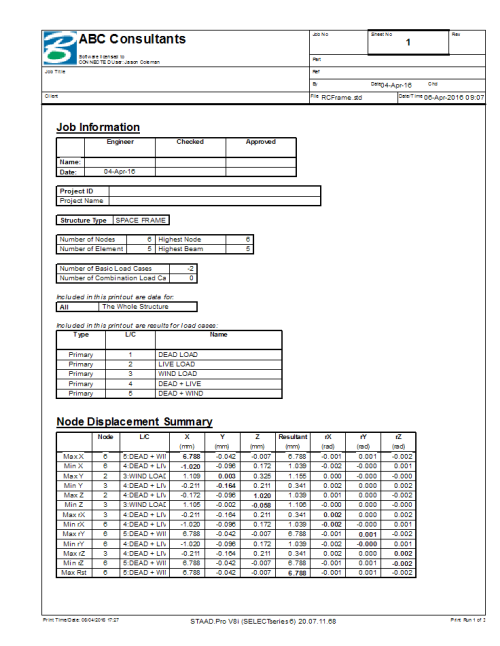
The Print Preview window opens with the report contents. Here you can review and print the report.
The first and the last pages of the report are shown in the next two figures.
- Click Close.