In order to create or edit 3D frames, any changes to plans must first be finalized.
-
In the 3D Frame workspace, select .
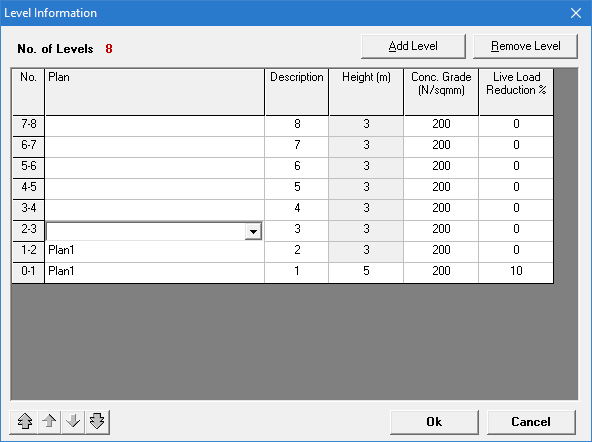
The Level Information dialog
opens.
-
Click Add Level to add another level and then click OK to confirm.
-
For each level, click in the Plan column to select a plan name from the drop-down list.
Tip: Use the autofill arrows below the table to copy the plan name to rows above or below a selected row, or to all rows above or below.
-
Click OK.
The 3D Frame is created.
- (Optional)
Select .