M. To Add a Column
To add a single column, use the following steps.
- In a plan workspace, select .
-
Click the nearest slab corner or edge where you want to place a column.
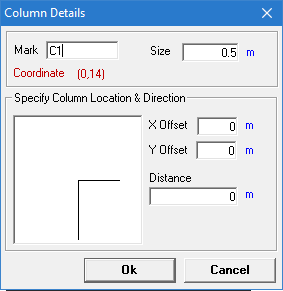
The nearest slab corner is highlighted with a red circle. The Column Details dialog opens.
-
Type column details:
- (Optional) Type a custom Mark
-
Type a face Size (square column).
All initial column sizes are assumed to be square. Columns can later be resized manually or designed.
- (Optional) Type an X Offset Y Offset The coordinates of the column are displayed for reference.
- (Optional) Type an Angle Distance
- Click OK. The column is drawn in dark blue on the graphical view.
- Repeat Steps 2 through 4 to continue placing columns.