T.3 Creating the Plates - Method 3
To create the plate elements using the Structure Wizard program, use the following steps.
A program installed with STAAD.Pro called Structure Wizard offers a library of pre-defined structure templates (also referred to as "prototypes"), such as Pratt Truss, Northlight Truss, Cylindrical Frame, etc. A surface entity such as a slab or wall, which can be defined using 3-noded or 4-noded plate elements, is one such template. You can also create your own library of structure prototypes. From this wizard, a structural model may parametrically be generated, and can then be incorporated into your main structure.
-
On the
Geometry ribbon tab, select the
Structure Wizard tool in the
Structure group.

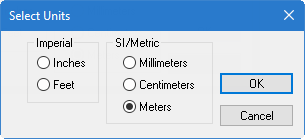
- The unit of length should be specified prior to the generation of a model.
- From the Model Type drop-down list, select Surface/Plate Models.
- Either:
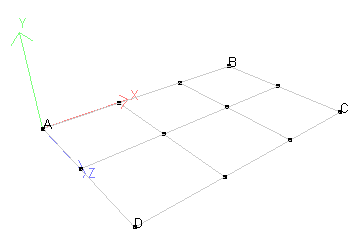
- Specify the meshing boundary corners and the individual element data as follows:
- Select . You are prompted to confirm that you want to transfer the model data with your STAAD.Pro model.
- Click Yes.
-
Click
OK.
In this tutorial, there is no existing model nor is there a need to shift the model from the origin.


If you want to proceed with assigning the remainder of the data, go to " T.3 Changing the input units of length ".