M. To Create a Beam
To add a single beam, use the following steps.
Note: The Auto Beam tool will delete any existing beams on the plan. You may want to use use the Auto Beam feature prior to drawing individual beams.
- In a plan workspace, select .
-
Select the start and end support points for the beam.
If beams are drawing over columns or existing beams, the new beam will be broken into separate objects once placed.
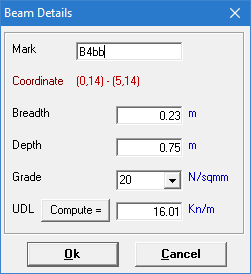
The nearest slab corners are highlighted with red circles. The Beam Details dialog opens.
-
Type the beam details:
- (Optional) Type a custom Mark
- Type a Breadth and Depth for the beam size.
- Select the Grade of material.
- (Optional)
To include the uniform dead load for the beam, type a value or click Compute
Beam Load
Note: If Compute is used, the Beam Load dialog opens with the specified beam dimensions. You can specify a material Density and include options for walls supported by the beam.

- Click OK. The beam is drawn in green on the graphical view.
- Repeat Steps 2 through 4 to continue placing beams.