EX. Create the model and plan details
- On the Start page, select New. The New page opens to the Model Info tab.
- Type Building Example in the File Name field and then select a Location to store the file.
- Select the Building option for the Type of model.
- Select Metric for the Units.
- (Optional) Select the Job Info tab to add project member names, dates, project description data, etc. You can also associate your STAAD project with a ProjectWise Project here.
-
Click
Create.

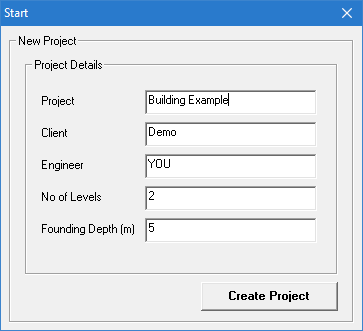
The STAAD.Pro window closes and the STAAD Building Planner application opens. The Start dialog opens. - Provide the project details:
- Click Create Project. The New Plan dialog opens.
-
Enter in the plan details and assign it to the levels:
- Type 4 (m) in the Height of Level Above field.
- Click in the Assign Levels drop-down list and then click in the fields for both levels 1 and 2 such that Plan1 is displayed there. This action assigns the typical plan to both levels.
- In the Import Plan group, select the Create Plan Graphically option. You will use the graphical interface to create a simple plan in this tutorial.
- Click Create Plan. The Slab Details (Rectangle) dialog opens.