EX. Create the model and plan details
- スタートページで「New」を選択します。 「New」ページが開き、「Model Info」タブが表示されます。
- Type Building Example in the File Name field and then select a Location to store the file.
- モデルの「Type」の「Building」オプションを選択します。
- Select Metric for the Units.
- (Optional) 「Job Info」タブを選択して、プロジェクトメンバー名、日付、プロジェクト説明データなどを追加します。 ここでSTAADプロジェクトをProjectWiseプロジェクトに関連付けることもできます。
-
「Create」をクリックします。

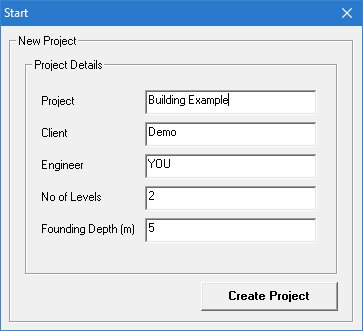
STAAD.Proウィンドウが閉じ、STAAD Building Plannerアプリケーションが開きます。「Start」ダイアログボックスが開きます。 - Provide the project details:
- Click Create Project. The New Plan dialog opens.
-
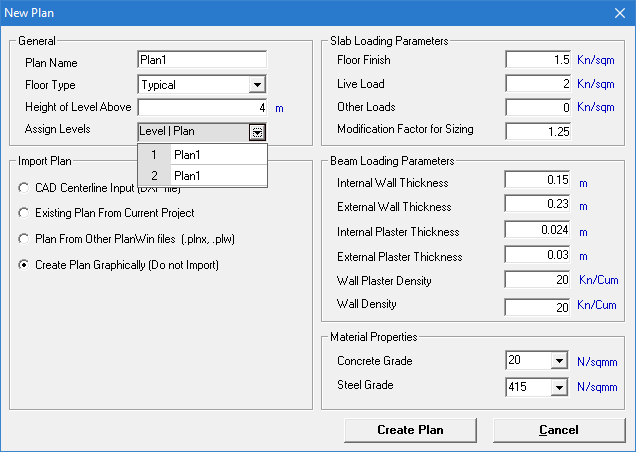
Enter in the plan details and assign it to the levels:
- Type 4 (m) in the Height of Level Above field.
- Click in the Assign Levels drop-down list and then click in the fields for both levels 1 and 2 such that Plan1 is displayed there. This action assigns the typical plan to both levels.
- In the Import Plan group, select the Create Plan Graphically option. You will use the graphical interface to create a simple plan in this tutorial.
- Click Create Plan. The Slab Details (Rectangle) dialog opens.