T.3 Specifying load groups 1 and 2
-
On the
Spreadsheet ribbon tab, select the
Load Cases tool in the
References group.

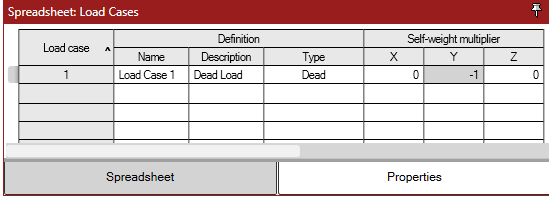
The Load Cases spreadsheet opens. - For Load 1:
- Create a load group for the external pressure load: The new load group is created and selected as the active load group.
-
On the
Surface Tools ribbon tab, select the
Pressure tool in the
Loads group.

The Add Surface Uniform Pressure dialog opens. -
Specify the pressure load:
- Type -300 kg/m2 in the Pressure field.
-
Select
Global Y as the
Direction.
Tip: Since the surface is parallel to the XZ plane, you could also have selected local 3 as to achieve the same direction. However, due to the counterclockwise selection of nodes, the local 3 axis is oriented in the opposite direction of the Global Y. Therefore, you would use a positive magnitude for that case.
- Click OK.