T.3 Create primary load cases
-
In
STAAD.Pro, select the
Loading page in the
Analytical Modeling page control bar.
The Loading ribbon tab is selected and the Load & Definition dialog opens.
-
On the
Loading ribbon tab, select the
Primary Load Case tool in the
Loading Specifications group.

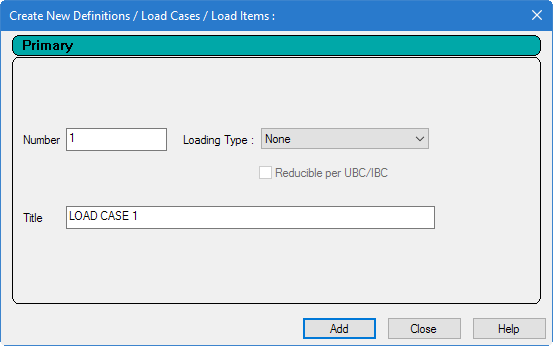
The Add New: Load Cases dialog opens. -
Create a pair of primary load cases:
-
Type
Dead Load as the
Title for Load Case 1.
Leave the Number as the default (1) and leave the Loading Type as None.
- Click Add. Note that the dialog stays open but the load case number is automatically incremented.
-
Type
External Pressure Load as the
Title.
Again, it is not necessary to select a Loading Type.
- Click Add.
- Click Close.
-
Type
Dead Load as the
Title for Load Case 1.
-
Assign the reference loads to the primary load cases:
-
On the
Loading ribbon tab, select
the
Load Items tool in the
Loading Specifications group.

The Add New Load Items dialog opens. - Select the tab on the left.
- Select R1: "Load group 1" in the Available Load Cases list.
- Click >. The reference load case is added to the selected loads list.
- Click Add.
- Click Close.
-
On the
Loading ribbon tab, select
the
Load Items tool in the
Loading Specifications group.
- In the window status bar, select 2: External Pressure Load as the current load case.
- Repeat Step 4 to add the reference load for Load group 2 to the External Pressure Load primary load case.