Assign Section Cuts
There are two ways to assign section cuts to a wall design group: automatic generation or manual assignment.
We'll start with automatically generating section cuts.

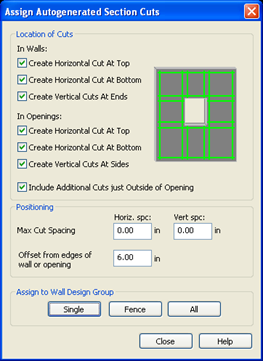
The Assign Autogenerated Section Cuts dialog will open with the following defaults. Note that the "Max Cut Spacing" of 0.0 results in the greatest possible spacing between cuts.
- Click [Single]
- Click the target cursor Wall Design Group 1. Notice how the section cuts are generated around the wall opening per the selected criteria.
- Right click to return to the dialog
- Click [Single]
- Click the target cursor on Wall Design Group 2.
Now we will manually add section cuts to Wall Design Group 3. To assign section cuts manually, you must be in elevation view. You can select elevation view before issuing the add command or, if you issue the command first, you will be prompted to do so.
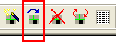
- Select the Elevation View toolbar button
- Click the target cursor on the wall in Wall Design Group 3.
- Select
Before the dialog opens, you must draw a line through your wall using the mini-target cursor at the approximate location of where you want your section cut.
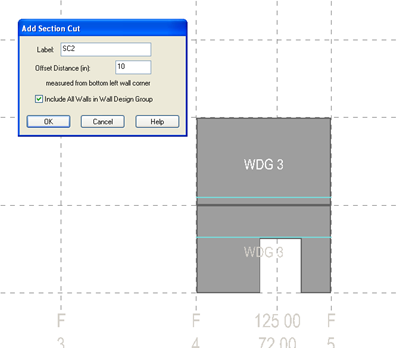
When you release the mouse, the Add Section Cut dialog will open.
- Adjust the value in the Offset Distance edit box to 100.00 inches (2550 mm).
- Click [OK].
- Add another to the upper wall at 10 inches.
If there were multiple walls in this wall design group, checking the "Include All Wall in Wall Design Group" would result in the section cut being assigned to all walls, even if they are out of plane of the originally selected wall.