Story Data
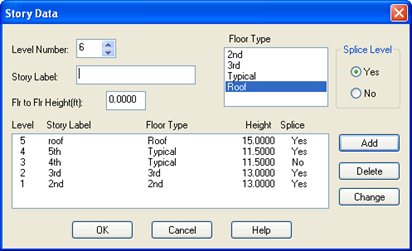
With all of the floor types defined, you can now designate the arrangement of these floor types in the building. This is called the story data:
- Select Story.
- Type 2nd for Story Label.
- Type 13 (4.25) for Flr to Flr Height.
- Highlight 2nd in the Floor Type list box.
- Select Yes for Splice Level.
- Click [Add].
- Type 3rd for Story Label.
- Type 13 (4.25) for Flr to Flr Height.
- Highlight 3rd in the Floor Type list box.
- Select Yes for Splice Level.
- Click [Add].
- Type 4th for Story Label.
- Type 11.5 (3.75) for Flr to Flr Height.
- Highlight Typical in the Floor Type list box.
- Select No for Splice Level.
- Click [Add].
- Type 5th for Story Label.
- Type 11.5 for Flr to Flr Height.
- Highlight Typical in the Floor Type list box.
- Select yes for Splice Level.
- Click [Add].
- Type Roof for Story Label.
- Type 15 (4.75) for Flr to Flr Height.
- Highlight Roof in the Floor Type list box.
- Select Yes for Splice Level. (the splice above the top level does not matter)
- Click [Add].
- If your data appears like the figure above Click [OK], otherwise highlight the incorrect level, modify the required settings and click [Change].
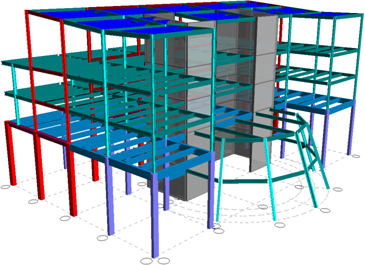
A full 3-D model of your structure has now been developed, albeit not quite complete. To view your 3D model:
- Select .
You should now see a 3D view of your model. Feel free to investigate some of the features in the 3D Viewer.
- Press the arrow keys on the keyboard to rotate the model or hold down Ctrl and move the mouse to rotate.
- Press the F2 function key to see other keyboard shortcuts.
- To exit 3-D View and return to Plan View, select .