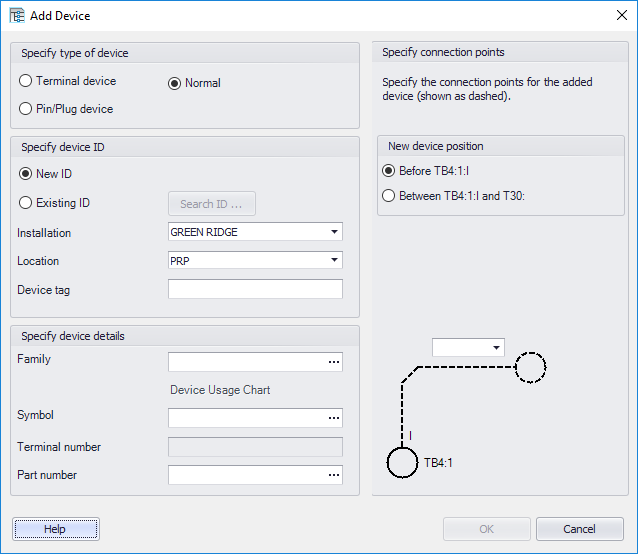
| Select Type of Device
|
Select the type of device to insert:
- Terminal device
- Pin/Plug device
- Normal
|
| Specify Device ID
|
Select the radio button to determine whether you
will use a New ID or an
Existing ID for the terminal or pin/plug.
- New ID: Enter its
device tag in the
Device Tag field and select the
desired installation and location.
- Existing ID: The
Search dialog will appear, allowing
user to select one of the available terminal or pin/plug IDs. Select the
desired ID in the Search dialog followed by
OK. The selected ID will appear grayed
out in the
Insert Device dialog.
- Installation: Select
an Installation from the drop down list.
- Location: Select a
Location from the drop down list.
- Device Tag: Enter a
Device Tag into the field.
|
| Family (Optional)
|
If using a new ID, user can select a device family
for the new group in the
Family field. When a family is selected,
the user will be prompted to pick a role in the device usage chart which will
automatically populate the symbol name.
|
| Symbol
|
Select a symbol for the new group. Use the
Browse button to display the
Select Symbol dialog.
|
| Terminal No.
|
Enter a terminal or pin number. When using an
existing device tag, user will be prompted automatically with the first
available terminal number.
|
| CP Text
|
Select the connection point for the new group.
|
| Part Number (Optional)
|
Select a part number for the new group.
|
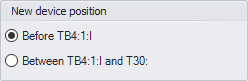
| Specify Connect Points
|
When adding a new device into a potential, the type
of device to add is defined on the left side of the dialog. Once the symbol has
been determined, the fight side of the dialog lets the user determine where the
new device will be inserted into the potential. Select one of the options for
the New Device Position:
In the lower right image the user can then select
from the pull-down the connection point to connect this new device to. The
choices in the pull-down are driven by the symbol you selected on the left side
of the dialog or by the family role if the user picked a family.
|
 Used to create a potential group
with an existing unused terminal/plug connection point or add a new
terminal/plug within the
Wiring Manager.
Used to create a potential group
with an existing unused terminal/plug connection point or add a new
terminal/plug within the
Wiring Manager.