Managing Roles and Assigning Permissions
Like other Bentley cloud services, ProjectWise Web uses Bentley's role-based access control system (commonly referred to as RBAC for short). With role-based access control, project team members inherit their permissions through the role that is assigned to them. You can either set permissions for a role and then assign that role to a team member, or you can assign a team member to a role and then set the permissions for that role. Team members can be assigned more than one role.
You can assign permissions using just enterprise roles (a role that can be used for all projects in your organization), just project roles (a role that only exists in a specific project), or a mix of both enterprise roles and project roles.
Assign permissions to an enterprise role
- Go to the CONNECT Center (https://connect.bentley.com) and enter the Enterprise Portal for your organization (click your organization's name at the top of the page).
- Click the Roles and Permissions tile.
- On the
Enterprise Team Management page, click
Define Roles.
This takes you to the Enterprise Role Management page.
- (Optional) If needed,
create a new, custom enterprise role.
To create a custom enterprise role, click the New Role button, optionally select an existing role to use a Template for the new role, enter a Role Name, and click Save. You can also just select an existing enterprise role or custom enterprise role from the list and then click Save As to create a new role using the selected role as a template.
- On the left, under Enterprise Roles or Custom Enterprise Roles, select the role you want to assign permissions to.
- On the right, under Service Access and Permissions, expand a service and then turn on the permission or permissions you want this role to have for that service.
- Click Save.
- After setting role permissions, make sure that the team members who need these permissions have this role assigned to them.

Assign permissions to a project role
- Go to the CONNECT Center (https://connect.bentley.com) and enter the Project Portal for your project (click the project's name under ProjectWise Projects).
- Under Team Members, click Manage Members.
- On the
Project Team Management page, click
Manage Roles.
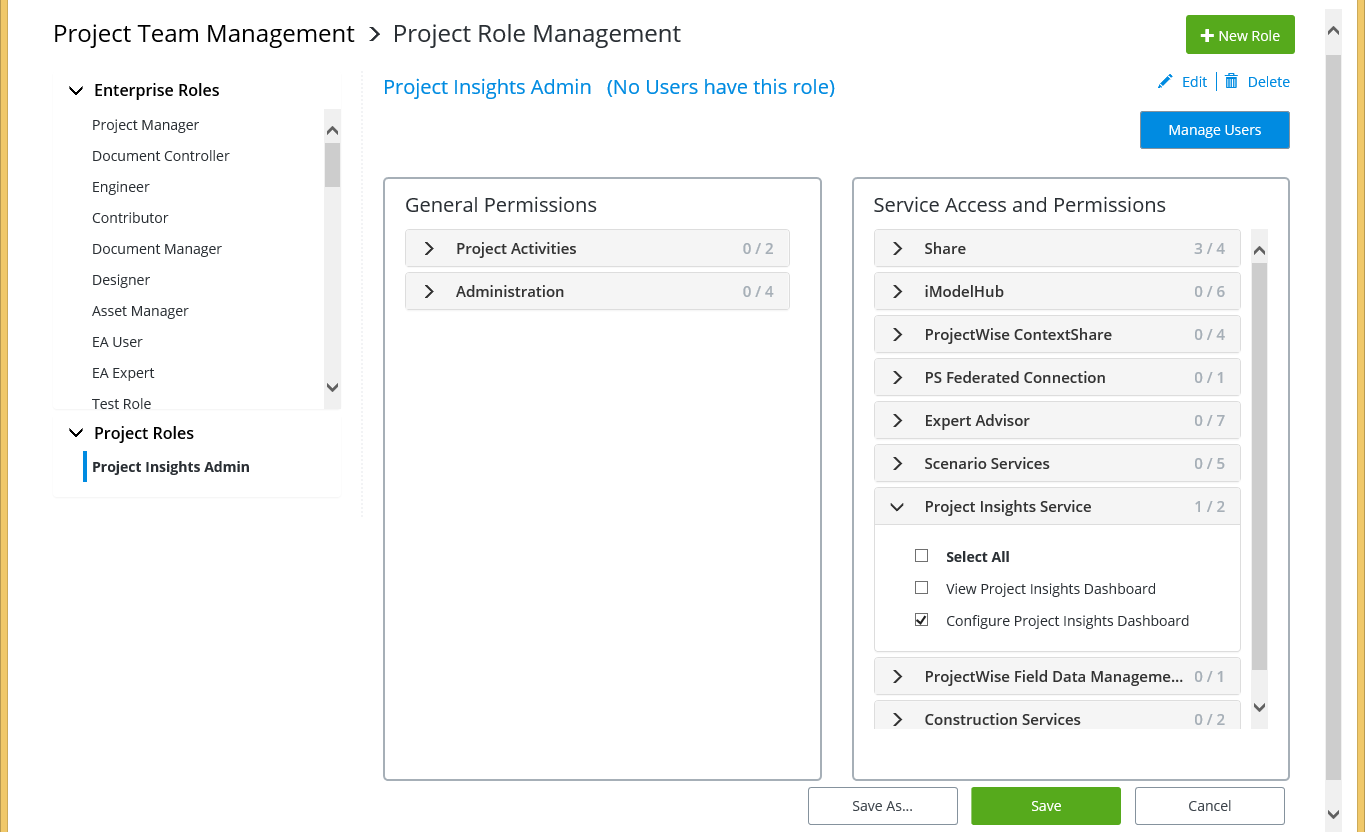
This takes you to the Project Role Management page.
- (Optional) If needed,
create a new project role.
To create a project role, click the New Role button, optionally select an existing role to use a Template for the new role, enter a Role Name, and click Save. You can also just select any existing enterprise, custom enterprise, or project role from the list and then click Save As to create a new role using the selected role as a template.
- Under Project Roles, select the role you want to assign permissions to.
- Under Service Access and Permissions, expand a service and turn on the permissions you want this role to have for that service.
- Click Save.
- After setting role permissions, make sure that the team members who need those permissions have this role assigned to them.