Manually Adding Internal Users to the Project
You can manually add internal users to the project from the Manage Project Team Members page, either by adding them one at a time, or by uploading a CSV file containing a list of users (email addresses) with pre-assigned roles.
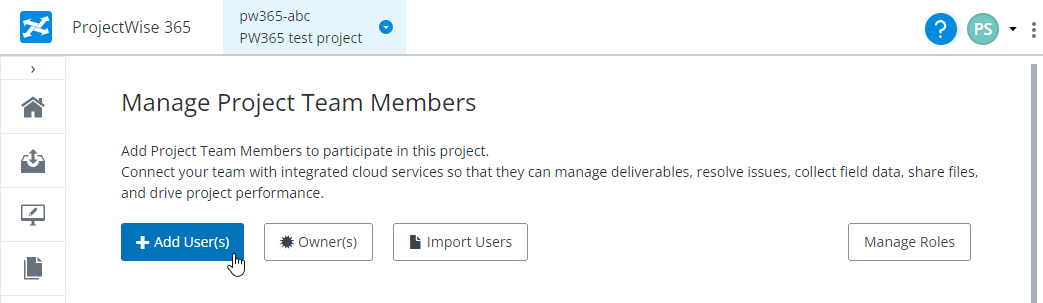
Manually adding one or more users to the project team
- Go to the
Manage Project Team Members page of your
project.
(To get there, click the Administration icon
 to go to the
Administration page, then click
Manage your team.)
to go to the
Administration page, then click
Manage your team.)
- Click
Add User(s).
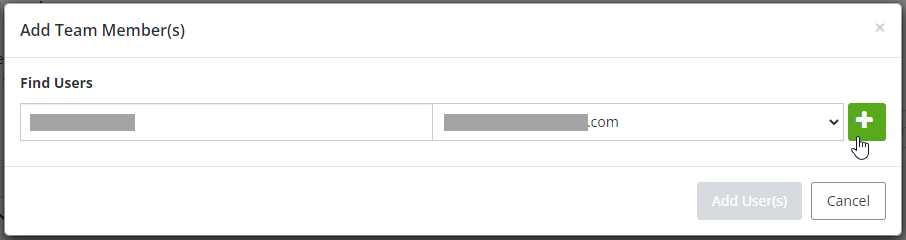
The Add Team Members dialog opens.
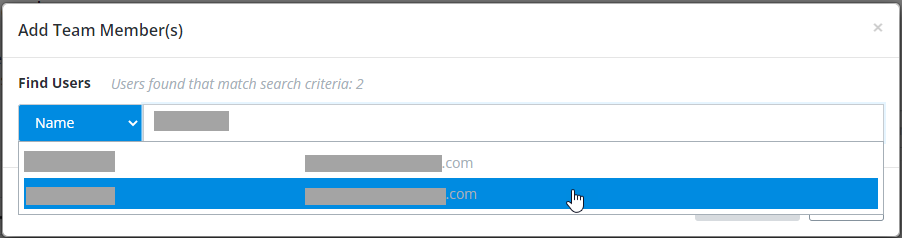
- Select the user or users
from your organization you want to add.
- Set the search field to Find Users by Name (default) or Email, enter the name or email address of the person you are looking for, and select that user from the results list.
- Click the
+ button next to the user's name.
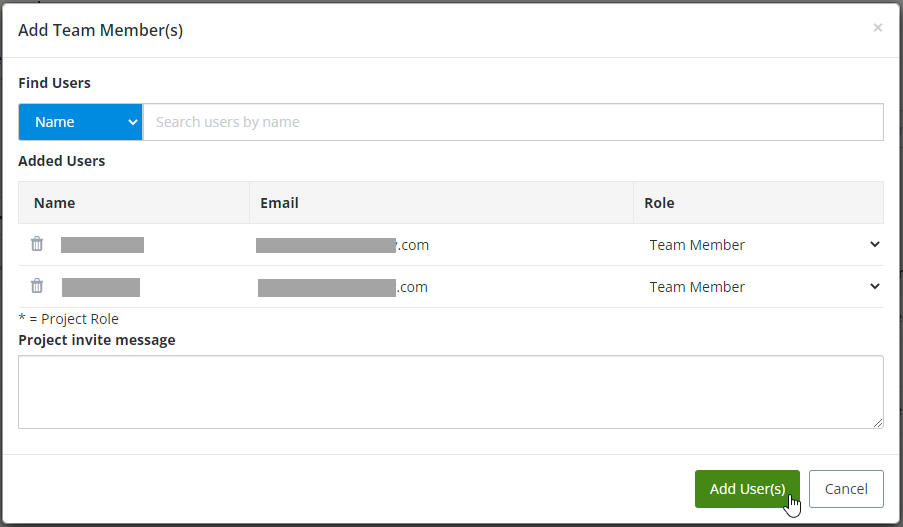
The user is added to the list of users to be added.
- Repeat these steps to add more users to the list.
- Set the
Role for each user as needed.
The Role is set to Team Member by default for each user. You can leave the default role set or change it for any user if needed.
- (Optional) In the Project invite message field, enter a personal message that will be included in the project invitation email that will be sent to all of the selected users.
- Click
Add User(s).
The selected users are added to the project, and each user is sent a project invitation email with a link to the project.

Importing a list of users with pre-assigned roles
You can also add internal users to the project by configuring and uploading a CSV (comma separated values) file that contains a list of all the internal users you want to add, and the additional role or roles you want to be assigned to each user. All users that get added to the project through this uploaded CSV file will automatically be assigned the Team Member role, so you only need to specify a role here if you want to pre-assign additional roles to a user.
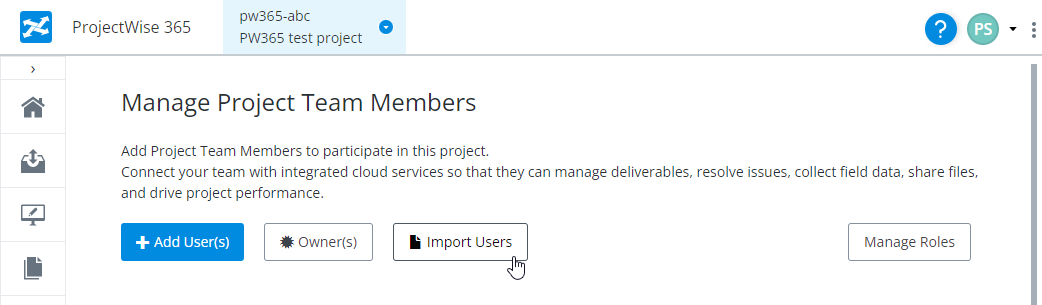
- On the
Manage Project Team Members page, click
Import Users.
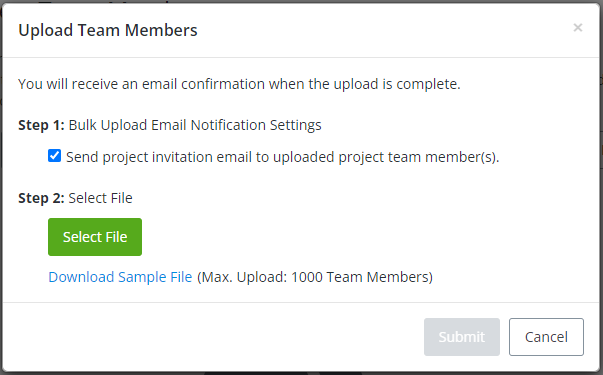
The Upload Team Members dialog opens.
- The option to send a project invitation email to each user that gets added is on by default. The project invitation email contains a link to the project, so it is recommended to leave this option turned on.
- Click
Download Sample File, then open the downloaded
sample CSV (comma separated value) file in a text editor and add the users (up
to 1000) you want to import.
At the top of the file is the header row Email,Role. Do not delete this row!
Below the header row, add each user on a new line.
All users that get added to the project through this uploaded CSV file will automatically be assigned the Team Member role, so the only requirement here is that you enter the user's email address (if the user already has a Bentley IMS account, enter the email address that is associated to their Bentley IMS account). You only need to specify a role here if you want to pre-assign one or more additional roles to the user.
If you want to pre-assign one or more additional roles to the user, the format (as implied by the header row) is either <email>,<role> or <email>,<role>,<role> (you need to enter a comma between the email and the role, and also between each role).
For example:
Email,Role
Jim.Bob@mainlinator.com
Mary.Jane@mainlinator.com,Project Administrator
Sue.Smith@mainlinator.com
Bill.Jones@mainlinator.com
Save and close the file when finished.
- Back in the Upload Team Members dialog, click Select File and select the CSV file you just configured and then click Submit.