To Install ProjectWise Caching Server
-
Download
ProjectWise Server Setups
(https://softwaredownloads.bentley.com/en/ProductDetails/2547)
and run the installer (Setup_ProjectWise_Serverx64_<version>.exe).
-
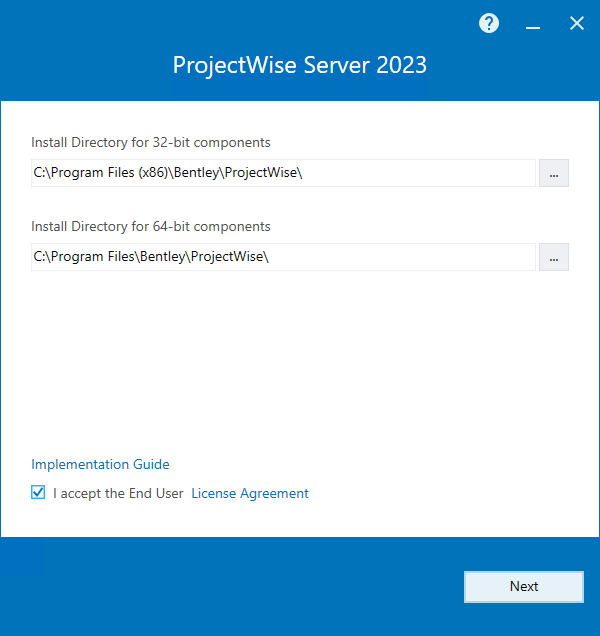
When the
installer opens, accept the license agreement, change the installation location
if needed (if possible), and click
Next.
The default installation location is C:\Program Files\Bentley\ProjectWise.
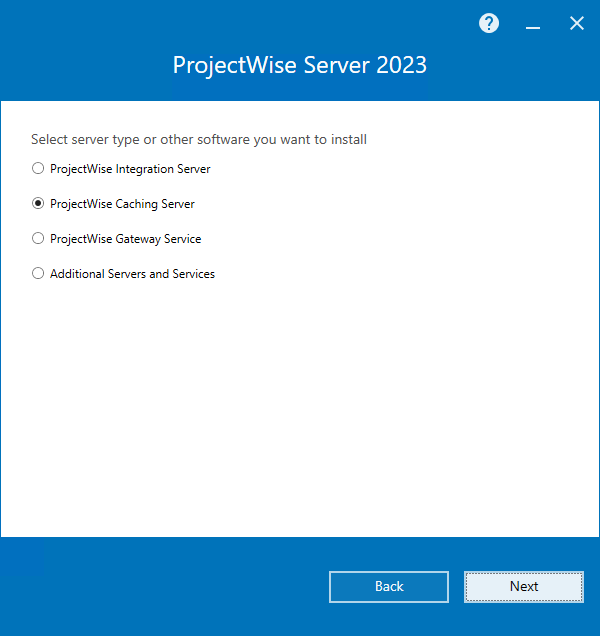
- On the Server server type page, select ProjectWise Caching Server and click Next.
- On the Select feature to install page, click Next.
-
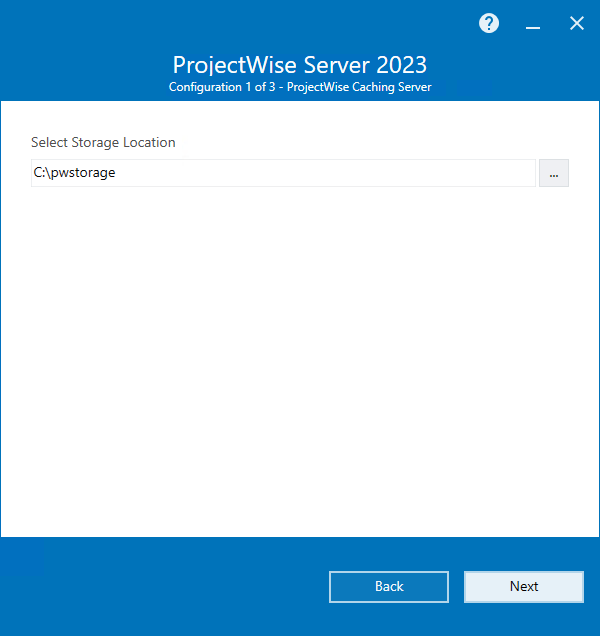
On the
Select Storage Location page, specify the
physical location on this computer (either manually enter the folder path or
browse for the folder you want) under which storage areas hosted by this server
can be created, then click
Next.
The location you specify is added to this server's DMSKRNL.CFG file under the section labeled, "Section defines allowable locations for storage areas". For example:
; -------------------------------------------------------------
; Section defines allowable locations for storage areas
; -------------------------------------------------------------

[FileStorageService]
StorageLocation0=E:\pwstorage
When you eventually create your storage areas for this server in ProjectWise Administrator, you will only be able to create a storage area if the location you select is somewhere within the allowable storage location.
-
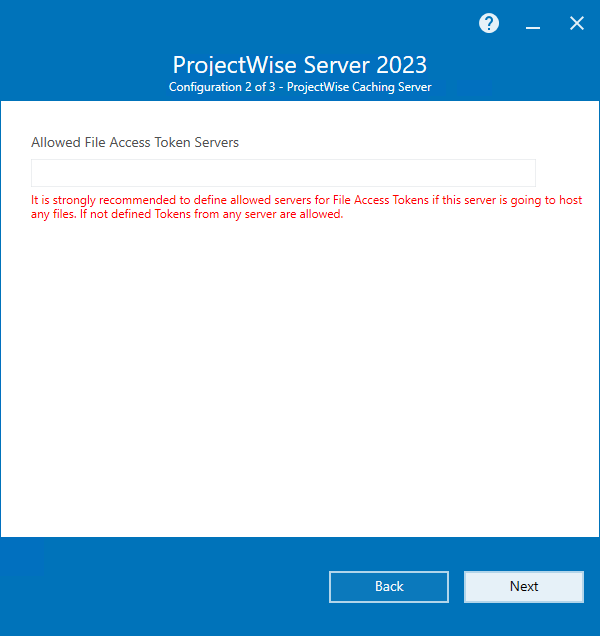
On the
Allowed File Access Token Servers page,
(recommended) define the list of allowed file access token servers and click
Next.
Note: This field is used to specify which ProjectWise Intergation Servers the ProjectWise Caching Server is allowed to accept file access tokens from, when a user tries to access a file that exists in a storage area that is being managed by the ProjectWise Caching Server. The servers you specify here are added to the FileAccessTokenServers setting in the DMSKRNL.CFG file. You can skip this page now and manually add the required servers to the DMSKRNL.CFG file after installation, but either way you MUST configure this setting if this ProjectWise Caching Server is going to manage storage areas.
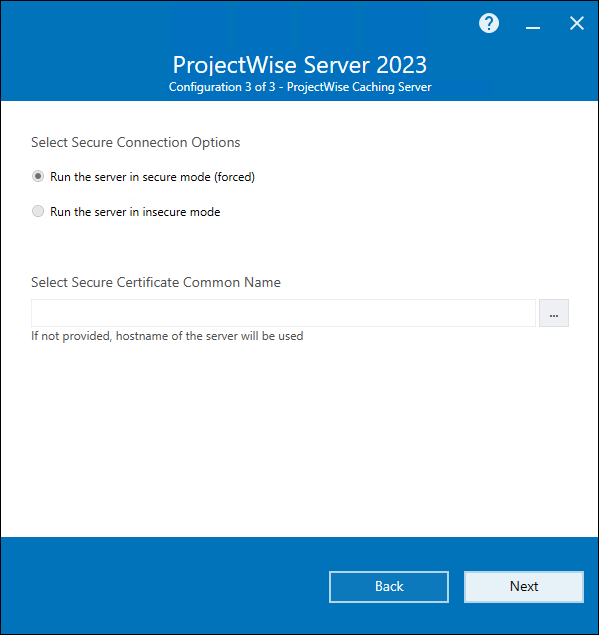
- On the Select Secure Connection Options page, Run the server in secure mode is pre-selected and cannot be change. Click the browse button (...) to select a certificate or leave the certificate field empty to use the hostname of the computer, then click Next.
- On the Pre-installation summary page, review your selections, make any last minute changes if necessary, then click Install.
- When installation is complete, click Finish.
- When the Bentley Login Client window opens, sign in with your Bentley IMS account.
- After installation, manually start the ProjectWise Caching Server in the Services window.