Working with Workflows and States
A workflow is an ordered group of milestones called states, through which a document passes on its way to completion. Workflows are created in ProjectWise Administrator and can be assigned to folders and work areas as needed in ProjectWise Explorer. Access control security settings can be applied to a workflow, and to each state in a workflow, so that only certain users have access to a document when it is in a particular state.
When a workflow is first assigned to a folder or work area, the documents in that folder or work area are placed in the first state of the workflow. When a document completes its first milestone, the user moves the document to the next state in the workflow. Users with access to that next state can then begin working on the document. The process continues until the document passes through all states in the workflow and is considered to be finished. Users with appropriate permissions and user settings can then mark the document as Final (also referred to placing the document in final status) to indicate that the document has reached the end of the workflow. Documents that are marked as Final are read-only, to prevent anyone, regardless of permissions, from further modifying the document. Users with appropriate permissions can also remove final status from a document if needed.
To change a document's state, your user setting must be on, and both your Write and Change Workflow State permissions must be on for that document.
To set final status on a document, your user setting must be on, and your Change Workflow State permission must be on for that document. To remove final status, your user setting must be on, and your Change Workflow State permission must be on for that document.
Assign a workflow to a folder
- Select a folder or work area.
- Select .
- On the Properties dialog,
select the
Workflow & State tab.
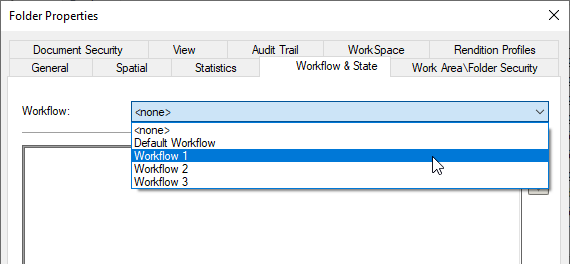
The Workflow list contains all the workflows defined in the datasource. When you select a folder or work area that does not have a workflow assigned to it, the Workflow list is set to <none>, and the states list below it is empty. If a workflow has already been assigned to the folder or work area, the name of the workflow displays and the states list below it displays all of the states in the workflow.
- From the
Workflow list, select a workflow.
A message appears, asking you to confirm that you want to change the workflow of the folder or work area.
- Click
OK.
The selected workflow is assigned to the folder or work area, and all documents at the root of the folder or work area are placed into the first state of the workflow. Existing subfolders or sub-work areas do not inherit the workflow assigned to their parent folder or work area, however new folders or work areas you create will automatically be assigned the same workflow as its parent folder or work area.
- Click OK.
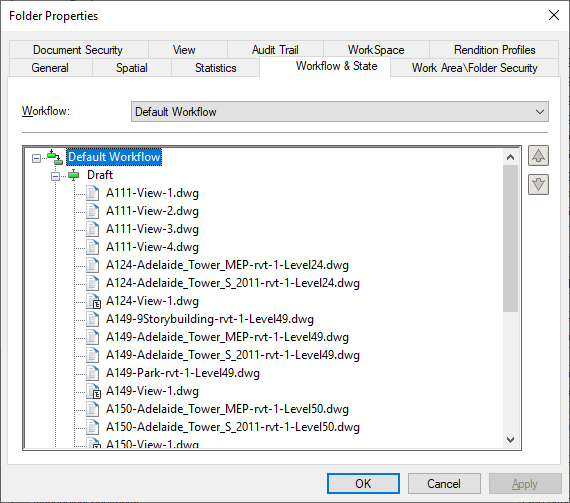
Change the state of documents using the Folder Properties dialog
- In the Folder Properties dialog, select the Workflow & State tab.
- In the list, expand the state containing the document or documents whose state you want to change.
- Drag one or more
documents to another state.
You can also select one or more documents, then click the Down or Up button as many times as needed to move the document to another state of the workflow.
- If the audit trail Comments dialog opens, enter comments and click OK.
- Click OK on the Folder Properties dialog.
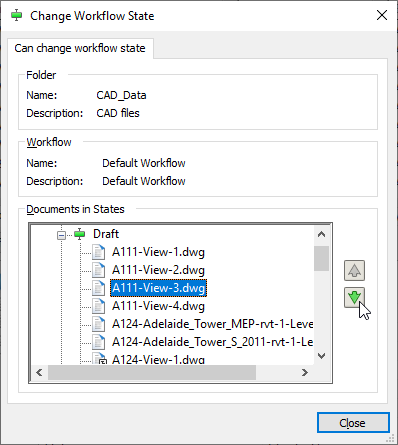
Change the state of documents using the Change Workflow State dialog
- Select a document.
- Select
Document > Change State > Change.
The Change Workflow State dialog opens, with the selected document highlighted in its current state in the workflow. You can select additional documents, or you can select different documents to move altogether.
- (Optional) Select or deselect documents as needed.
- Drag the selected
documents to another state.
You can also click the Down or Up button as many times as needed to move the selected documents to another state of the workflow.
The selected documents are moved to the selected state, and the new state opens to display the list of documents now in that state.
- If the audit trail Comments dialog opens, enter comments and click OK.
- Click Close on the Change Workflow State dialog.
Mark a document as final (place document in final status)
- Select one or more documents.
- Select .
- If the Set Final Status audit trail dialog opens, enter comments and click OK.
The document is marked as Final and the document's icon is changed to indicate that.
Using workflow rules
Workflow rules are used to define what should happen to a document in a particular workflow state when a specific operation is selected on the menu in ProjectWise Explorer.
Normally, a workflow is assigned to a folder and users change the states of documents as needed by selecting the standard Next, Previous, and Change options on the menu. When workflow rules are in place, the standard Next, Previous, and Change options are disabled, and instead the user has new options or operations to select from on the menu. The selected operation triggers a rule, which is a defined set of actions configured to run in a specific, sequential order. As a simple example, when a document is in a particular state in a particular workflow, the 'Revise' operation might be configured to 'place this document in a specific state of the workflow' AND 'create a new version'.
Workflow rules are imported through the Rules Engine node in ProjectWise Administrator. Any user who has the Workflow Rules Engine extension installed (an option of your ProjectWise Explorer installation) will be able to use the rules, assuming they also have access to the workflows that are using the rules.