Importing Exported Datasource Data
You can import exported datasource data into either an existing datasource, or a new and empty datasource. Generally, you will use the Import Wizard to set up a new datasource. Importing into an existing datasource must be done with great care, since it is possible to corrupt the database and render it unusable. Only experienced users, who understand the basic structure of both the database itself and that of ProjectWise, should attempt this operation. A full backup of both the database and the document storage area should be made before attempting this operation. This ensures that they can be restored should a user error occur.
To import data into a new datasource, you must first create the database as usual, and then open ProjectWise Administrator and create a new datasource. This creates the basic tables in the database and ensures that these tables are updated to the current version of ProjectWise. If you exported environments using the Export Wizard, there is no need to create environments, since the import wizard recreates them.
To Import Exported Datasource Data Using the ProjectWise Import Wizard
-
Open the ProjectWise Import Wizard:
- On Windows 8 or later /
Windows Server 2012 or later:
Go to the Start page and type Import from AAM File Wizard, or go to and click Import from AAM File Wizard.
- On Windows 7 / Windows
Server 2008:
Select .
You can also open the wizard from the command line, by navigating to the location of the PWIMPT.EXE file and entering pwimpt (currently only the 32-bit version works).
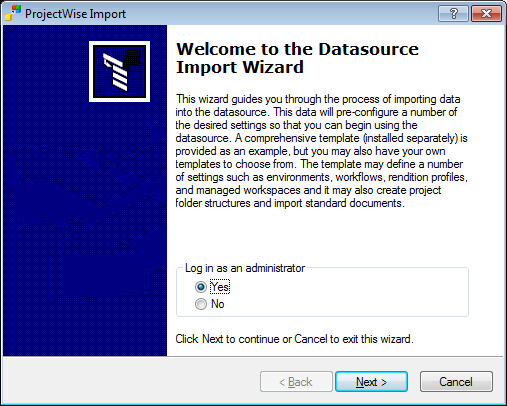
This first page asks whether you want to log in as an administrator or not. This is because an administrator log in is required when importing environments. If you want to import environments, then you must select Yes here, and the user name and password you specify after clicking Next must be a member of the Administrator group in ProjectWise (a member of the Restricted Administrator group will not work in this case). If you are not importing environments, then you can select No here, and the user name and password you specify after clicking Next can be any ProjectWise user (even an administrator).
- On Windows 8 or later /
Windows Server 2012 or later:
- Select Yes or No as needed, then click Next.
- When the ProjectWise Log in dialog opens, select the datasource to import data into, enter a valid user name and password for it (Password is case sensitive, User Name is not), and click Log in.
-
On the
Define the import settings page, do the
following:
-
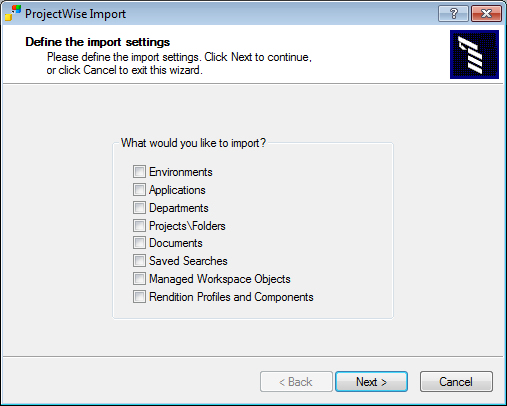
Select the items you want to import.
If you turn off Applications and/or Departments but there are application names and department names found in the script file you are importing from, the Import Wizard will try to map the application names and/or department names encountered in the script file with those existing in the datasource. If the application name does not exist in the datasource, the document can be imported without it.
If your datasource already contains the required hierarchy, you do not need to import work areas and folders, they are mapped for you.
-
Click
Next.
-
Select the items you want to import.
-
On the next
Define the import settings page, do the
following:
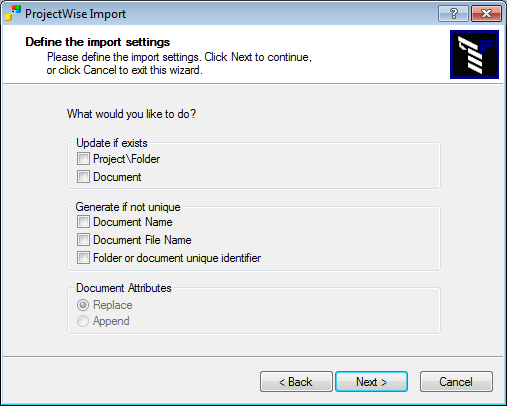
- — if on, existing work areas or folders in the datasource are updated with the properties from work areas or folders of the same name in the script file.
- — if on, existing documents in the datasource are updated with the imported document. If not selected, they are either not imported, if the options in the Generate if not unique are not selected, or renamed if these options are. If during the import process the import tool finds a document in your datasource with the same name as one in the script file, but their properties differ. The properties of the document contained in the datasource are updated to that contained in the script file.
- — if selected and the Document option in the Update if exists section is not selected, the document is renamed if it already exists in the target folder. If during the import process the import tool encounters documents with the same name in the datasource and the script file, as these must be unique, it generates a new document name.
- — if selected and the Document option in the Update if exists section is not selected, the document file is renamed if it already exists in the target folder. If during the import process the import tool encounters documents with the same file name in the datasource and the script file, as these must be unique, it generates a new document file name
- — If off, exported unique identifiers (GUIDs) of documents and folders are used; if on, new unique identifiers are generated
- — if selected, the attributes of any existing documents are replaced with those of the imported document. If during the import process the import tool updates an existing document, the updated document's attributes are replaced by those from the script file.
- — if selected, the attributes of the imported documents are appended to those of the existing document. If during the import process the import tool updates an existing document, the document's attributes from the script file are added to those of the updated document from the datasource.
-
Click
Next.
-
On the next
Define the import settings page, do the
following:
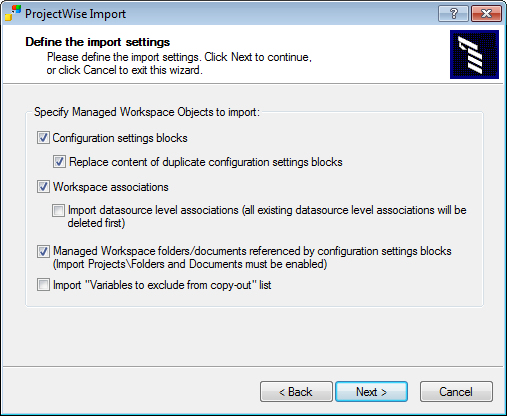
- Turn on Configuration settings blocks if you want to import them.
- Turn on Replace content of duplicate configuration settings blocks if you want to keep your original configuration settings blocks, and just replace their content with that of any incoming duplicate configuration settings blocks. It is a replace and not an overwrite, so that the original configuration settings block is able to keep its associations. When this option is off, duplicate configuration settings blocks are skipped on import. This option is disabled if the option above to import configuration settings blocks is off.
- Turn on Workspace associations if you want the import to reassign configuration settings block associations to the appropriate folders, documents, and applications. The associations will be imported even if the related configuration settings blocks are not imported.
- Turn on Import datasource level associations if you want to import them into the datasource. These associations are included in the export if there were datasource level associations on the exported datasource, and if any folders were exported along with workspace associations. This option is disabled if the option above to import workspace associations is off.
- Turn on Managed Workspace folders/documents referenced by configuration settings blocks if you want to import the work areas, folders, and documents referenced by any of the configuration settings blocks that are being imported. Note that this option does not import any associations. This option is disabled if the Work Area\Folder and Document import options were turned off on the first Define the import settings page of this wizard.
- Turn on Import Variables to exclude from copy-out list if you want to import those variables.
-
Click
Next.
-
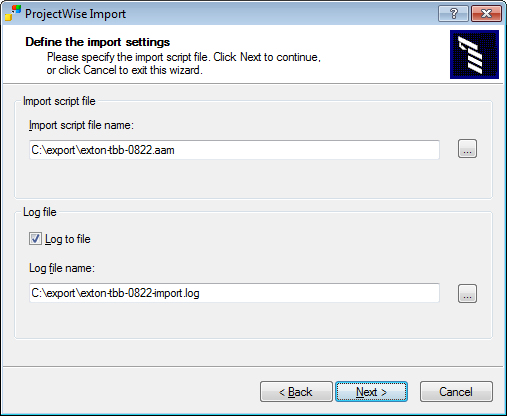
On the last
Define the import settings page, do the
following:
- In the Import script file name field, type the path to and name of the script file that will be imported. For example, C:\export\pwtest.aam. You can also click the Browse (...) button to select the script file.
- Turn on Log to file, and in the field below, type the path to and name of a log file that will be created. You can also click the Browse button (...) to select an existing log file.
-
Click
Next.
-
On the next
Define the import settings page, do the
following:
Note: The controls on this page are disabled if the Work Area\Folder and Document import options were turned off on the first Define the import settings page of this wizard.
-
In the left window, select an exported folder or
work area, or select
Manually exported folders if you want to
import them all to the same location. In the right window, select the
destination folder or
work area, or select the
Documents root folder as the destination.
After the source and destination are selected, click the arrow button
(->).
The exported folder or work area is staged to be imported at the selected location. Repeat this step for the rest of the work areas or folders in the export file.
- If the Document import option was turned on but Work Area\Folder was turned off, then the documents are grouped under the label Folderless documents in the left window. For these documents, you must select a specific work area or folder under which they will be imported — you cannot import them directly to the Documents root folder.
- If you do not want to import the exported data into any of the existing folders or work areas, you can create a new folder or work area here, by right-clicking in the window on the right and selecting New Folder or New Work Area.
- From the Choose storage area list, select the storage area that will be used in the event that the Import wizard encounters folders with an associated storage area that does not exist in the destination datasource.
- Click Import.
-
In the left window, select an exported folder or
work area, or select
Manually exported folders if you want to
import them all to the same location. In the right window, select the
destination folder or
work area, or select the
Documents root folder as the destination.
After the source and destination are selected, click the arrow button
(->).
- When the import is complete, click Close.

To Import Exported Datasource Data Using the Command Line
- Open a command prompt and navigate to the ...\Bentley\ProjectWise\bin directory.
-
Enter your import command. For example:
pwimpt /s /ub <datasourcename> /uu <username> /up <userpassword> /ee /ed /fi <pathtoAAMfile>
This example command will import all documents (/ed) and all environments (/ee) from the specified AAM file, into the specified datasource.
The /s command switch is what runs the import command "silently" (without opening the ProjectWise Import Wizard). If you just typed pwimpt on the command line and then pressed <Enter>, the ProjectWise Import Wizard would open.
The following options are available when you use pwimpt from the command line:
Import Option Definition /s silent mode (do not display Import Wizard) /ub datasource name /uu user name /up password /ua log in as administrator /queries imports saved searches /workflow imports workflows and states /app imports all applications /dep imports all departments /ie imports environments assigned to imported folders /ia imports applications assigned to imported documents /io imports departments assigned to imported documents /iv imports folders /id imports documents /renditions imports rendition profiles and rendition profile components /mv updates existing folder if importing folder with the same name /md updates existing document if importing a document with the same name /aa adds a new attribute sheet if document is found (if /aa is not used, attributes are overwritten) /mwicsb imports configuration settings blocks (CSBs) /mwicsbreplacedup replace content of duplicate CSBs (if specified it will automatically set the /mwicsb flag) /mwiassoc imports WorkSpace associations /mwidslevelassoc imports datasource level associations (if specified it will automatically set the /mwiassoc flag) /mwicfgfolders imports managed configuration folders and documents referenced by CSB's (only works if work areas/folders and documents are enabled) /mwiexclusionlist imports "Variables to exclude from copy-out" list /genname generates document name if it is not unique /genfilename generates document file name if it is not unique /ivn sets the folder, specified by its name, as the import root folder. A folder tree non-root entry should be made by specifying all the parent folders up to the root. The folder names are separated by the '/' character. /ivi sets the folder, specified by its folder ID, as the import root folder, for example, /ivi340 (no space between /ivi and the ID number) /sn specifies the default storage to be used for newly created folders /fi specifies the name of the import file /fl specifies the name of the output log file Example:
pwimpt /s /ub pwtest /uu pwadmin /up pwadmin /ua
/ie /iv /id /app /dep /queries /workflow /sn Storage /fi c:/export/pwtest.aam
/fl c:/export/pwtestimport.log
In this example, the import command runs in silent mode (pwimpt /s), logs in to the datasource "pwtest" (/ub pwtest) as an administrator (/ua) using user name "pwadmin" (/uu pwadmin) and password "pwadmin" (/up pwadmin), and imports environments (/ie), folders (/iv), documents (/id), applications (/app), departments (/dep), saved searches (/queries), workflows and states (/workflow), uses the specified storage area (/sn Storage), all from the script file called "pwtest.aam" (/fi c:/export/pwtest.aam). This example also creates a log file (/fl c:/export/pwtestimport.log) where you can review the results of the import.