To Run the Scan ESRI Files Tool
- Select Tools > Scan ESRI Files.
-
When the wizard opens, click Next.
-
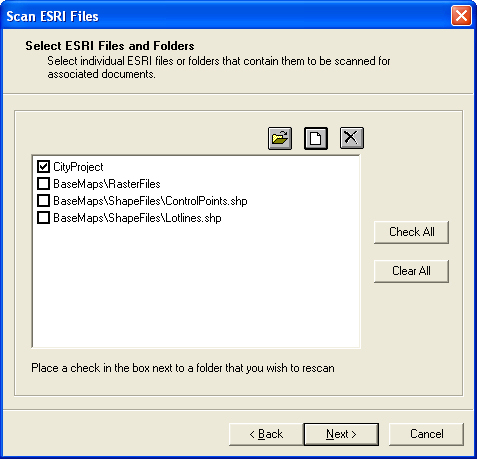
On the Select ESRI Files and Folders page, click the folder and document icons to add the folders and documents you want to scan for ESRI SHP files.
If the check box to the left of an item is ON (has a check mark in it), and if that item has been previously scanned, it will be scanned again, even files that already have their own logical set.
If the check box to the left of an item is OFF, all the files that already have a logical set will be ignored in the scanning process.
Typically, a user wanting to recreate relationships among already existing ESRI files in the datasource should check this item ON, so that the files get re-scanned as if they were newly added in the datasource.
Checking ON or OFF an item for individual files has no effect. Any individual file in the list is guaranteed to be processed by the scanning tool.
In the example below, the BaseMaps\RasterFiles and City Project folders will be scanned and the individual files ControlPoints.shp and Lotlines.shp will also be scanned. The files in the City Project folder will also be re-scanned, and the files from the BaseMaps\RasterFiles folder that have their own logical set will be skipped in the scanning process.
-
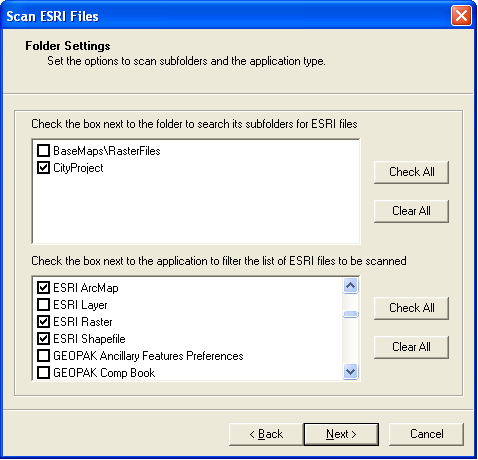
If one or more folders was selected on the previous page, the Folder Settings page opens for you to specify whether or not to scan subfolders. You can also specify what file types within the selected folders will be scanned by using application filters.
If the check box to the left of an item is ON, all the files located in the subfolders under the selected folder will be scanned. If the check box to the left of an item is OFF, only the files in this folder will be scanned (files located in the subfolders will be ignored).
The Application Filter list is used to determine what type of files will be scanned based on their associated application. If no application is selected in the list, no filter will be applied and all the files will be scanned. This filter is applied to all the selected folders and subfolders.
-
The next page of the wizard is the Search Options page, which lets you configure your search strategy.

Use the Priority Search option to search only the selected folders in the order they are listed in the folders list.
Select Folder icon — Opens the Select Folder dialog, which is used to add a folder to the list of folders to scan or re-scan.
Delete icon — Deletes the selected item(s) from the list.
Up arrow icon — Moves the selected folder up in the folders list.
Down arrow icon — Moves the selected folder down in the folders list.
Check All — Used to turn ON the check boxes for all of the folders listed.
Clear All — Used to turn OFF the check boxes for all of the folders listed, exempting its subfolders.
Folders list — Displays the folders that will be scanned for the presence of ESRI documents.
If the check box to the left of an item is ON (has a check mark in it), the subfolders will be searched.
If the check box to the left of an item is OFF, the subfolders will not be searched.
The order in which the folders appear in the folders list is important because the scanning tool will search for documents in the folders in the order they are listed.

Use the Proximity Search option to start the search with the topmost folder selected, then work its way down until all subfolders are searched. This approach is used for situations where the location of the searched files depends on the location of the scanned file. The Proximity Search Options page is used to determine how the list of searched folders for a given folder will be constructed.
Search all subfolders for associated documents — Controls whether or not the scanned file’s subfolder will be searched. Toggle ON to scan the subfolders. Also allows to configure the Start location from which the list of searched folders will be constructed.
Current Folder — If turned ON, the scanned file’s folder will be the base folder from which the list will be constructed.
Parent Folder — If turned ON, the scanned file’s parent folder will be the base folder from which the list will be constructed.
Advanced — Allows the user to define the specific number of levels above the scanned file’s folder from which the list of scanned folder will be constructed.
For example, if a given datasource has the following folder structure:
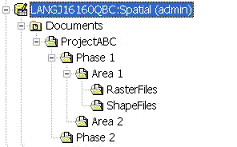
Supposing that the scanned location is in the folder named Area 1.
— Turning ON Search all subfolders for associated documents and using Current Folder as the start location — The Area 1, RasterFile, and ShapeFiles folders will be searched for associated documents.
— Turning ON Search all subfolders for associated documents and using Parent Folder as the start location — The Phase 1, Area 1, Area 2, RasterFile, and ShapeFiles folders will be searched for associated documents.
— Turning ON Search all subfolders for associated documents and using the Advanced option with 2 as the number of levels above the scanned file’s folder — The Project ABC, Phase 1, Phase 2, Area 1, Area 2, RasterFile, and ShapeFiles folders will be searched for associated documents
— Not turning ON any of the Proximity Search options — Only the scanned file’s folder will be searched for associated documents.
It is also important to mention that when the list of searched folders is constructed, the order in which the folders will be searched is the following: The folders at same level are added first. The folders are also added in the order in which they were created.
For the folder structure in the example above, if the scanned file is in the Phase 1 folder, the order in which the folders will be searched will be: Area 1, Area 2, RasterFile and finally ShapeFiles, assuming the Area 1 folder was created before the Area 2 folder and that the RasterFile folder was created before the ShapeFiles folder.
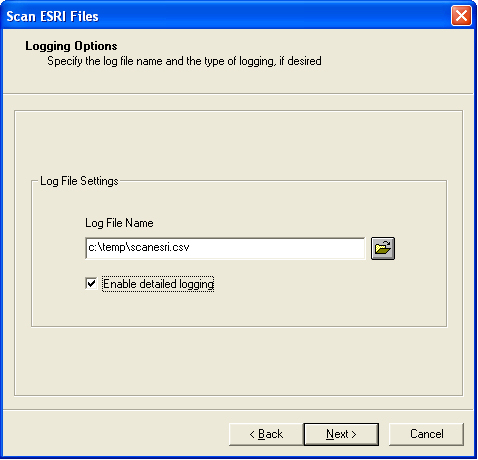
- (Optional)
When the Logging Options page opens, enter the name of a logging file to output the scanning results to, then click Next.
-
When the last page of the wizard opens, click Start Scan.
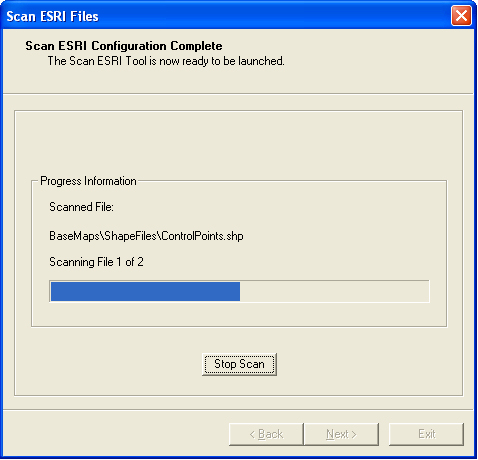
- When the scan is done, click Exit.